


Brown food is notoriously one of the most tricky food styling challenges any food photographer will face. Whether it’s chocolate photography, baking photography, meat photography, we all wonder why the most tasty food is the hardest to capture well.
In this post, I’m breaking down my favourite chocolate photography tips (along with other pesky brown foods), so you can approach your shoots more confidently, and nail that food styling.
To help you get started, I’ve created you a PDF with my Top 10 Food Styling Tips for Food Photographers. Click below to grab your free guide now 👇
If you’d prefer to watch, then hit play on the video below, and let’s get right into it!
The challenge of chocolate photography
Chocolate photography and other brown food photography (such as baking photography) pose a challenge to us as photographers, because these colours are not typically seen as “appealing”. Even though the food itself might be delicious, brown is quite a flat and… well boring colour.
As photographers we need to be able to bring dimension and contrast to these brown food photos, and there are a few food styling tips we can use to help us do that better.
So let’s dive right into the tips!
1. Use Specular Highlights
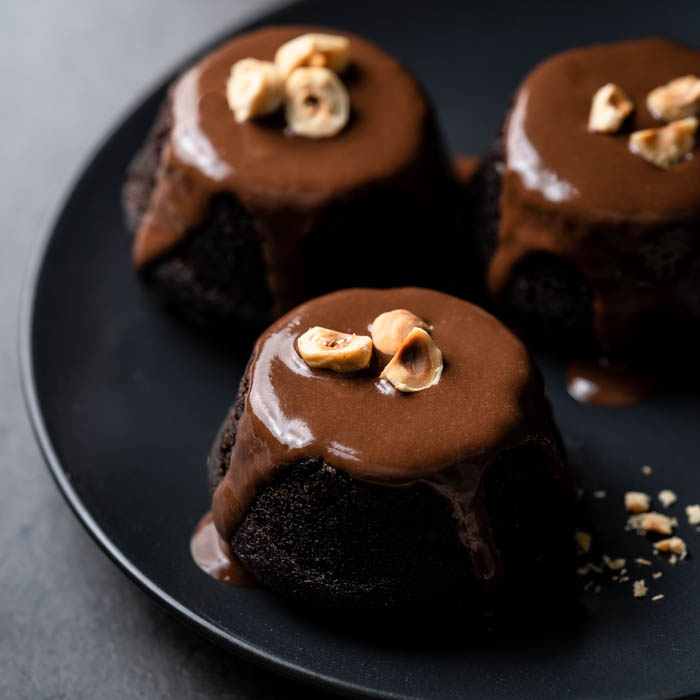
Photographing chocolate can present similar challenges to photographing black objects: a total lack of detail that no amount of increased exposure or more powerful lighting will change. And just as when photographing black, the solution here is to create specular highlights – i.e. direct reflections of your light source – on the food itself.

The strong highlights you can see in the chocolate ganache above are simply reflections of my soft box. If it wasn’t for these, the image would be totally flat and the chocolate would lack all texture and detail.
Specular highlights are a great way of adding life to any boring but reflective subject – chocolate included, and one of my favourite dark and moody lighting techniques for chocolate photography!
2. Capture Texture
Everyone loves cookies, cakes, and bread. But let’s be honest, cookies don’t always make for the most exciting of baking photography subjects. The secret to shooting simple brown foods such as this is to concentrate on texture.
Emphasising texture is all about clever use of lighting.
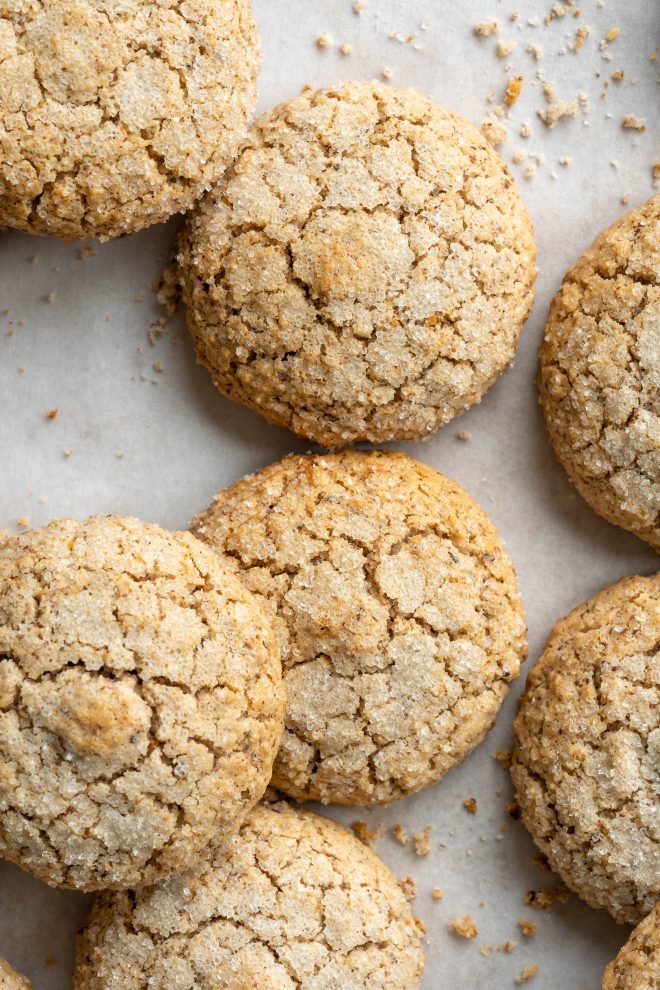
For the cookies above, I played around with the angle and hardness of the light, positioning it slightly lower than I normally would, so as to pull out as much of the texture as possible. This helped to break up the otherwise monochrome cookies and gives them a nice crunchy and crumbly look.
On the close-up image, I used my macro lens to capture the cracks and sugar crystals in all their mouthwatering detail.
3. Create Layers
Another really good way of adding interest to baking photography and other brown foods is to create a feeling of greater depth by layering. Just because interest is lacking in one aspect of an image – in this case colour – doesn’t mean that all the other elements need to be one-dimensional too.
When faced with any monochrome subject, layering can really help to add a feeling of increased depth, with different elements sitting on different planes within the shot.
For example, let’s take a look at this pie straight out of the oven, sure, it’s delicious, gooey and has the perfect crust. But it looks a bit… boring and flat.
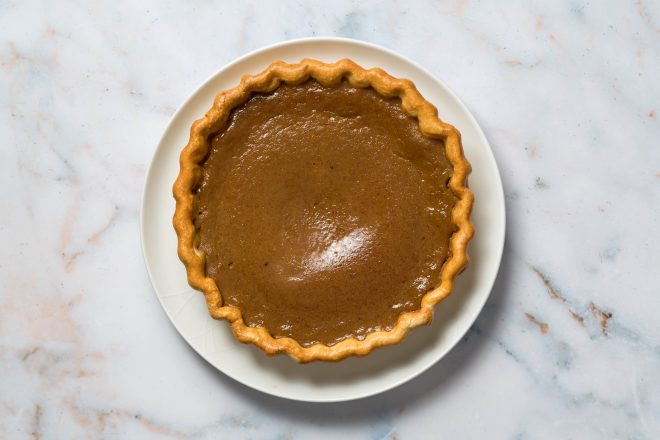
So let’s take a look at how layers made all the difference to the final shot.
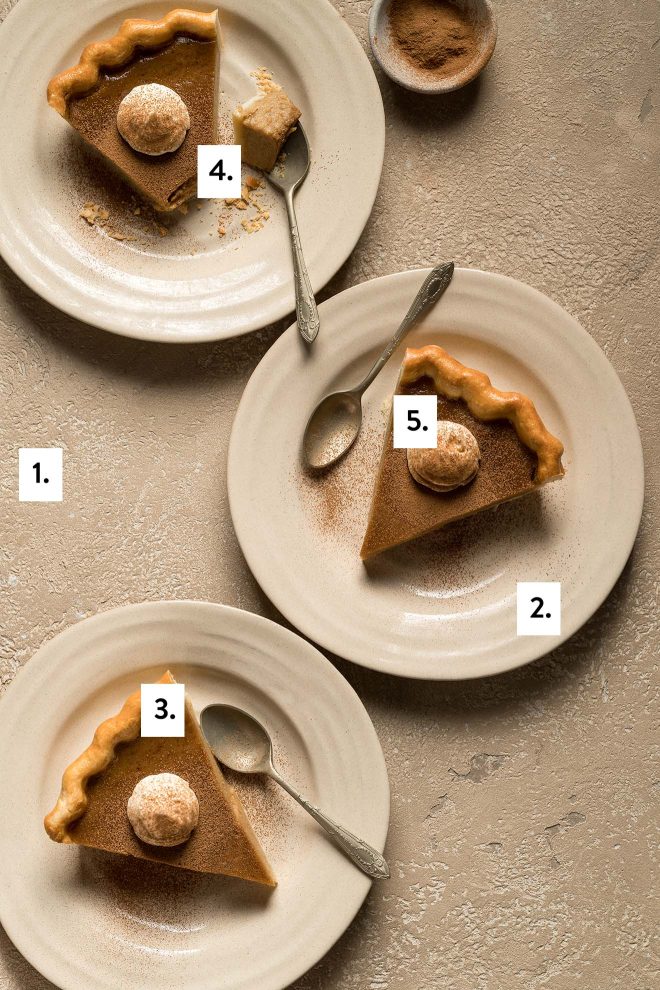
Let’s break down the layers in this shot
- Brown surface. I chose to keep the backdrop of the image in the same analogous colour palette to create a calm feeling in the image that would complement the food and not compete with it.
- Next, I chose props in a brown colour palette, but a slightly paler tone. This is already creating interest between the different shades of brown going on in the image.
- The next layer is the pie itself. I decided to cut it into slices and used leading lines to position them to keep the flow throughout the frame
- I piped a dollop of whipped cream onto the top of each slice, because it makes sense to serve with the pie, and it also adds a nice highlight and focal point to each slice.
- Finally, a sprinkle of cinnamon helped add a final layer of texture and emphasise the flavours in the pie.
A few spoons and a little bowl of cinnamon and this scene is complete. If we compare this final photo to the initial plain pie, you can see the difference that these simple layers made to this shot.
Want to get more of my food styling tips? Download my free PDF guide with 10 of my best food styling tips!
4 . Change your perspective
If you’re struggling to make brown foods look good, you might simply be approaching things from the wrong camera angle. Turn the dish around; shoot it from above; even from below. If it’s a cake, bread, or other baked item that can be cut open, what does it look like on the inside? Maybe revealing the interior will add that extra degree of interest that makes the shot come to life.
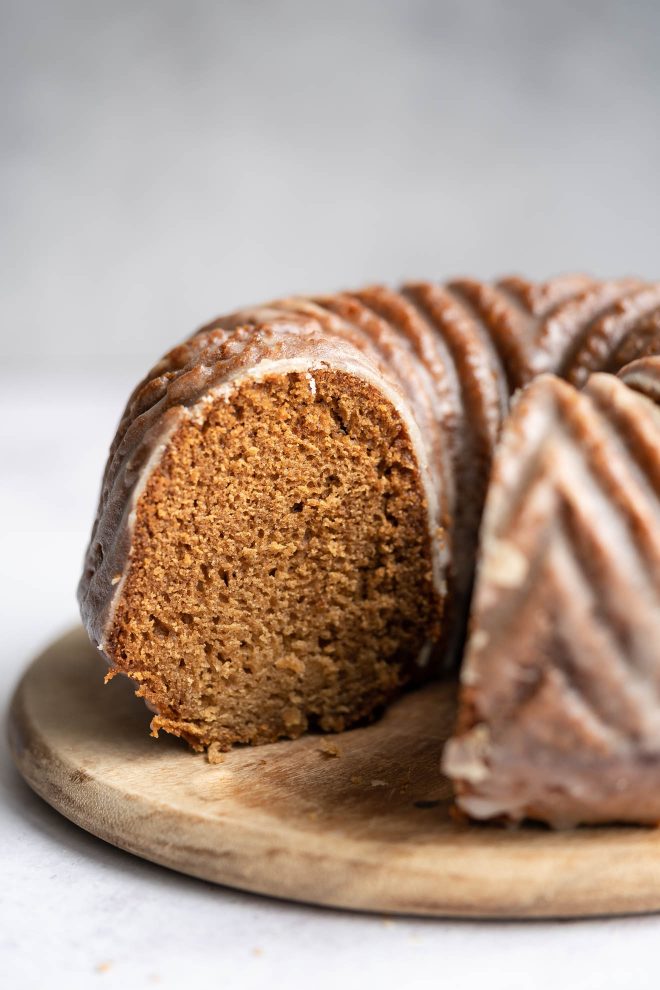
Brown foods needn’t be boring; the shot of this cake only came together when I cut into it, revealing all that beautiful texture inside. Switching up your camera angle can transform your baking photography!
5. Use complementary colours
People who understand colour know that no single colour is truly beautiful on its own; rather it’s how colours are combined that makes them interesting.
Brown can look great with other browns (analogous colour palette), or with lighter shades within the same family; such as pale yellow or beige. Brown also looks beautiful when combined with just black, white, and shades of grey.
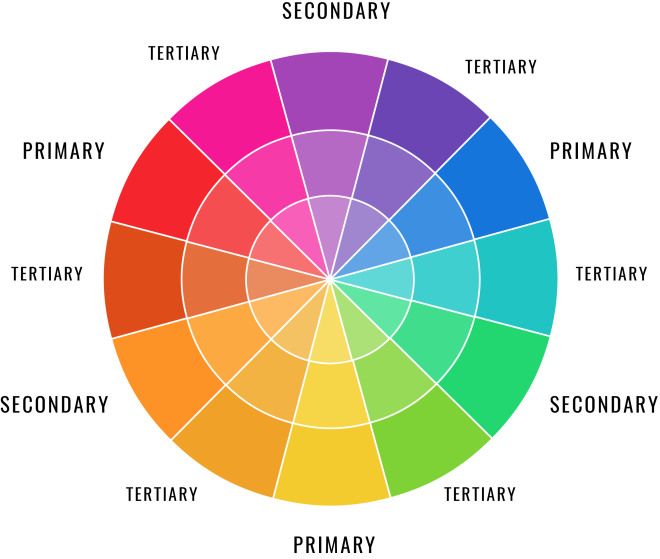
But if you know your way around a colour wheel, you’ll also know that the complementary colours for brown are in the bluish region (exactly which kind of blue will depend on the precise shade of brown you’re working with).
For example, baked goods and other brown foods can look truly stunning when photographed in combination with deep indigo or more cyan-heavy shades such as turquoise.
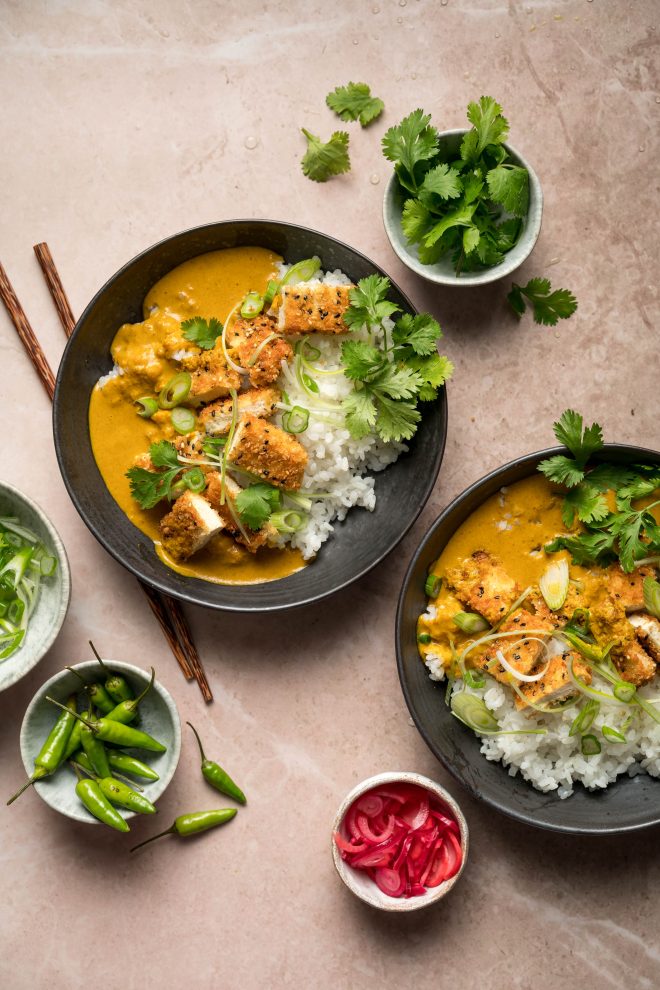
I love photographing brown foods on bold coloured backdrops, but if you don’t have a lot of backgrounds hanging around, really making the most of your garnishes can be a great way to add interest to your brown dish.
In this shot above, I made sure to include plenty of green garnish, by cutting the spring onion in two different ways for interest, and placing lots of fresh coriander on the dish, and in a little serving bowl to the side. The green chillies also give an idea of the flavour in the dish, while providing another complementary pop.
In need of inspiration? Try using an online colour palette tool such as Adobe’s Color Tool to see what other colours would work well with your brown dish.
Don’t forget to grab your free Top 10 food styling tips guide before you go!
6. Embrace Monochrome
What happens when the dish you’re shooting basically has no colour? Well… embrace the monochrome!
Now the shot becomes all about light, texture, and form. This way you get to ignore what doesn’t work, and concentrate solely on the dish’s good points – like it’s texture!
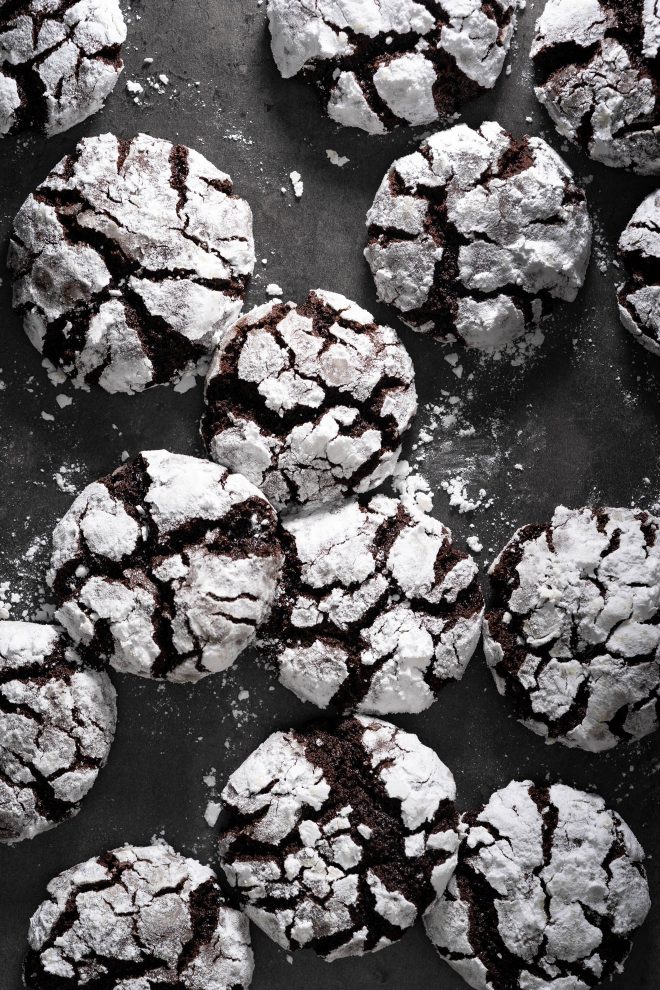
In this chocolate photo of crinkle cookies, the brown is barely even perceptible due to the darkness of the cocoa. Instead, I wanted to focus on the stark contrast of the black and white, picking up all the craters and texture from the icing sugar.
Shooting on a dark background allowed the food to stand out without distracting from the beautiful white powdered sugar.
Final Thoughts
Although chocolate photography and baking photography definitely present a few unusual challenges, they are not necessarily the insurmountable obstacles we’re often told they are. The evidence lies in the fact that baked goods can, and do, look amazing when photographed well.
By following the above tips, you should now have a very good idea about how to take pictures of baked goods and other brown foods without dropping your visual standards. Here’s hoping your next brown food shoot comes out looking all dark, rich, and sophisticated; and less like something you scraped off the bottom of your shoe. And don’t forget your FREE food styling tips guide!
I love photo editing but I am learning photography a little bit. Your photography is amazing. I will come back to your blog again. Thank you.
Where do you get those lovely backdrops?
Hi Pat! Ooooh lots of different places. Some of my favourites are: Capture by Lucy (for vinyls), Texturit for boards, then quite a few are old tiles/offcuts from hardware stores too!
Nice post
I love how you categorized them as boring brown goods. I personally enjoy taking photos of these maybe because I also treat myself a bite. Regardless, great tips.
These suggestions are extremely beneficial! I adore baked breads and enjoy looking at photos of baked foods. It just appears to be so delicious. Thank you for sharing a detailed video
These tips are exactly what I needed because I am still new (ish) to food photography and shoot a lot of whole grain foods and dark colored foods for my site. The brownish foods and whole grain pastas have been the bane of my existence at capturing correctly. Thank you!
I’m so glad Ashly! You could definitely creat some AMAZING texture compositions with whole wheat bread and pasta!