


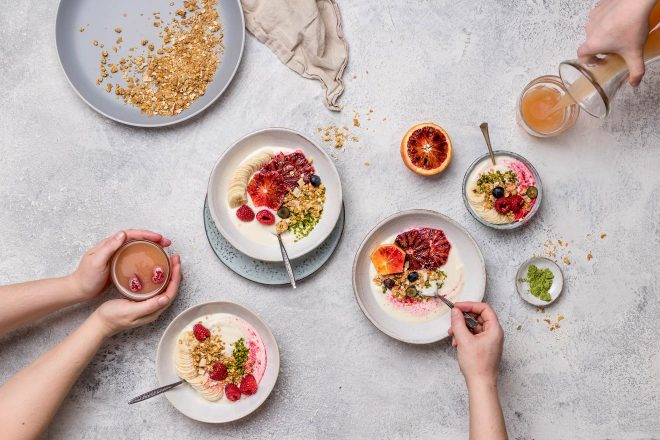
Having many pairs of hands interacting with your food scene is a great way to add life and movement to your food photos, but how do you create these kinds of busy food scenes when you’re the only person on your shoot?
The answer? Photoshop composites.
If you hear the word “Photoshop” and run for the hills in fear of #allthebuttons, then today’s post is for you! I’m going to take you step by step through what you need to do before and after a shoot to put a stunning photoshop composite image together.
This is a game changer for your food photography, and will allow you to create images you never thought you could on your own!
As well as this blog post, if you prefer to watch this kind of thing as a demo, you can watch the video tutorial below, and download your free step-by-step guide for reference any time.
Photoshop composites work by layering several images on top of each other, then masking certain areas of each layer, so that you can choose only to see the parts of the image with the different “actions”. It’s ideal when you want to give the effect of a busy table scene, but are lacking 3-4 extra pairs of hands!
You can download my step-by-step photoshop compositing guide below, to refer back to any time.
Let’s get into this tutorial…
Equipment
There are a few things that you’re going to need to make this photoshop composite work, and those are:
- A tripod
- A camera
- A light source
- Your props and food
The composite process starts well before we open Photoshop. It’s important that all your photos are identical, other than the different hand positions. This is why a tripod is absolutely essential for this process
Related: Why using a tripod is essential for your food photography
Preparation
Step 1: Set up your tripod. A tripod is an essential part of this process so that your position is consistent throughout your photos.
Step 2: Set up your light source. You can use natural or artificial light for this. Personally I prefer artificial as it’s more consistent.
Step 3: Set up your props & food. Once you’ve done this, we’re not going to be moving anything else in the scene, so be sure you’re happy with your composition before you start shooting.
Step 4: Set your camera settings. It’s important that every photo in your composite was taken with the same camera settings, so that the exposure is consistent across all of the images. So set your focus, shutter speed, aperture and ISO then don’t touch them again!
Step 5: Take your photos! Set your camera on a timer and move around your scene taking as many photos as you like, with your hands interacting with your scene in different ways. In this example, I’m going to be working with 3 images:

Editing Part 1:
Before we move into Photoshop to create our composite, we need to do a first edit on our photos. I like to use Lightroom to do this.
Step 1: Choose your images. Go through your images and pick which ones you want to include in your final composite. Once you’ve decided, import them into your Lightroom Library.
Step 2: Start by editing the first image in Lightroom (the one on the far left of your preview bar). Once you’re happy with the look of the image, select all the other images. To do this, click on the preview of the image you just edited, then hold down shift and click on the last image. Next, click the “Sync” button and make sure all the boxes are ticked on the popup window. Then click ok, and all the edits you made on the first photo will be applied to the rest of the images.

Step 3: Export your Images from Lightroom. Choose your export settings and save your images in a folder. Export the images at full size from Lightroom.
Grab your free Photoshop composites step by step guide now!
Editing Part 2
Now it’s time to hop into Photoshop and start putting our composite together. Before we start, here’s a handy list of keyboard shortcuts you can use.
New Layer: Control + Shift+ N / Command + Shift+ N
Select All: Control + A / Command + A
Copy: Control + C / Command + C
Paste: Control + V / Command + V
Invert Layer Mask: Control + I / Command + I
Brush Tool: B / B
Increase Brush Size: [ / [
Decrease Brush Size: ] / ]
Increase Brush Hardness: { / {
Decrease Brush Hardness: } / }
Step 1: Open all your images in photoshop. In Photoshop select File → Open → Then select all the images you exported from Lightroom. Each Image will open in a new tab in Photoshop.
Step 2: Create a “Layer 0”. It doesn’t matter which image you choose as your base layer, so just start with the first one. In the layer panel, the photo will automatically be a background layer. Simply double click on the background and click “ok” to turn it into a layer 0.

Step 3: Create a New Layer. Click the new layer button, or use the shortcut to create a layer on top of your first photo.
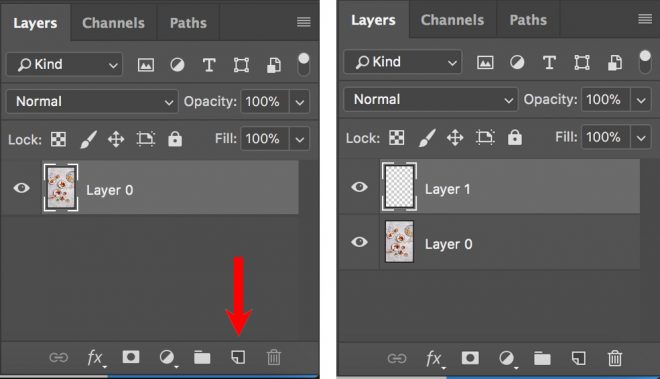
Step 4: Add in the next Image. Open the second tab in photoshop and use the select all shortcut to select the whole image. Then copy the image again using the shortcut. Next, open the first image again and make sure layer 1 is selected. Then paste your image into layer 1 using the shortcut. Your next image will now be the one fully visible on your main editing screen.
Step 5: Add a layer mask. With layer 1 selected, click on the “add layer mask” button. The mask will appear as another box next to the photo preview in layer 1.
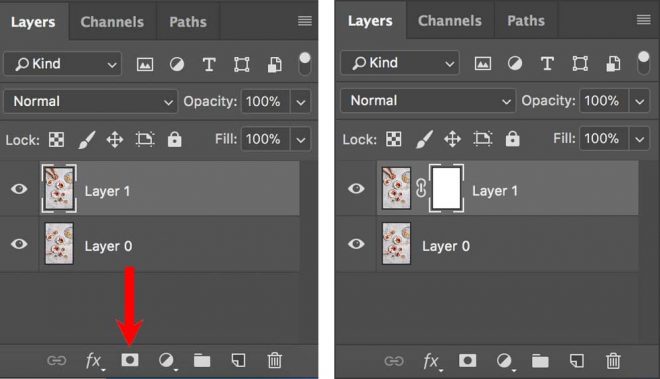
Step 6: Invert the Layer Mask. The layer mask will default to white, which means the whole layer is visible. We want the layer to become invisible. With the layer mask selected, use the shortcut to invert the layer mask. The layer mask will now become black, and your top image will disappear from your main editing screen.
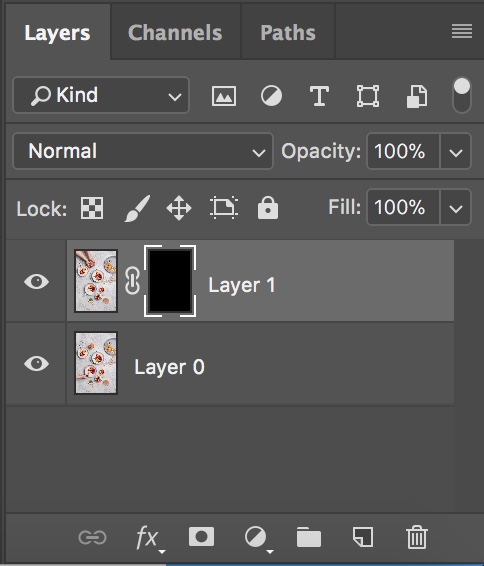
Step 7: Select the brush tool and set the settings. Using the shortcut “B”, select the brush tool and ensure that the colour of the brush is set to white.
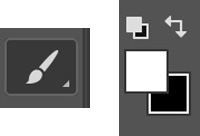
Next, in the top bar, set your brush settings as the following: Flow: 30%, Opacity: 100%, Mode: Normal.
![]()
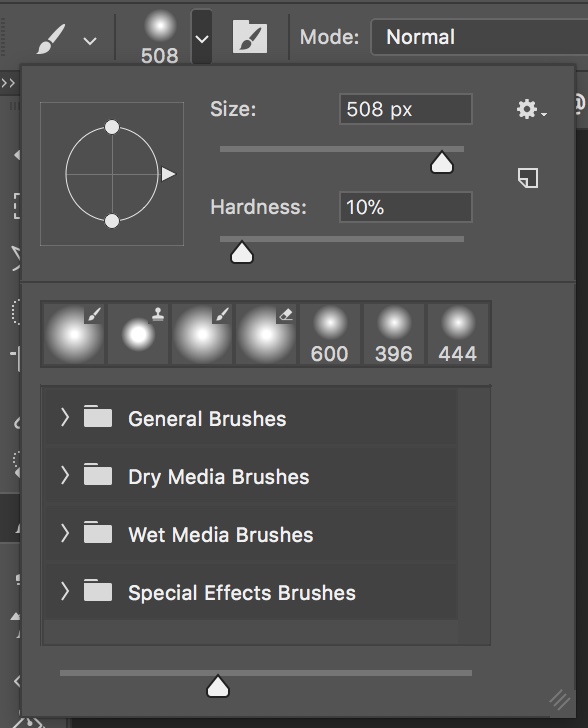
To set the size and hardness of the brush, click on the brush preview next to the “mode”, window. The size brush you need will depend on the size of your photo and the size of the element you’re brushing in, so play around with that until you have a size you’re happy with. Set your brush hardness to 10% so the areas you brush in have nice soft edges.
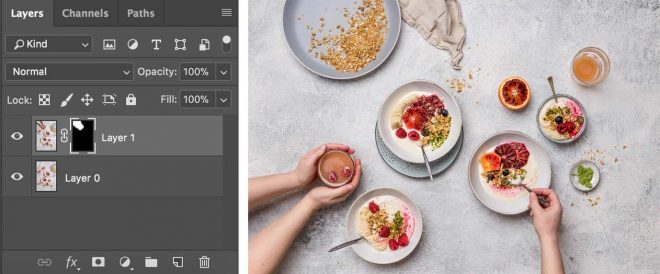
Step 8: Start brushing in your hands! With your layer mask in layer 1 selected, start brushing over the area of the photo with your hands, and keep painting until you have all of your hands and relating shadows brushed in. You will see on your layer mask, that the area of that layer you have made visible turns white, indicating that the white part is the only part of that layer you will see.
Here’s what my photo looks like with the first layer added:
Step 9: Repeat! Repeat the steps in the “Editing Part 2” section above for as many images as you have in your composite.
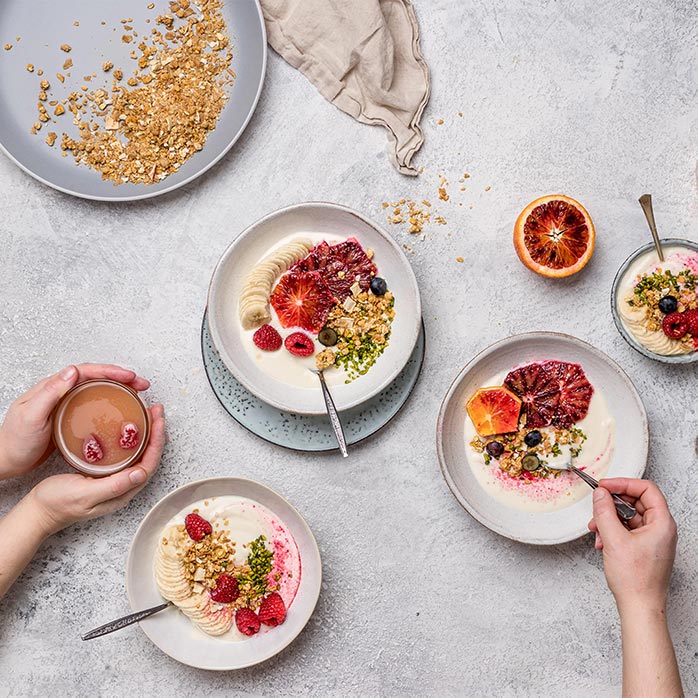
Here’s the final photo:
Step 10: Export your final photo. Choose your image size, export settings and save your final composite!
Get your free step by step Photoshop Composite Guide now!
So there you have it, a super simple way to create amazing food photos using photoshop composites. How do you think you’ll try this technique out first?
That’s a great guide! I’d just recommend adding one more step before masking – “Auto-Align Layers”! 🙂
This can be very useful! But I actually recommend shooting on a tripod so that you automatically get this straight out of camera.
Hi Lauren once again superb, superb, superb………
Can you explain the lighting setup for this photographs.
Hi Jairaj, thanks so much again! I’m so glad you found it useful! In this photo, I used my 170cm softbox, single diffused, with the light on one side, angled slightly downwards towards the table
Thanks you very much.
This post is just what I needed Lauren! I’ve been wanting to take photos like this for ages, and just assumed that people who took them always had lots of friends and family around the table lol. I’ll be giving this a go right away!
So happy to hear that Olivia! I can’t wait to see what you create!