


Continuing my series on putting together a home studio for food photography, in this post I look at the options for lighting equipment – keeping in mind that both budget and available space may be limited.
In part 1 of this series on putting together a home food photography studio, I covered the most important issues to consider when choosing which part of your home to use for shooting in. Meanwhile, in part 2, I covered the basic “must-have” equipment that can be found in pretty much every photography studio in the world. In this, the third post in the series, I move on to considering all the optional equipment that will really make the studio your own: specifically lights.
To be totally clear, not every photographer will need all the equipment I list here, and precisely which of these items you may want to purchase will depend on your personal photography style. In fact, even just within the food photography genre, it can be surprising how much variation there is in the equipment and techniques different photographers use.
All of this content is also available on my YouTube channel. So if you’d rather watch the video, you’ll find the link embedded below! With this said, clearly there’s quite a lot of ground for us to cover here. So without further ado, let’s get right down into it.
Lighting
Natural Daylight
If you’re blessed with a well-lit space, in a part of the world that enjoys year-round good weather, you may have already decided that you’ll be working exclusively with natural light. And of course, the sun is undoubtedly a much cheaper option when compared with artificial lighting.
Nonetheless even if daylight is your method of choice, there are a few items that you may want to consider purchasing for your home studio so as to better be able to control that light. Specifically:
● Black panels (foam core)
● Reflectors (foam core also works here)
● Diffusers such as frost and scrim
Studio Lights: Continuous
The fact is, though, that not all of us have access to consistently available daylight. As a case in point, I live in a part of the world where the daylight is highly inconsistent. In fact, I’m lucky if there’s much more than a faint misty glow during some winter months, so clearly an all-daylight setup isn’t a serious option in my case.
What’s more, many photographers (such as me!) prefer the total control offered by studio lights anyway. Daylight can be really beautiful, but there’s a limit to how much you can modify it. This means that you often just have to work with what the sun gives you.
For these two reasons, I shoot almost exclusively with artificial studio lights. However, this doesn’t mean that I own an enormous lighting setup. In fact, I sometimes shoot with just a single head; a Pixapro LED 200D MKII continuous light. This is great for reproducing a convincing natural lighting look, at any time of the day (or year). Especially when combined with a reflector for bouncing some fill light into shadow areas.
The one disadvantage of continuous lighting when compared with flash though is a lack of power: continuous lights such as my Pixapro LED give out a low but consistent output over a long period of time. Meaning that they can also be used for video, but don’t permit shooting at particularly fast shutter speeds.
Studio Lights: Flash
A flash head, on the other hand, gives out an enormous charge in the blink of an eye – and then needs to recover for a short while before it can be fired again. The high-powered output makes flash better suited to both achieving a deep depth of field and to freezing action. On the downside though, the fact that a flash will typically need to recycle briefly before it can fire again and can occasionally cause a delay or misfire when the unit is used at full power.
Nonetheless, strobes are pretty much essential when working with liquids, particularly if there will be any movement involved – as is the case when shooting stunning food photography splash effects. For this reason, I mostly shoot with flash these days.
The cost of studio flash can vary enormously, from just a few hundred dollars for a basic model, to several thousand for even an entry-level kit from top brands such as Profoto or Broncolor: either of which could legitimately claim to be the Porsche of studio lighting.
While the advantages of high-end studio lights are numerous (fast recycling times, powerful output, sturdily built, easy to use, etc.) amazing results can be achieved even with the most budget-friendly of strobes.
However, it’s also worth considering that pro studio kits will tend to occupy a lot more space than a portable off-camera flash, making the big guns less than ideal for a home studio set up where both shooting and storage space is likely to be limited.
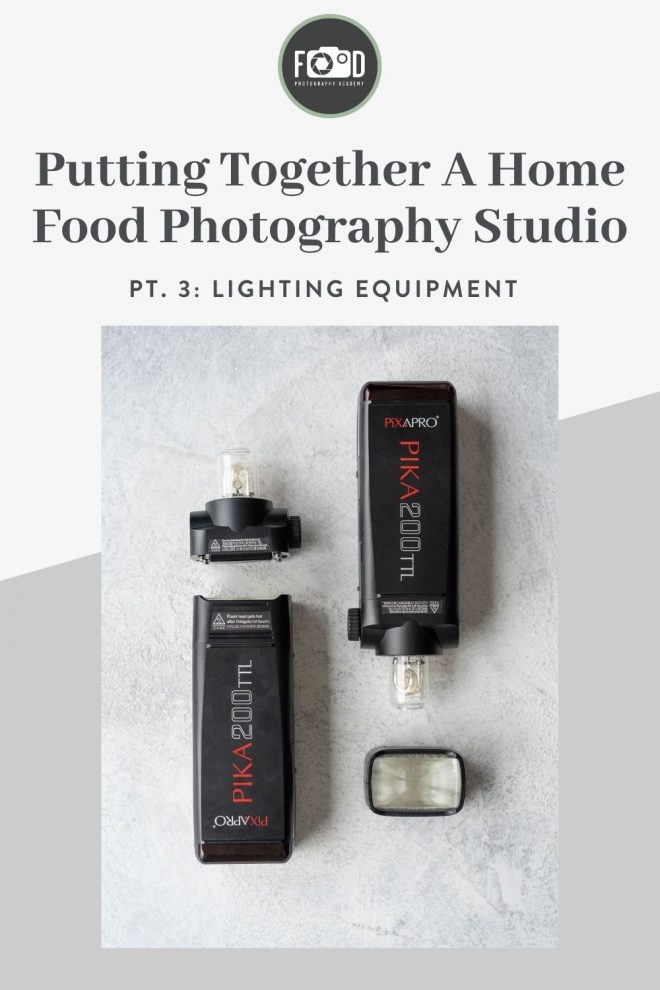
When I shoot at home I use a couple of Pixapro PIKA 200 flashes with both bare-bulb and speedlight heads. These compact and portable TTL strobes give out 200Ws of light: which is plenty for my purposes when shooting in close proximity – something I anyway have little choice over when working in my little studio.
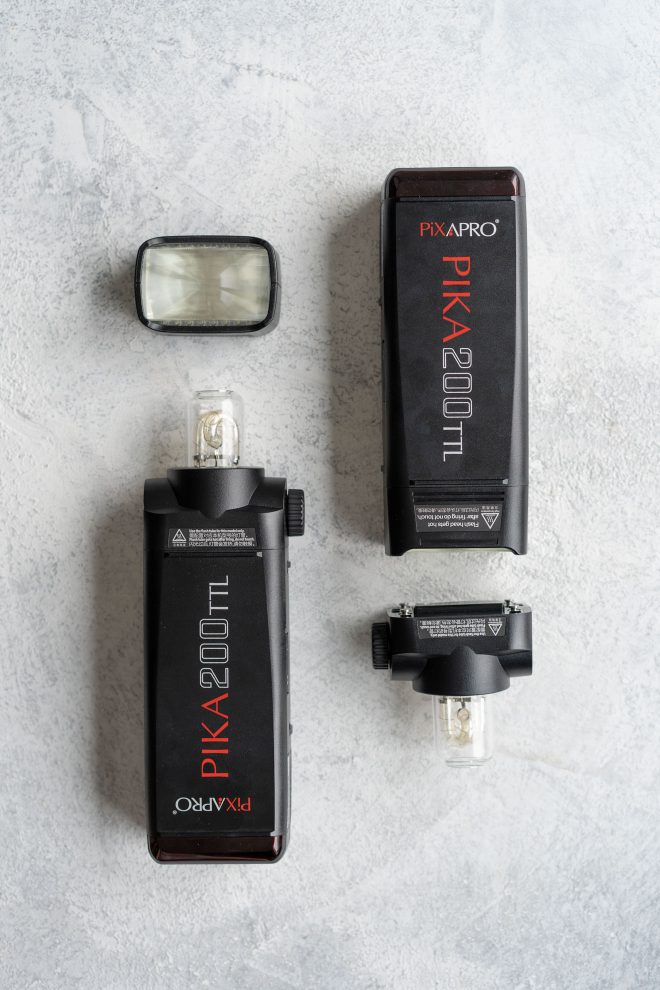
Although owning two of the PIKA 200s really gives me a lot more flexibility in my lighting setup, you can actually do an awful lot with just a single strobe. However, whereas a reflector can be extremely useful when shooting with continuous lighting, they are not so practical when using flash. Here, a second strobe head really comes in handy for when you need to fill in the shadows with any degree of control.
If you think you can get by with just using one light, my advice would be to start putting some money aside in order to invest in a single pro-level studio kit from one of the leading brands. But if quantity of lighting sources (as opposed to quantity of light) is a priority, you can make your money go a lot further by purchasing a bunch of smaller strobes and speedlights from one of the numerous brands that have come on the market in recent years.
If you can afford it, you could always purchase one powerful studio kit as your main light, and then add a couple of smaller budget strobes later to augment this setup. Just bear in mind that although the quality of budget-manufactured studio lighting has improved massively of late, budget lights are unlikely to be a good long-term investment.
Lighting Stands
Whatever type of lighting you go for, you’ll need to stand them on something. By far the most stable kind of lighting stand (without getting into great big studio wind-ups and the like) is a C-stand (also known as a Century stand). However, unless you’ve got an enormous amount of space, these are not all that practical for home use. They’d also be total overkill for something as small and lightweight as my Pixapros; it’s better to go for something more compact, with fully retractable legs.
Avoid stands with legs that don’t spread out very far though, as these will be at much greater risk of getting knocked over.
Lighting Modifiers and Accessories
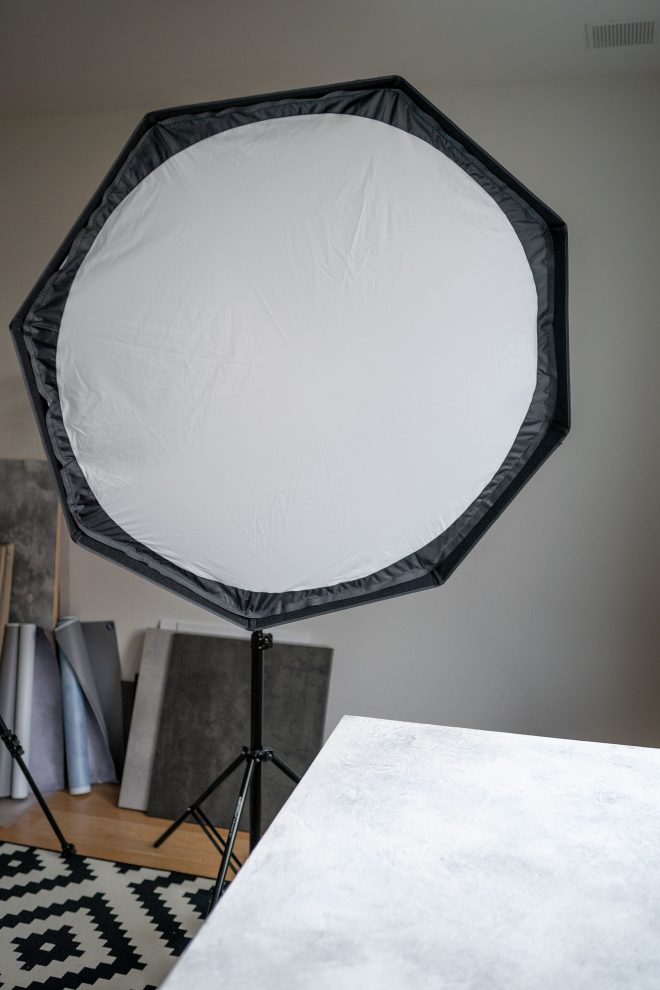
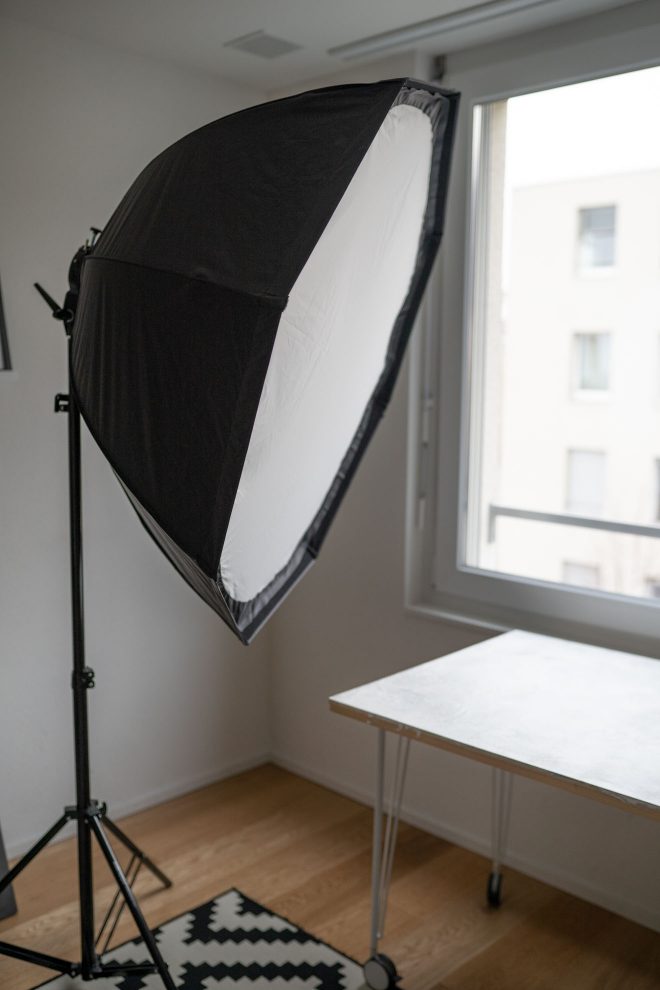
The naked slap of a studio flash is rarely all that attractive. Nor, for that matter, is the harsh zing of an unmodified LED. So whether you are using continuous lighting, studio strobes, or speedlights, I highly recommend investing in a diffuser such as a softbox. This will help to soften the light, making it more flattering and easier to work with.
Personally, I own two softboxes: one measuring 120cm and the other 150cm. Both of which will work on either my continuous LED light or with the two flash heads. The great thing about these softboxes is that they can be double-diffused and made more directional by the addition of a honeycomb grid. Note, however, that these are optional extras that you can totally get by without if you are on a really tight budget.
However, resist the temptation to skimp on the softbox itself, as in my opinion, they fall into the category of “you get what you pay for.” In fact, softboxes are #3 on my list of equipment that photographers should never cut corners on (see part 2 in this series of articles for items 1 and 2).
One essential lighting accessory every photographer should own is a 5-in-1 reflector. These are absolute lifesavers. The gold, silver, black, and white sides have you fully covered either for blocking out light or reflecting it onto your subject and although the reflector sides are less practical when shooting with studio flash, the clear center panel is the perfect diffuser for harsh direct light. It can even be used in lieu of a softbox.
With this in mind, you may also want to consider purchasing a superclamp or two, along with an extra lighting stand, so that you can secure your reflector in place.
Final Thoughts
Whether you plan on working with either artificial or natural lighting, in this post I’ve considered several kinds of lighting equipment and accessories beyond the basic essentials that you may want to add to your wish list. If you plan on solely working with daylight, your investment here will of course be minimal. Nonetheless, there are certain essential items you’ll want to have on-hand in order to fully make use of that light. For anyone planning on shooting with artificial lighting though, the investment in gear will be much greater, and here you’ll need to research your purchases very carefully.
In the final chapter in this series, I’ll move on to considering all the non-photographic items – those more on the art-direction and styling side of things – that are nonetheless essential for any food photography studio. See you then!
I’m constantly impressed by the insightful and practical tips shared on your blog. Keep up the fantastic work! LED well lights are perfect for creating stunning uplighting effects that highlight landscape features. Your blog showcases their brilliance beautifully!
Thank you, Lauren. Yesterday I saw your tutorial on shooting the caramel drizzle cake action shot as part of the Mastering The Art of Food Photography (fabulous). You mentioned the benefit of using the long, narrow softbox in that situation. I have neither room or money for more equipment so I came up with a way to achieve that shape of modifier. My sewing skills are rubbish and I have a visceral hatred of the activity but this was a simple solution, very easy and cost me £2.00 for the Ripstop material and a meter of velcro. I just sewed… Read more »
Very simple and space saving, even if not exactly straight
You get the idea