


Today I want to talk about one of the simplest, yet most important, food photography tricks that you’ll need to be aware of if you ever plan on going professional: pre-lighting.

Imagine the scene: you’ve tweaked the lighting until it’s perfect, played with the props and framing until the composition is totally killer, but in the meantime the food’s ruined and now you’re behind schedule.
What went wrong?
As a professional food photographer you’ll often need to shoot a lot of dishes in a single session. Just as you don’t have time to waste hanging around for the hero dish to be ready before setting up your shot, the food isn’t going to wait for you once it does arrive.
Related: Nailing Artificial Light in Food Photography (Video)
If you’re too slow in prepping your lights and finding the right composition, the hero will no longer look its best when you are finally ready to shoot it.
The solution? One of my favorite food photography tricks: using a body-double to pre-light.
The Problem
First off, here’s how to do it the wrong way. You put your hero dish in place, adjust the lights until they’re where you want them, and then you get the composition locked down. Great!
There’s just one problem: you’ve taken so long setting up the shot that your beautiful ice cream has melted.
But what was the hero dish doing there in the first place if you weren’t ready to shoot? Even at the best of times, lighting and composition need to be about 90% perfect before the hero comes anywhere near the set. When shooting ice cream, that figure is probably more like 99.999% (check out this super-informative article for the full “scoop” on photographing ice cream).
But that leaves us in a Catch 22 situation. How can we decide upon composition and lighting if we haven’t got the subject in front of us to work with?
The Solution
Pro portrait photographers usually have harddisks filled with endless photos of their assistants in stupid poses, standing in for the real model while the lights are being tweaked. A couple of years ago famed fashion photographer Glen Luchford even published a book – The Agony and the Ecstasy – featuring all the Polaroids he’d shot of his lighting assistant over the years.
But what do food photographers do for a stand-in? My assistant doesn’t look anything like a tasty snack.
In reality, the solution will vary from shoot to shoot. With ice cream it’s actually pretty straightforward: here you should have simply used another serving of the same ice cream as your stand-in, without bothering to prep it. That would have been enough to get an idea of how the final shot would look, without wasting the hero. Then you could have just brought out the hero once you were totally ready to go.
Drinks, too, are fairly easy – as long as you’ve got some spare glasses and access to a similarly-colored liquid.
Related: 7 Tips to Create Magazine Worthy Drink Photography
Some dishes present more of a problem though. Like baked goods, or anything that requires a lot of cooking time. If you ruin the hero, it’s not like the chef can quickly whip up another one in a few minutes.
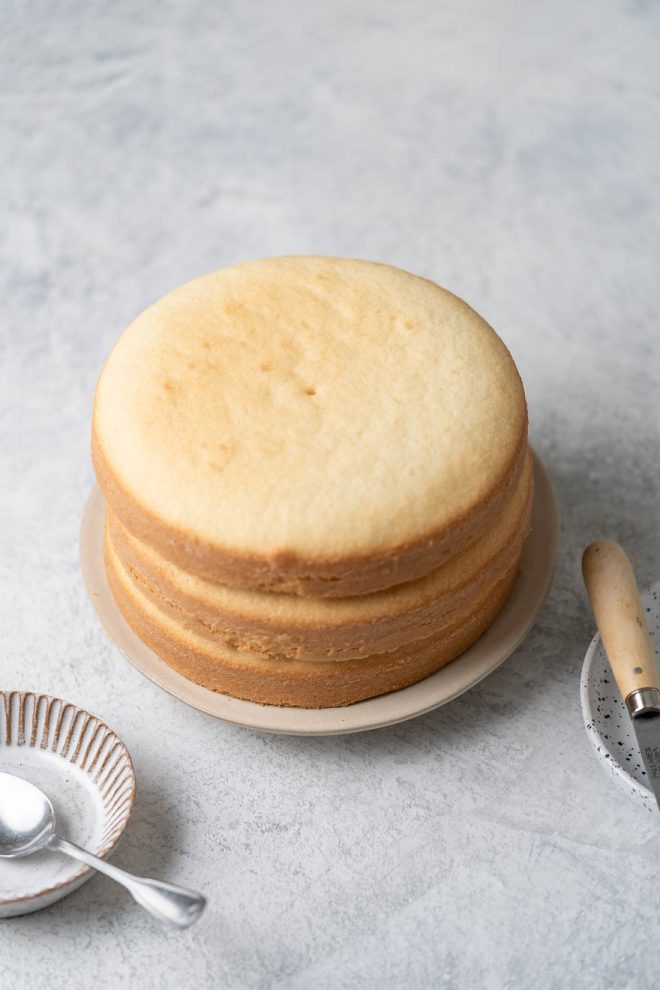
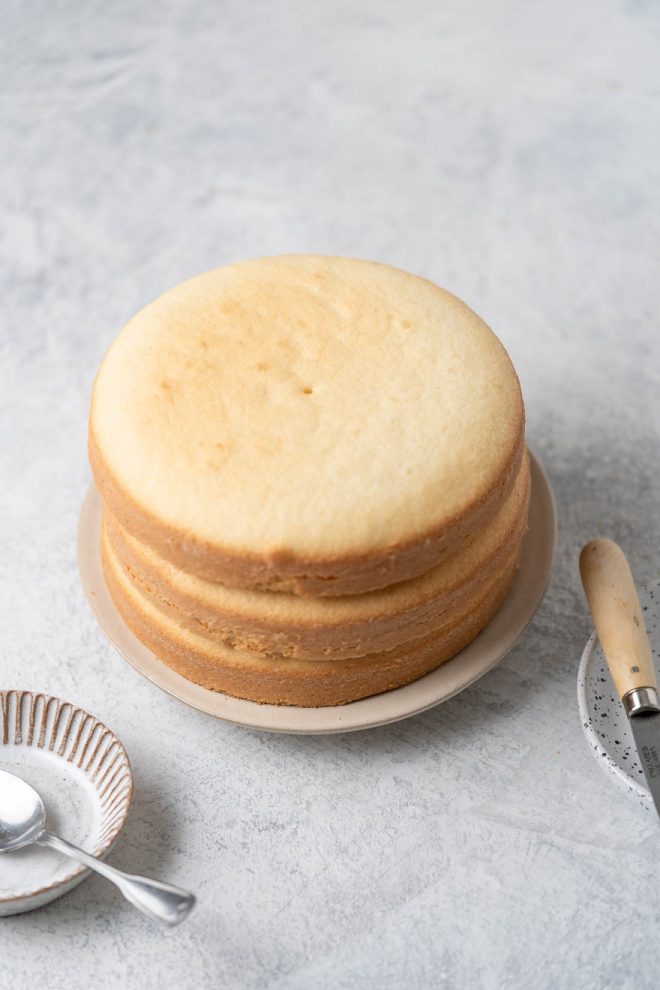
Here I find that the best solution for pre-lighting is often to use the hero, but without it being prepped or styled in any way that might cause damage. For example, an unglazed cake is unlikely to suffer if it sits around for a while waiting for the lights. You can use the “naked” hero to set up your framing, and then only add things like frosting and decoration when you’re finally ready to start.
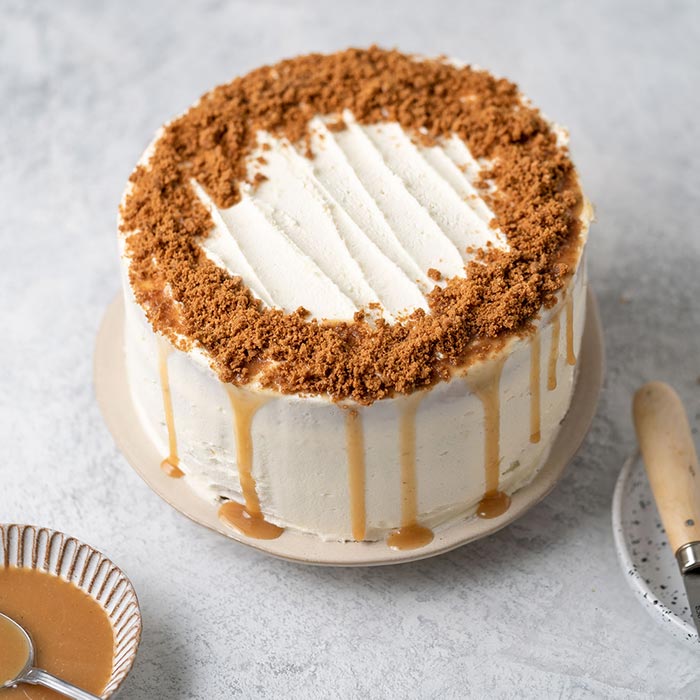
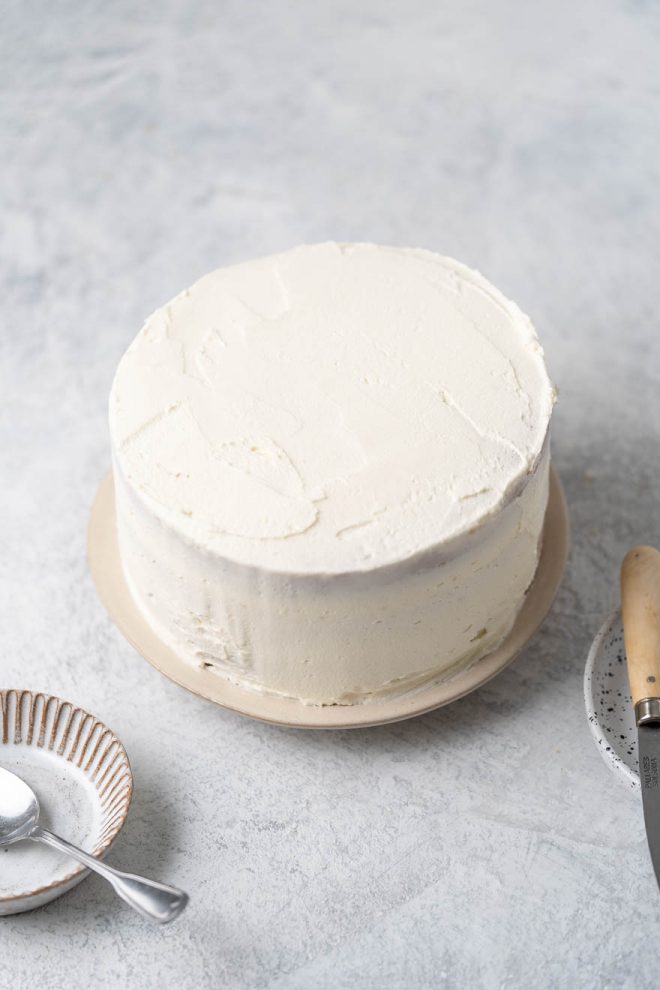
Let’s look at an example, in this cake photo, I set out all my props and the naked layers of the cake to tweak my lighting before adding any frosting.

Although the changes are subtle, I ended up changing the direction and intensity of my flash in the softbox, and adding a white fill card at the back to bounce a little more light onto the shadow side of the cake, without eliminating the dark tones completely.
Next I added the frosting and the caramel to the little bowl:
Then quickly added the biscuit crumbs and caramel drizzle:
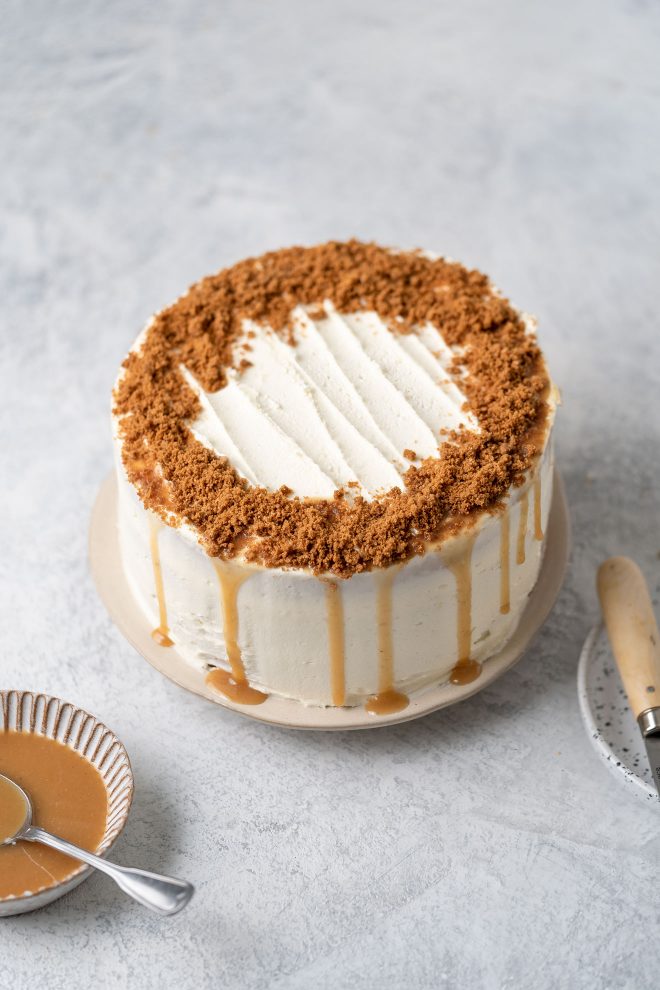
I probably spent about 10-15 minutes setting up my props and fiddling with the lights, but after I added the caramel drizzle I took the photo within 10-15 seconds. If I had fully decorated the cake first, and then spent 10-15 minutes tweaking the lights, I would have had a caramel mess at the bottom of the plate and the hero image wouldn’t have had nearly as much impact.
Prelighting is a big part of what made this image successful.
Because of budget or time restraints, this may not always be an option though. Here what I tend to do is look for an object of a similar shape and size to the hero that I can use as a body-double in the meantime. For example, if you’re shooting a muffin, maybe a tennis ball will work as a stand in? A pan full of roast potatoes? Maybe a couple of coffee-table books will do the trick?
Sometimes though, the only option is to just use your props, minus the food. Not ideal, but better than nothing.
Some photographers recommend just grabbing a camera lens, spare prop, or other bit of kit you find on set to use as a stand-in for the hero. In many cases this will likely work out fine: as long as the stand-in is roughly the same size and shape as the hero dish.
Where problems can occur, however, is when the hero has reflective surfaces, but the body-double doesn’t. For example, if we were to use a tennis ball as our stand-in while setting up the lights, but the hero wasn’t a muffin but instead a shiny apple, crème caramel, glazed doughnut, or any dish containing liquids, we might be in for a nasty surprise once the hero arrives and starts reflecting the lights.
On a related note, if there will be silverware props in your final shot, make sure you’ve added these to the scene and checked how they look under the lights long before you bring in the hero. There’s no point in pre-lighting and getting everything looking perfect in time for the hero, if you’re then going to add a couple of spoons at the last minute, only to discover that they pick up distracting reflections from the lights. Those reflections need to be fixed before you give the go ahead to prep the hero, or you’ll risk wasting precious time solving the problem later. With the food fading on you all the while.
Final Thoughts
As we’ve seen then, in situations where setting up a shot is likely to take a little time, using a body-double dish – or even a non-food item – as a stand-in is pretty much essential. This way the hero will still be at its best once you’re ready to begin shooting.
Love this, Lauren. Very helpful!
641/5000 Good morning Lauren. I am from Brazil and I work in advertising for over 30 years and near the end of the journey, I have dedicated myself to photography. Although I took courses at kodak over 30 years ago. And here because things are so slow I decided to study on my own and I’ve learned a lot from you, Joanie Simon (where I met her work), Darina, a Brazilian who lives in Portugal Bagnola and a creative photographer from Rio de Janeiro. called Alexander Landau. But none of them but you revealed this trick. A real cat jump… Read more »
You’re so welcome! I’m happy that you find the tips useful!