


So you’ve bought yourself a nice DSLR camera, a couple of good lenses, and now it’s time to get started. You’re all set, right? But what on earth is raw format? And how do you use it?
Owning and using a DSLR properly is no mean feat. I only picked up a DSLR for the first time when I started my food blog and I was super overwhelmed by ISO, shutter speed, aperture, white balance and those million menu items you never knew were possible to stuff inside a camera.
If you’re confused about manual mode, enrol in our totally FREE 5 day Manual mode course!

Free E-Course
Learn Manual Mode in 5 days flat!
Learn Manual Mode in 5 days flat!
On top of that, I was only just starting to get to grips with editing my food photography, trying to achieve that magazine look. I never even knew what raw files were, or how they would absolutely TRANSFORM how I produce my food photography. I probably spent a year not using raw format, with no idea how much I was holding myself back.
So if you’ve spent tons of time learning how to use your DSLR, but you’re still using JPEG to shoot your food photos, you’re probably doing yourself a huge disservice!
In today’s post, I’m going to unpack exactly what a raw file is, how to use it, and why it’s SO important that you flick that little setting in your shoot menu today!
So, what’s the difference between raw and JPEG? Excellent question
JPEG Format Files
JPEGs are probably the most common image file around, you probably encounter them on a daily basis. When you shoot in JPEG, the files are processed within your DSLR. You can kind of think of it as your camera doing a bit of the post production editing for you. The exact way in which the image is “edited” varies slightly depending on your camera, but your DSLR will add blacks, contrast, brightness, noise reduction and sharpening. Exposure and white balance are set based on your settings when the image is taken.
So far so great, right? Your camera is basically making the image better for you, and you have less editing to do, right? Wrong! Your camera is not as smart as you, you should be making the decisions about how your final food photos should look, not your camera!
JPEGs are known as a “lossy” file format. This means that when the camera makes its edits and compresses the file, those changes are irreversible. That’s it.
You can’t get any of that information from the original photo back, so if you want to make more edits in Photoshop/Lightroom or your other favourite editing program, you are far more limited. Sucks, right?
Raw Format Files
Raw files are uncompressed, unprocessed shots, that capture all of the detail possible on the camera’s sensor. They are known as “lossless” file formats, which means all of the data is recoverable when they are uncompressed.
Each camera manufacturer has a different raw file format. For example, Nikon is .NR2, Canon is .ARW and so on.
Because the camera isn’t making any, ahem, “helpful”, edits for you, the pictures come out of the camera looking a little flatter than a JPEG (i.e the shadows and highlights are less defined) but don’t be alarmed, this is a good thing for food photography. This means you can get the absolute most from your photo when you come to edit it.
Note: Raw files do have to be converted and edited before they can be used. A good photo editing program will retain all the information from the raw file when it’s converted. My favourite programs to use are Adobe Lightroom and Adobe Photoshop. Adobe offers a photography subscription to their Creative Cloud model for these two programs at a reduced monthly price.
Just got your DSLR and want a step by step guide to get started? Check out our free 5-day Manual Mode e-course
Free E-Course
Learn Manual Mode in 5 days flat!
Learn Manual Mode in 5 days flat!
Before we launch into an example so you can see this all in action, let’s talk about some of the main benefits of shooting your food photos in raw format.
Key benefits of using raw format for your food photography
1. Easy white balance adjustments
When you take a photo, the camera will apply a white balance based on your settings, but I normally end up tweaking it a little in post-production anyway. After all, sometimes your eyes just do a better job than your camera and computer.
When you shoot in JPEG format, the camera has already applied the white balance based on your settings, but because of the “lossy” format of JPEGs, that means the information BEFORE it made those changes is lost, and therefore you can’t easily adjust it later.
With raw format, all of the data from the sensor is recorded, so even though the camera has applied the white balance to your photo based on your settings, the rest of the information is retained.
This means that you can play around with the white balance in post production much more freely, making sure your food photos look appetising and natural.
2. More Tonal Range
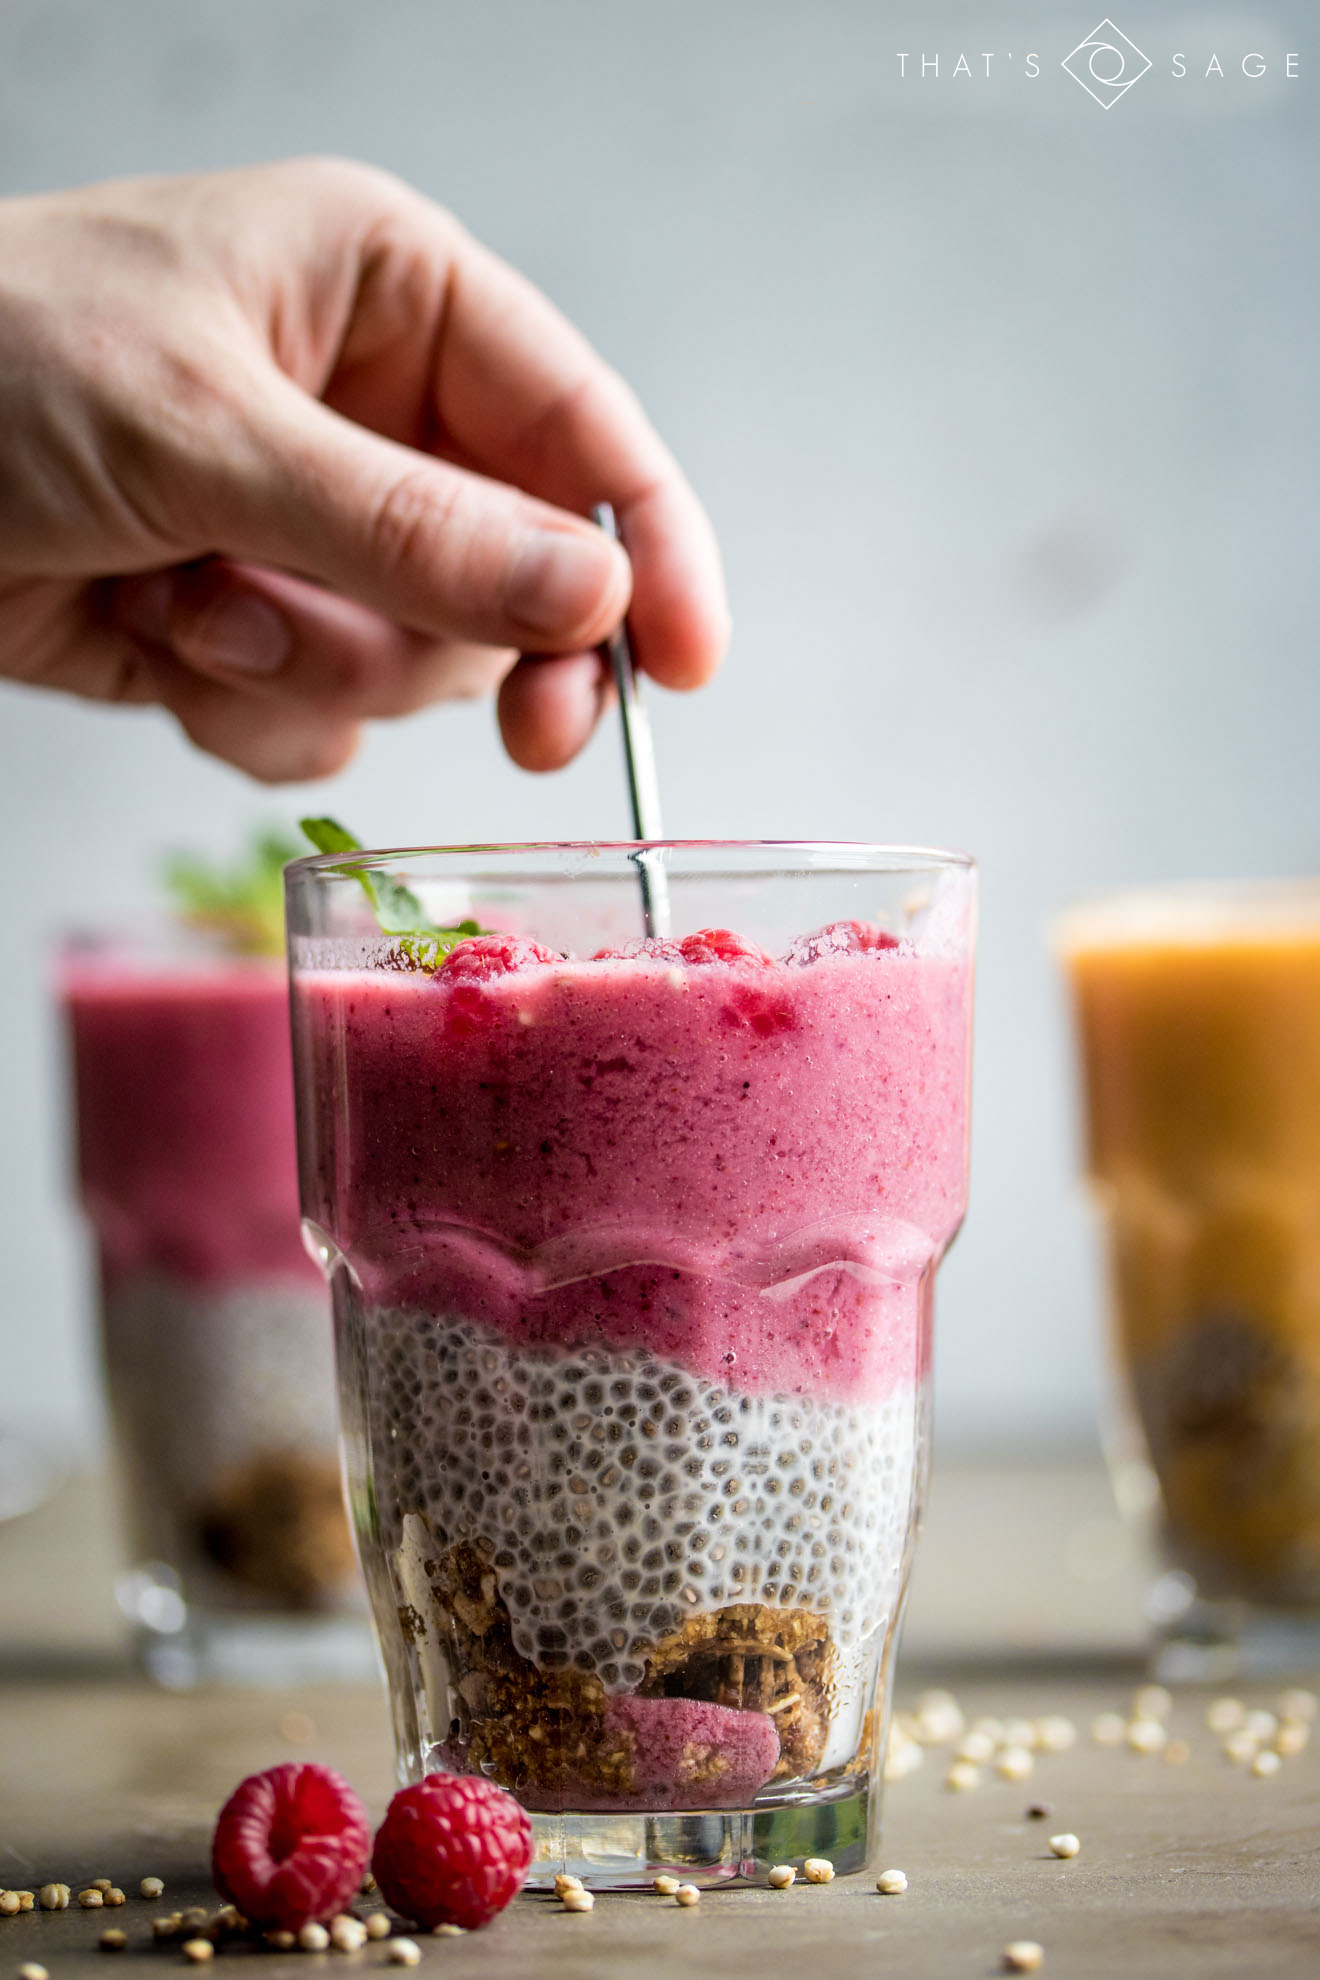
Quick definition: Tonal range = The number of visible tones in a photo, between the darkest and lightest points of your photo (the shadows and the highlights).
In the example below, you will see on the side of the glass there are highlights where the light hits the reflective surface, and under my hand there are some dark shadows. These, and everything in between, make up the tonal range of the photo.
In a JPEG file, there isn’t as much data retained in these brightest and darkest areas of the photo, so when you start editing them, you’ll notice the lack of quality. You’re far more limited in how much you can lift the shadows and darken (burn) the highlights.
Raw files on the other hand are absolute pros in this area. You have around +/-2 stops to play with when it comes to brightening underexposed shots and a really good amount in the highlights as well.
This is awesome for your food photography, because you can really play around, making sure that chia pudding looks just perfect, and still have a stellar quality photo at the end of it.
3. Non-Destructive Editing
This is probably one of the biggest advantages of raw files over JPEGs. When you’re making edits to a raw file, you aren’t touching the original data, instead, you’re just telling your software HOW to interpret the data, and how to manipulate it.
Every time you make a change to a JPEG, some of the data is lost, so each subsequent change is being made on a lower quality file. Boo.
Clarification: Once you’re done with all your edits, you’re still going to export your raw file as a JPEG for posting on your food blog. That’s fine – the benefit of shooting in raw is that you have ALL the data to play with up to the point of export, so your final image will look much better.
Raw Format vs JPEG
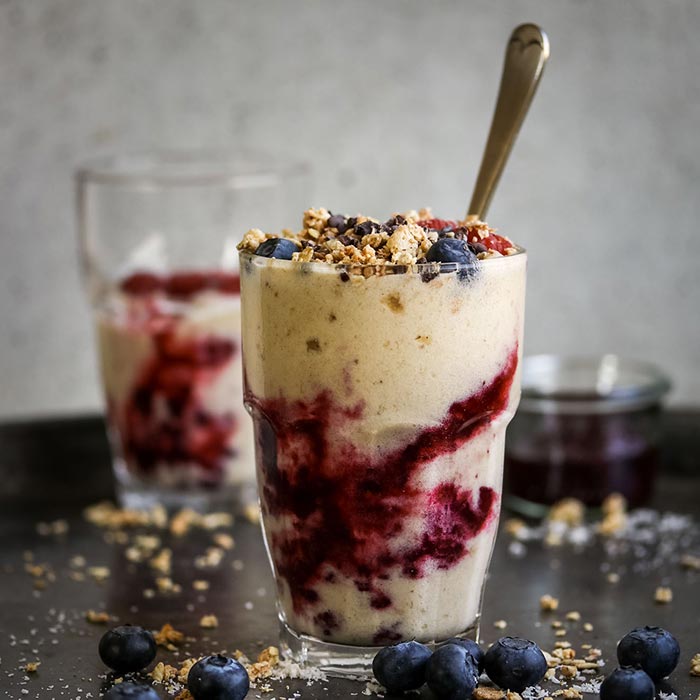
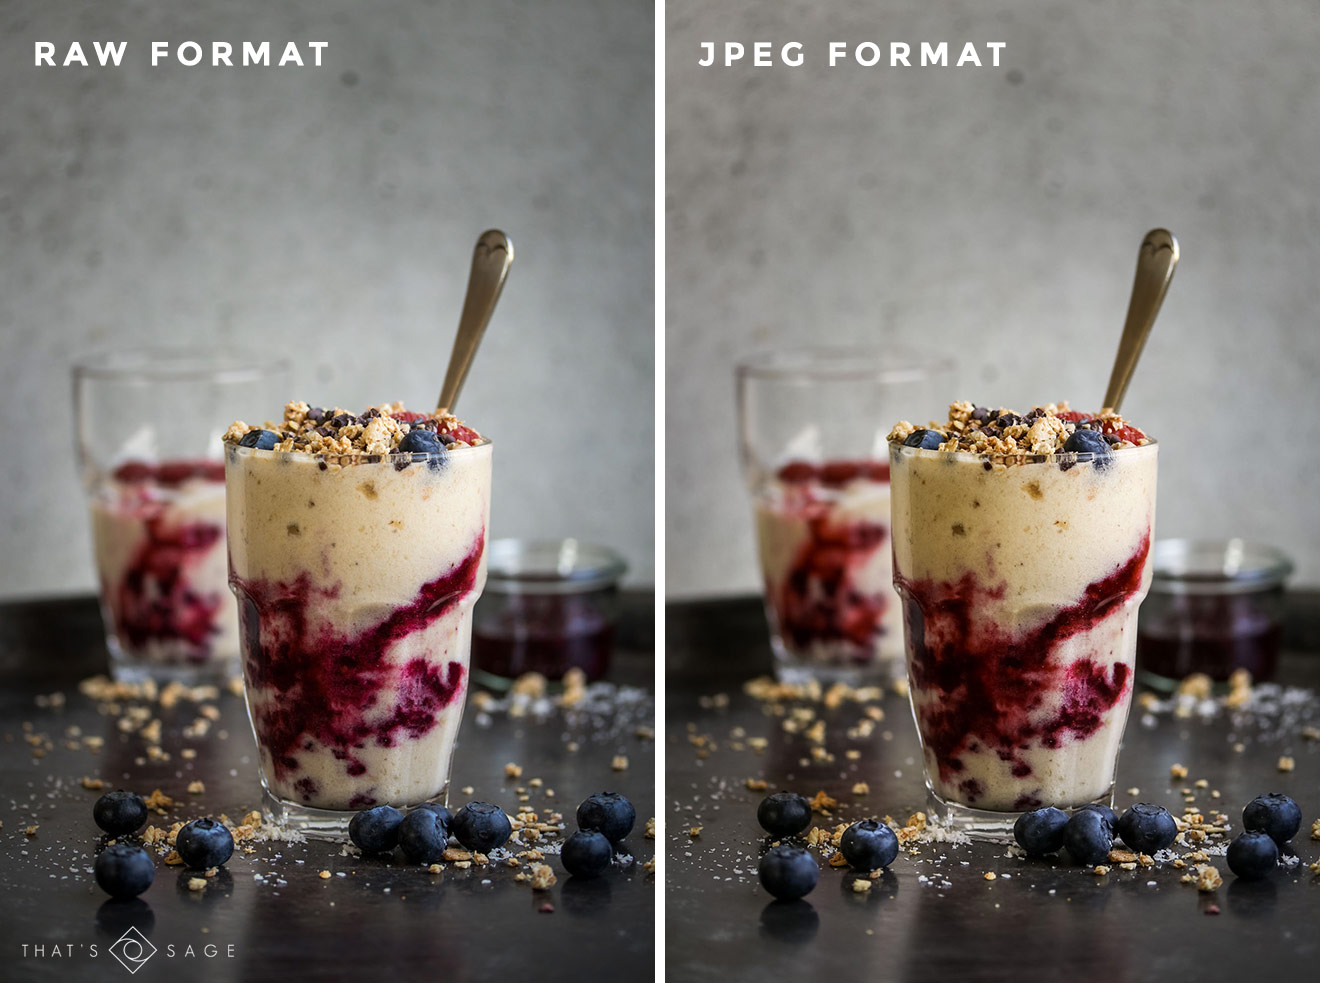
Let’s look at a real life example of all of this in action, with this delicious banana nice cream berry parfait. Yum.
Straight out of camera comparison
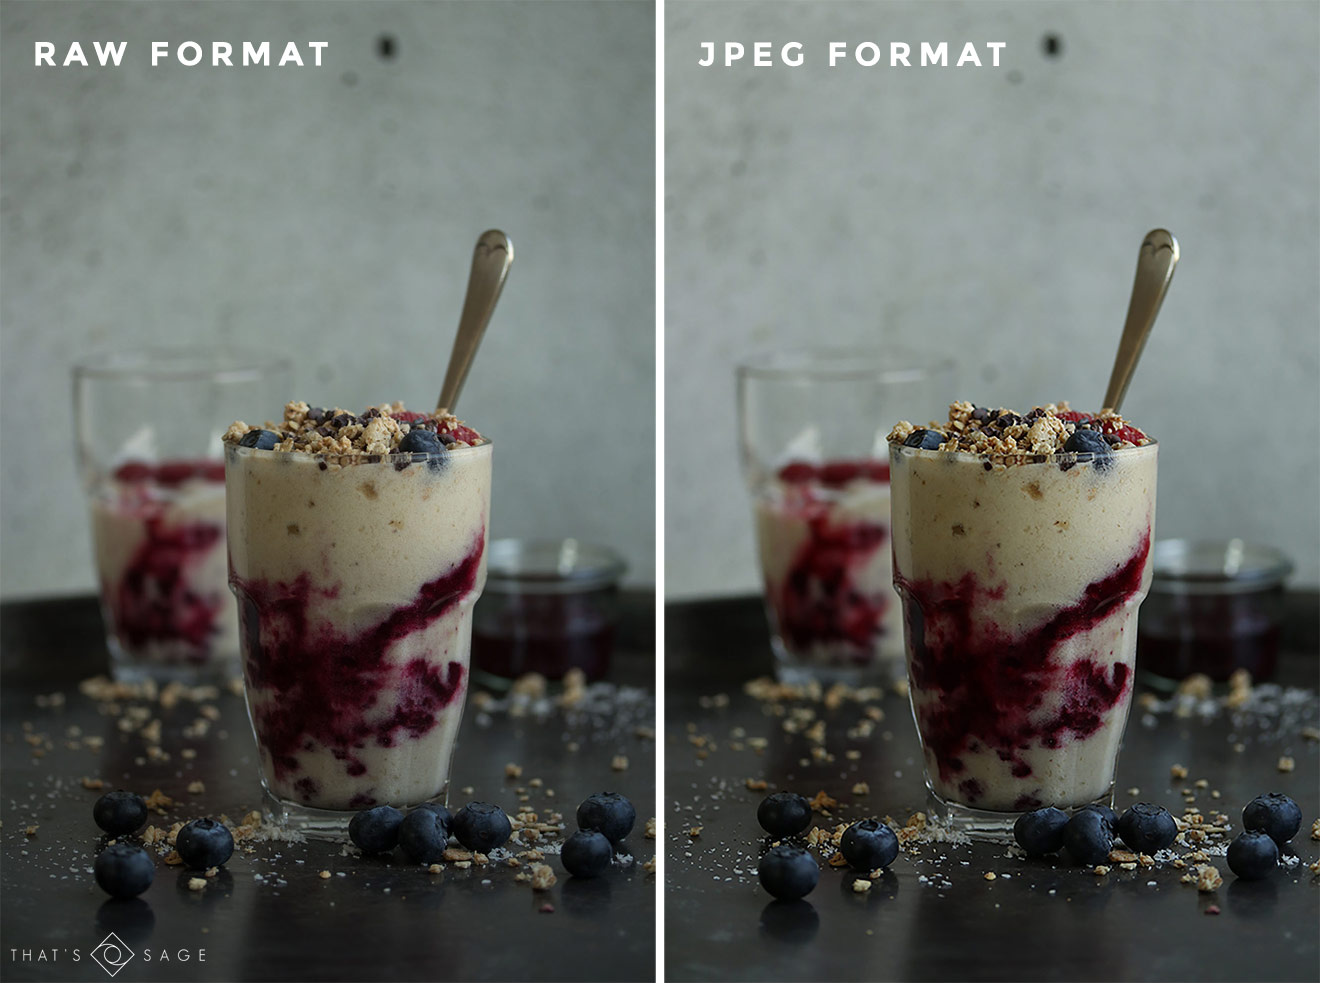
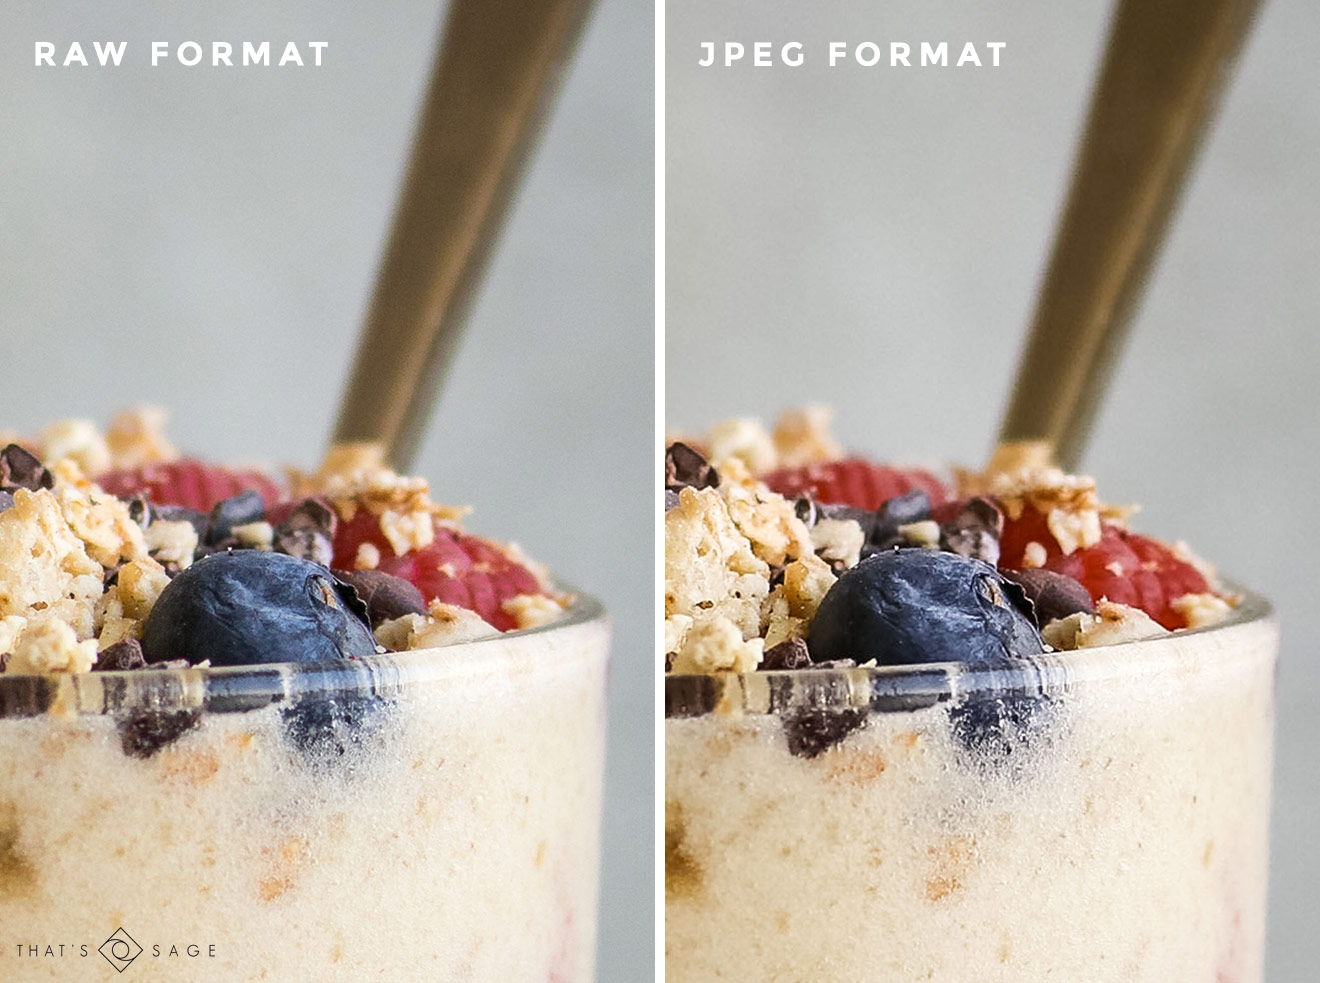
You’ll see in the image above, that the raw version looks much flatter than the JPEG and not as sharp. You can see on the JPEG that there’s a bit more contrast, but the most noticeable thing is the sharpening that’s applied. You can see this effect most prominently on the granola on top. Let’s take a closer look

In this close up, you can much more clearly see the sharpening that’s been applied. The blueberry and the piece of granola to the left look much more jagged in the JPEG, whereas the raw file looks softer.
One of the key reasons that I prefer to work with raw files is that I can use the masking tool in Lightroom, to apply the sharpening effect only to the edges of the most in focus areas. This gives the photo a more natural look and avoids excess “noise” (that grainy look you get on photos when your ISO was set too high).
Edited Comparison
To demonstrate the difference in the final image, I went through and edited the raw file, then pasted exactly the same adjustments onto the JPEG in Lightroom. Here are the most noticeable differences:
White balance – you can see that the overall hue of the picture is slightly different. Because of the limitations of the JPEG file, I’m not able to achieve the exact colour that I want the photo to have, whereas the raw file easily allows me to do this.
You’ll also see in the berry swirls on the left-hand side of the glass, that the raw version has much more detail in the darker areas, where the JPEG looks dark and muddy due to the loss of data in these areas.
And the sharpening. In the raw file, I was able to use the masking tool in Lightroom to only apply the sharpening to the most in focus areas of the photo, and I’m able to decide exactly how much (or little) sharpening should be applied. This has resulted in a much more natural look, and far more detail is retained in the sharpened areas.
Here’s a close up so you can see in more detail
Summary
1. Raw format files retain all the data available from the camera sensor. JPEG’s are compressed by your camera.
2. When you shoot in JPEG, your camera makes irreversible edits to your photos.
3. White balance is easily adjustable in a raw file.
4. There is no sharpening mask applied to a raw file in the camera, so you get to decide on the placement and the amount of sharpening.
5. Raw files have to be converted to either JPEG or TIFF format before they can be printed or used on your food blog. You’ll need to use an editing software such as Adobe Lightroom or Photoshop to do this.
Lastly, don’t forget you can enroll in our free, 5-day Manual Mode e-course, to help you hit the ground running with your new DSLR!
Free E-Course
Learn Manual Mode in 5 days flat!
Learn Manual Mode in 5 days flat!
Your Turn
Do you already shoot in raw format? Has this inspired you to give it a try?
I don’t agree with this at all. In your examples the jpeg just looks a little brighter and more contrasty. I think there’s more sharpening going on too. Personally, I prefer the look of your jpeg. All of those things can be adjusted to get the jpeg to look almost exactly like the raw image. There are a few small instances, in my experience, where raw does better. Raw wins with retouching along with shadow and highlight recovery (but only sometimes and you can do HDR jpeg to help compensate), but that’s about it. I’ve never seen a raw image… Read more »
Always interesting to have another opinion Mike! If you’re having a lot of CA issues, it sounds like it could be your lens that’s the issue. But anyway, thanks for sharing your perspective!
Sounds amazing, thanks for sharing:)
Didn’t know there would be such a big difference between taking raw photos and JPG. Thanks for this, will take it into consideration next time!
Very informative, thanks for sharing! Nice
Very useful article! Just bought a new camera and gonna try this!
Any tips for starting photographers, who want to take pictures with their phones?
Oh!! Thanks for this informative article!! It’s so helpful <3
Wow! These are great tips. I never knew it before. I learned a lot! Thanks for sharing!
Thank you for the helpful advice! There is so much to learn, and I learned some useful food photography tips from your blog.