


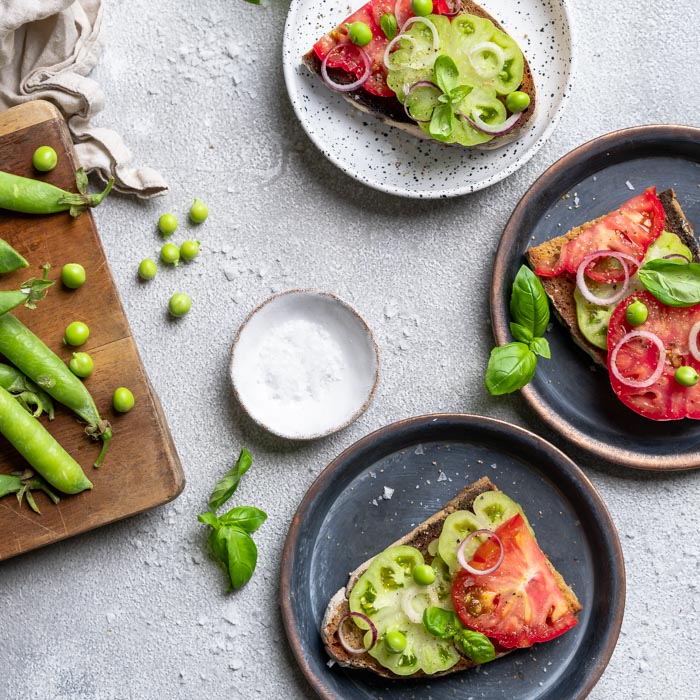

In today’s post, we’re gonna take a little dive into the world of white balance. By the end of this post, you’ll know exactly how to set a custom white balance (plus how easy it is!), allowing you to create incredible food photos with stunning, true to life colours, every single time.
The goal of shooting with the correct white balance is to get the colours you are shooting looking natural and true to their actual colour. In food photography, we really want the colour of your food to be accurate so that the food looks realistic and appetizing. As much as funky editing can look AMAZING on landscapes and portraiture, food photography isn’t where we want to be playing around too much.
In order to show you exactly how to set a custom white balance, here’s a video tutorial. And if you prefer a written tutorial, then keep on reading!
Shooting with the correct white balance is not only going to give your photos more consistency, it’s going to cut down your editing time by giving your photos the best, most consistent start, so you don’t have to spend ages tweaking the white balance in post production.
So what affects white balance? Well to answer that question, we need to chat a little bit about light first.
All light has a colour temperature which is measured in kelvins. Warm, yellow light has a lower kelvin value (eg. 2500k) whereas cool, blue light has a high kelvin value (eg. 9000k).
Depending on the colour of the light you’re shooting in, you’ll need to compensate in your white balance settings, to reach a neutral point where whites are truly white.
So if you’re shooting in warm, yellow light, you’ll need a cooler white balance, and cool, blue light needs a warmer white balance.
You can use the settings in your camera to achieve this, and we’re going to look at the different options you have. Most cameras have several preset white balance modes, such as auto, daylight, tungsten and many more, and you can scroll through them to see which one fits best, but there is a better (and far more accurate) way.
But before we start getting into white balance settings, I need to re-inforce the importance of shooting in raw format. Raw photos retain all the data captured on your cameras sensor, whereas JPEG’s are compressed by your camera, and some edits are already made which can’t be undone.
Read more about shooting in raw format here.
It’s tempting to just shoot with auto white balance, but particularly in food photography, auto white balance can cause some issues.
The problem with AWB is that it’s easily thrown off if the subject you are shooting is largely yellow or blue in colour. Often, in food photography, food is quite yellow toned, so if the majority of your frame is warm, your camera will incorrectly try and compensate, making your photo too cool.
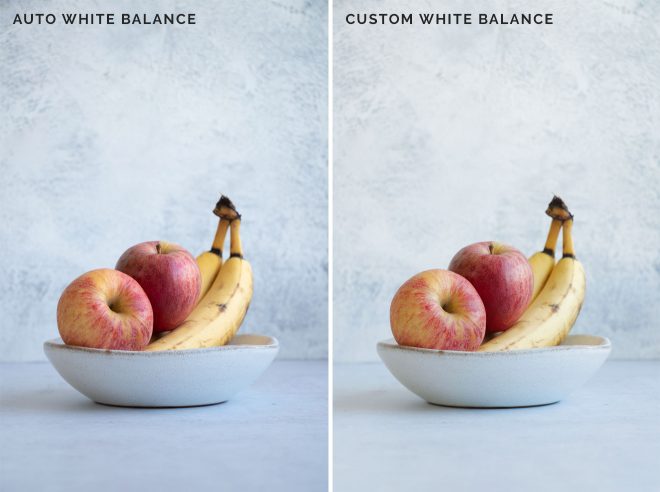
In this example, you can see how the camera is taking the yellow undertones of the banana and the apple and applying a cooler white balance. In the photo on the right, I used a custom white balance.
So how do you shoot with a custom white balance? Well, here’s a step by step that takes less than a minute to set up, and will become second nature in your shoots!
- Using either a white balance card or a white piece of paper, place it in your scene exactly where your subject is going to be. You want to make sure the light source is hitting your white balance card in the same way it will hit your subject.
- Set your white balance mode to “Custom White Balance” in your camera.
- Take a photo of the white balance card with the card filling the frame and your light meter set at 0.
- Go into your camera’s menu, find the white balance settings, then choose the photo you just took as the reference point for your camera to use.
- You’re done! Your camera is now going to use the information from this white shot to set the correct white balance based on the light you are shooting in.
Every time you change the position of the subject, or the angle/direction of the light, retake the photo and repeat the steps above to maintain the correct white balance.
This is such a simple step that is really going to take your food photography to the next level!
Don’t forget to subscribe to the That’s Sage YouTube channel if you’re not already!
What happens if I set my White balance and then change my shutterspeed or aperture do I need to reset white balance? Or what if I take an overhead shot and then a 45 degree shot?? Will I need to reset the white balance? Thank you in advance!
Hi Elizabeth! You would just need to check it between the changes in angle. Unless you’re using natural light and the temperature changes dramatically within the same setup
Hi Lauren
What an informative post! Please, would you mind sharing the details of the white balance card? I checked on Amazon there are various sizes, which one to get. 30×30 or 60×60? Does size matter in this case?
Jagruti
Size doesn’t matter at all as long as it fills the frame. Mine is smaller than 30×30 so I would go for that one!
Thanks, Lauren 🙂
Thank you so so much for this. I’m unsure on the terminology of checking how the light meter is at zero? Do you have a tutorial on how to check light meter and such so I can correctly set a custom white balance? Thank you bunches!
You’ll see your light meter on your live view screen (you might need to check how to make it visible on your particular camera), and you’ll see a little arrow hovering above it. As you change your shutter speed to affect your exposure you’ll see it move up and down, when it’s at 0, you’re good for taking the white balance photo.
Hi Lauren! This is some amazing information which will definitely help me in the future. However, I tried the method yesterday with a white sheet of paper instead, but what I got was a really blue tone of my image, which was gar away from the intended result. I mention that I followed the steps accordingly. Any idea why that could have happen?
Thanks
Cori
Hey Cori! So glad you liked the article! Hmmm, hard to say why this didn’t work… it must have been something to do with a camera setting, but without being there with you it’s hard to say exactly what went wrong!