


There are a number of beginner food photography mistakes that are common to many photographers, and yet very easily avoided. Read on to find out if your food photography currently suffers from any of these problems and, most importantly, learn how to fix them!

As I go through the 6 common food photography mistakes, I’m also going to be opening myself up to embarrassment with plenty of examples of my earlier (and not so great!) work.
1) The Shakes
The Problem
Your photos are blurry. Not just out of focus in some parts of the image and sharp in others, but soft and lacking definition everywhere. Zooming in to examine the edges between elements of the photo, you may even notice multiple lines as if you were looking at a misaligned double-exposure.
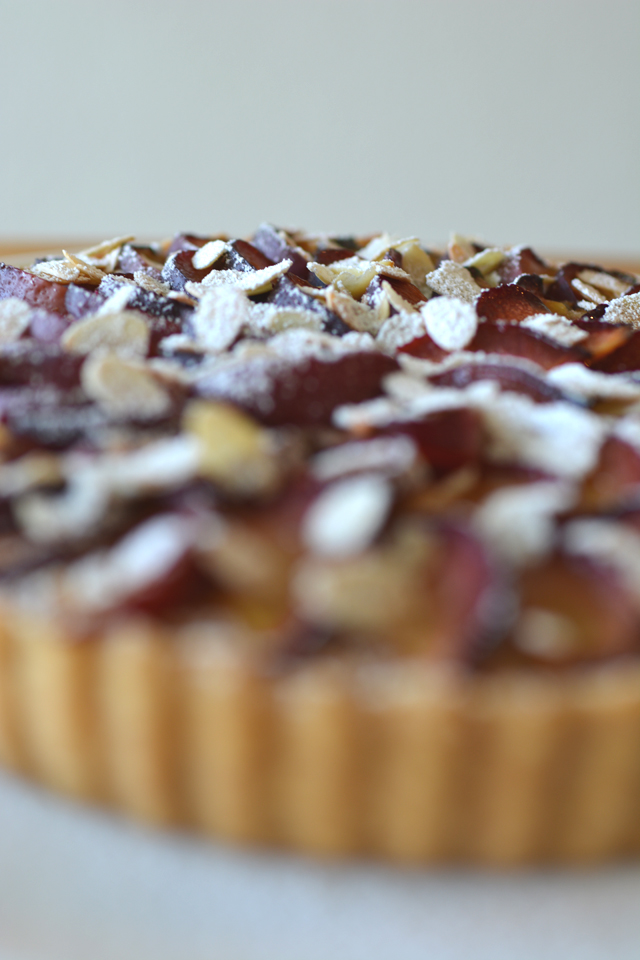
The Cause
The camera has moved during the exposure. Either because you were shooting handheld at a slow shutter speed or because you knocked the camera/tripod when releasing the shutter. You can see that there’s nothing completely in focus in this plum tart image above.
The Solution
● Set your lens to a wider aperture setting so as to be able to use a faster shutter speed for totally sharp handheld images. If you are not already using your camera in full manual mode, now’s the time to learn.
● Alternatively, increase the amount of light falling on the subject so you can use a faster shutter speed without underexposing the image.
● If you don’t want to use a wider lens aperture, can’t get any more light onto the subject, and don’t want to increase digital noise by upping the ISO setting, consider using a tripod for your food photography.
● If you are already using a tripod and are still getting blurred images, be sure to trigger the shutter by means of a remote release because by firing it manually, you risk causing vibrations. If you find yourself in a pinch and don’t have a remote shutter release to hand, use your camera’s built-in timer to countdown 10 seconds before the shutter fires, by which time most vibrations will have settled.
2) Focus Failure
The Problem
Unlike point 1) above, part of the image is in focus – just not the part that should be in focus. This makes the photo confusing or annoying for viewers to look at.
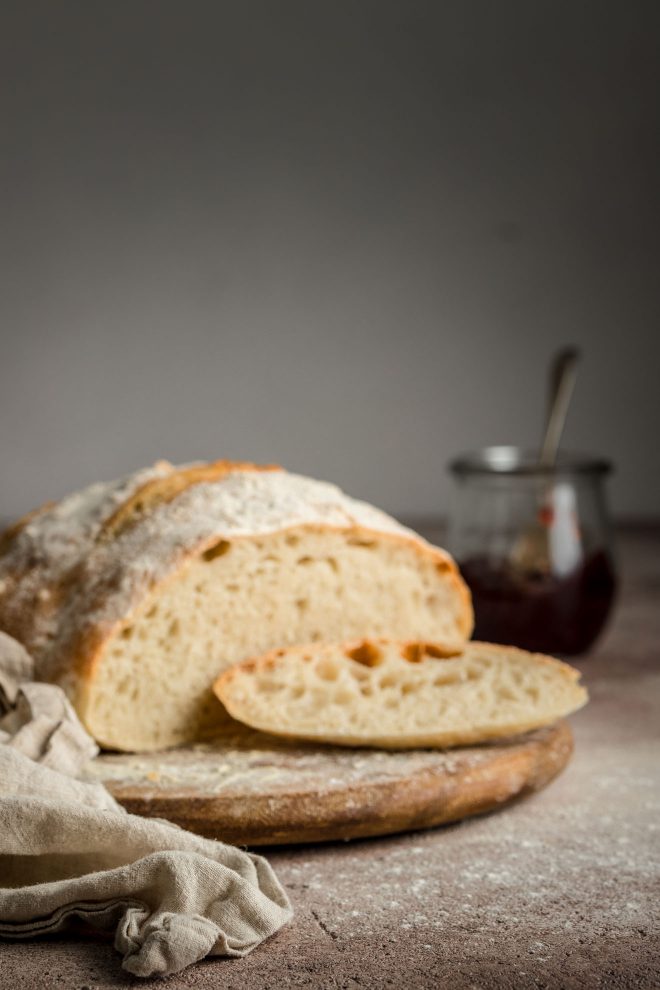
The Cause
This may have been caused by one of several errors:
● Inaccurate use of you camera’s autofocus.
● Sloppy manual focusing.
● Moving the camera after the focus was set.
● Focusing on the wrong part of the image from the outset, due to confusion over what is the true subject of your photo. (I’d rather see the bread in focus in this image… wouldn’t you?!)
The Solution
When using autofocus, make sure that the AF point in use (i.e. the one that becomes red when the lens achieves focus) is right over the area you wish to set as your focus point and not on the background or some other part of the subject. Alternatively, consider using manual focus to set focus exactly where you want it.
If focusing manually, keep in mind that when shooting close up at wide apertures even a difference of a fraction of an inch can make the subject go out of focus, rendering the photo unusable. Be extremely precise with your focusing.
Whether focusing manually or using AF, make sure that you do not change the distance between camera and subject between setting focus and pressing the shutter release button. This can happen very easily when shooting handheld if after setting focus you move the camera slightly to reframe for a better composition. Even just turning the camera a little to the side can result in a shift in focus.
Some focus problems are not caused by bad technique, but by simple indecision or a lack of awareness as to which part of the photo should be in focus. In this case, ask yourself, “What is the most important part of the image?” If it were a person, it would be the eyes; but with food, we have a little more room to maneuver. Nonetheless, the focus should always be on the part of the image that contains the most important information, or simply where you want viewers to look first. Check out my dedicated post on this subject for more advice about selecting the focal point in food photography.
3) The Wrong Lens
The Problem
In terms of symptoms, using the wrong focal length lens can cause anything from a weird perspective, ugly converging parallel lines, an unsuitable depth-of-field, or a simple inability to get the whole subject in the frame.

The Cause
Using an inappropriate lens for the shot you’re trying to achieve. In this image, I was using a 30mm (wide) lens so everything looks like it’s leaning towards the edges of the frame due to distortion.
The Solution
There’s no right or wrong lens, but certain lenses perform better at certain tasks than others. For example, unless you have thirty-foot ceilings, trying to take a top-down tablescape with a 150mm lens will prove nearly impossible.
Similarly, shooting a straight-on food portrait with a 35mm lens will not produce professional results. If you’re left wondering why that is, then it would benefit you to read up on lens focal length.
In order to excel at food photography, you need to gain a clear understanding of the advantages and limitations of all your equipment. Lenses are among the most important creative tools you have at your disposal, so if you’re unsure about the differences between a wide-angle and a telephoto, be sure to read my guide to choosing the right lenses for your food photography.
4) Slapdash Exposure
The Problem
Over- or under- exposed photos, burned-out highlights, lack of any shadow detail.
The Cause
Poor photographic exposure is usually caused by quickly checking the LCD on the back of your camera, seeing that the first image looks OK, and then continuing shooting at these exposure settings without checking the histogram.
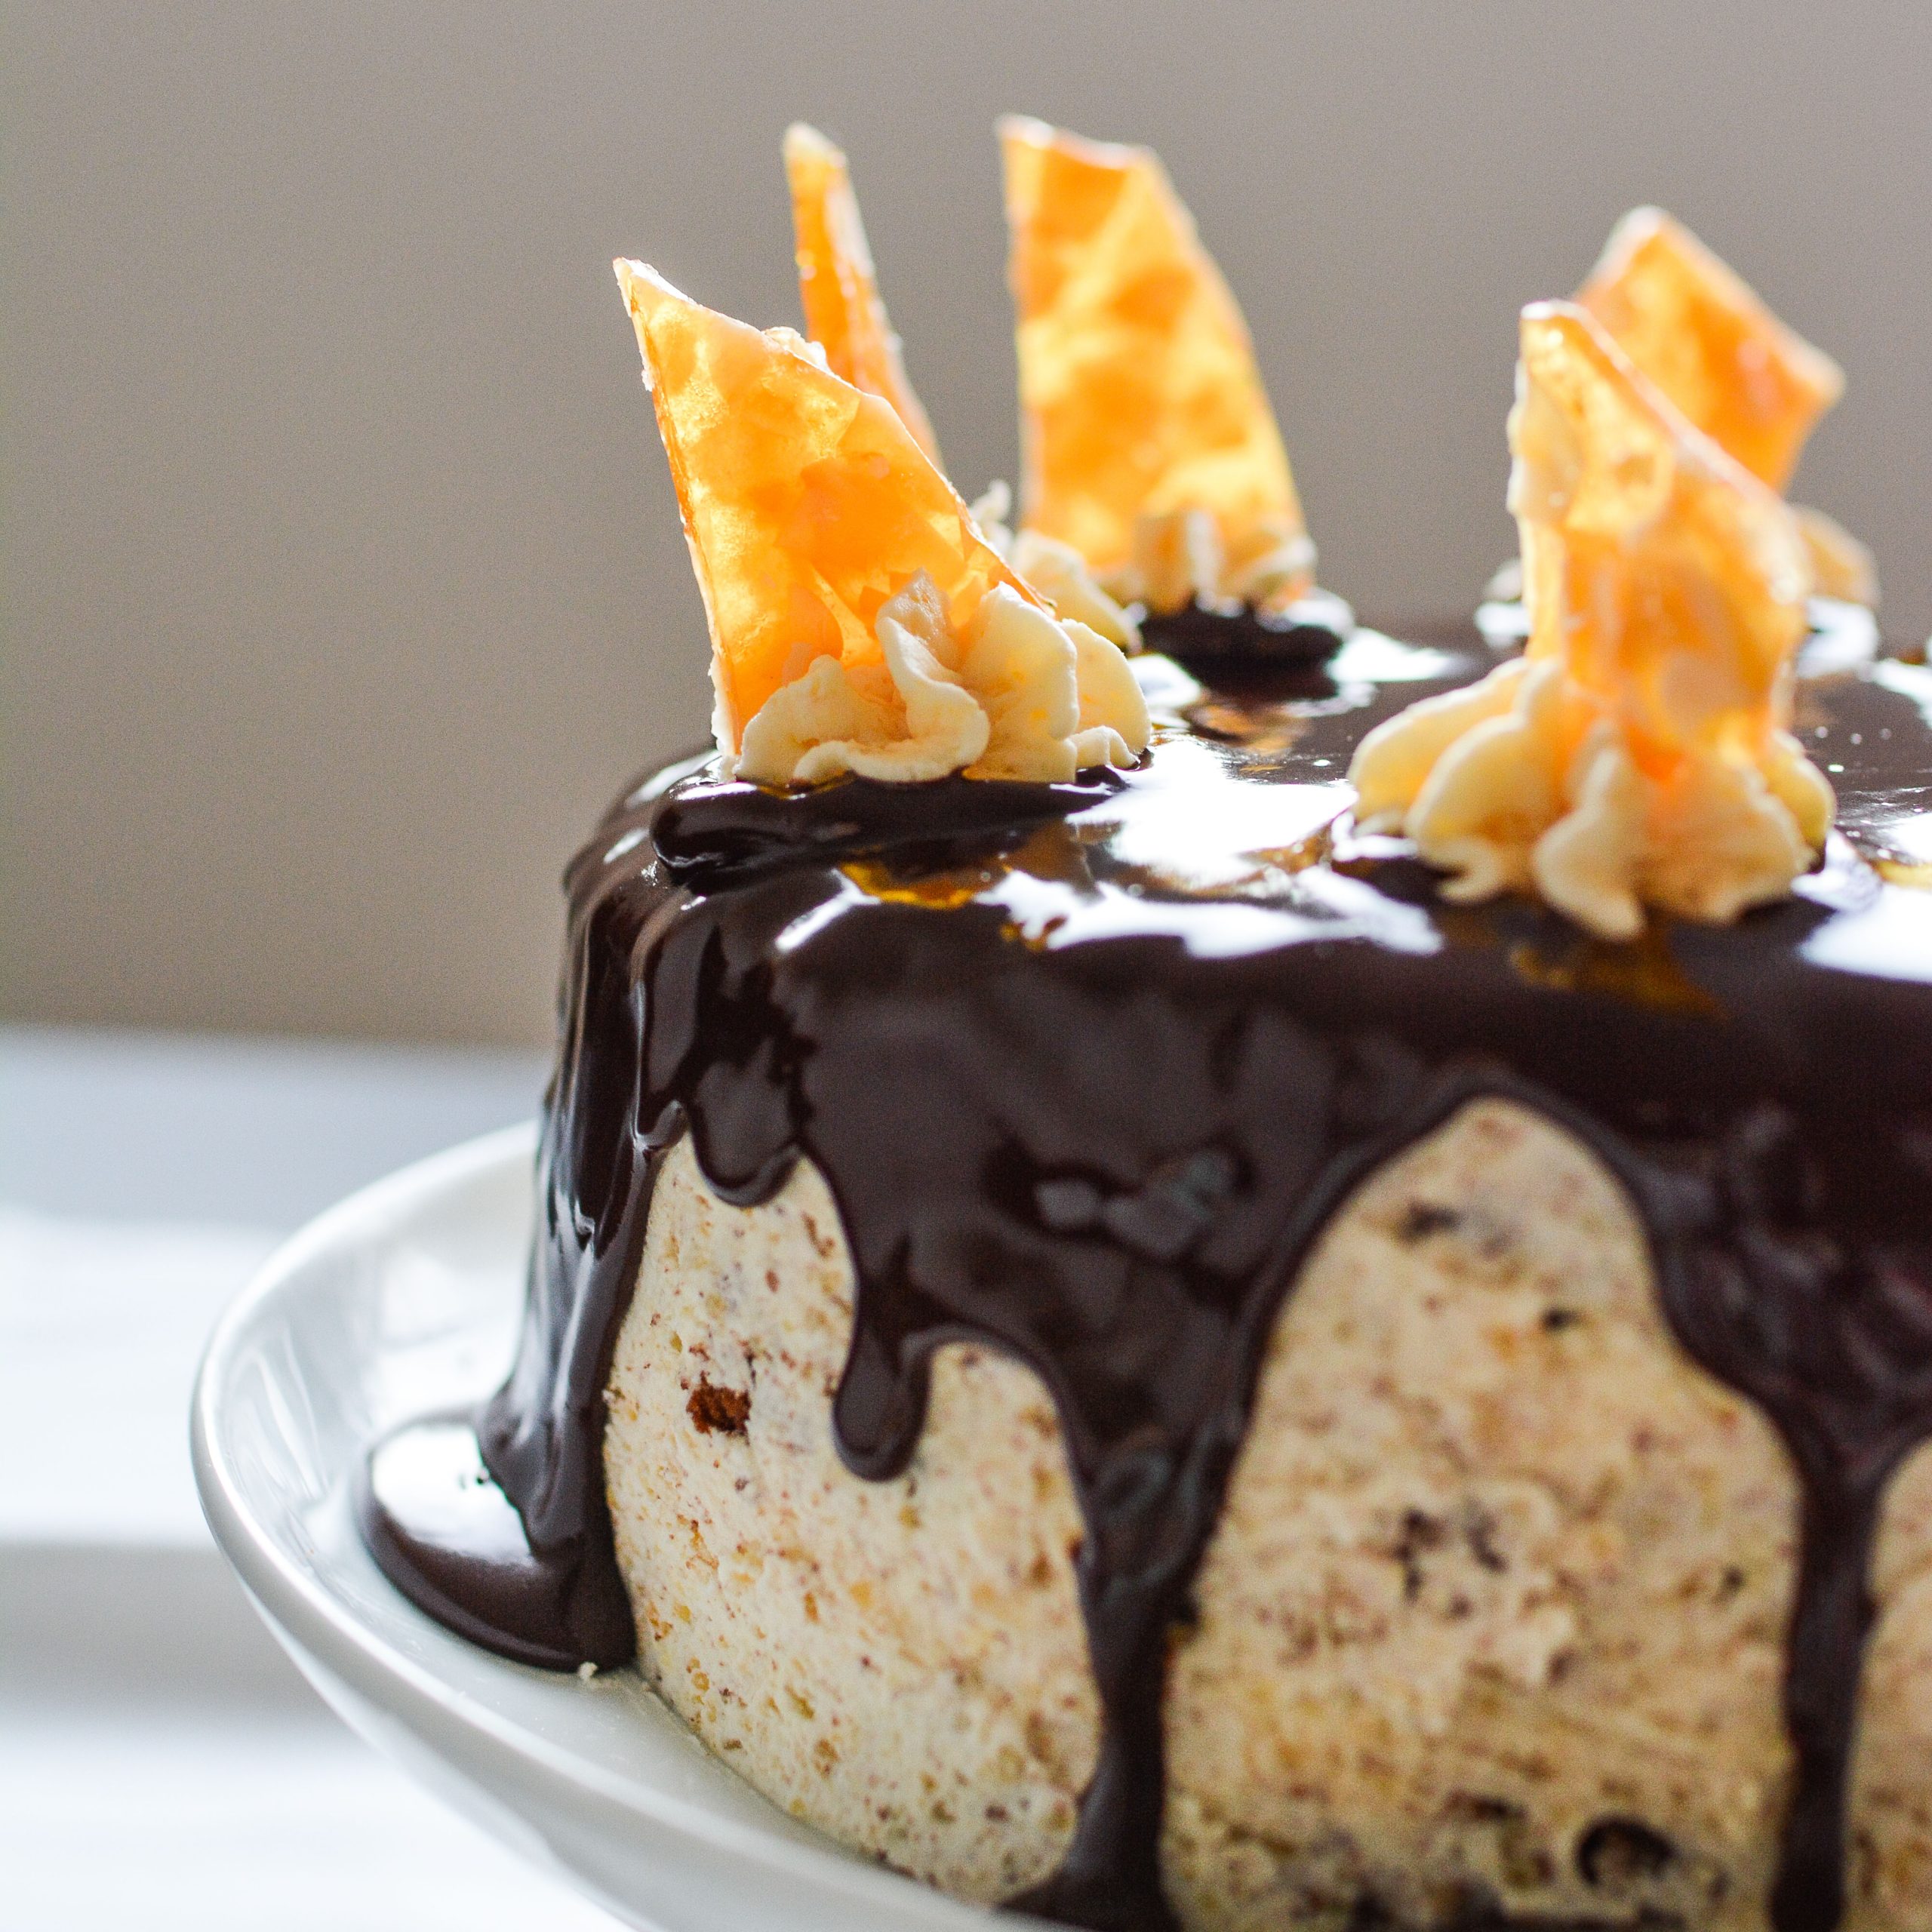
In this image, I’ve got blown-out highlights on top of the ganache, but an underexposed front and scene.
The Solution
The screens on the back of cameras – even pro-level cameras – never provide a truly faithful indication of exposure. The only way to be totally sure that you’ve captured all the information you need in both shadow and highlight areas is to learn to read your camera’s histogram display.
Once you are really in-tune with your camera and have repeatedly seen how the files it produces perform at the post-processing stage, then (and only then!) can you perhaps risk ignoring histograms. But until that time, histograms exist in order to help you produce great exposures every single time. Use them!
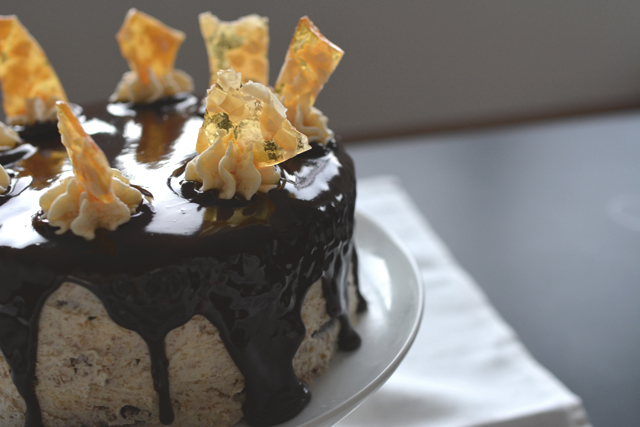
5) Clunky Composition
The Problem
Awkward framing, important elements being cut out of the shot; distracting objects included in the background or creeping in at the edges of the frame; not enough space around the subject; too much space around the subject; unattractive alignment of the different elements, etc.

The Cause
If your compositions still aren’t up to par, this may be caused by a lack of knowledge of the classical rules of composition. This ginger loaf cake from one of my earliest shoots shows how distracting that piece of cake is in the front! It takes up far too much space and the depth of field is too shallow so you can barely see what it is.
The Solution
Good composition skills are learned by:
● Studying the classical rules of photographic composition.
● Learning about creative ways to break the classical rules of composition.
● Repeatedly looking at good quality work by accomplished photographers.
● Shooting. A lot.
6) Heavy-Handed Editing
The Problem
Bad editing is one of the most common beginner food photography mistakes and can manifest in a variety of different ways. The following are just a few signs that your editing might be somewhat over the top:
● Bizarre or impossibly saturated colors.
● Highlight areas that are nearly as dark as the shadows, and vice versa.
● So much sharpening all over the image that the edges of objects have started to develop little haloes.
● The photo looks more like an illustration than something captured from real life.
● Vignetting around the edge of a photo should not be noticeable to the viewer as a dark black cloud. Instead, it should subtly improve the balance of the image and help to visually “close” the frame. This should be felt rather than seen.

In this image, I had no idea how to edit color correctly, so in trying to make the tomatoes more “red”, I actually made the whole photo look pink – like I’d applied a sketchy Instagram filter over the whole thing.
The Cause
This problem is usually caused by a combination of three things:
● Insecurity about your own photographic abilities.
● A lack of awareness about how light behaves in the real world.
● Looking at too much heavily-retouched photography on Instagram, or elsewhere, so that this aesthetic begins to look normal to you.
The Solution
Lightroom, Photoshop, and other digital editing programs are an essential element of every photographer’s toolkit. Don’t think that using them is somehow cheating. The issue is how you use them – and particularly how much you use them.
The key thing to keep in mind is that good photo editing is about realizing the full potential of an already good photograph, not turning a substandard shot into a great one. That just isn’t going to happen. The raw potential needs to be there from the moment you press the shutter, so don’t be tempted to go overboard with the retouching in order to compensate for not having captured the shot the way you wanted it in-camera.
Having said that, even if you do think that you might be guilty of overdoing the post-processing, it’s likely that many of the edits you currently make to your photos are actually perfectly fine – you just need to dial them back a little. Make them a little less extreme. As a general rule I’d say that if you can see the editing, it’s probably bad editing, so try toning your edits down to the point that they are only noticeable when compared side-by-side with the unedited original.
Aside from improving your photography editing skills, it’s important to develop a good understanding of natural light and the way that it behaves in different real-world situations. This way you will not be tempted to make edits to your photos in terms of the lighting that will look totally fake to anyone who genuinely understands how light works.
As good photographers tend not to overly rely on editing for the success of their work, one of the easiest ways to improve your editing skills is simply to look at good photography as often as possible until you absorb this aesthetic.
So there we have it, 6 common mistakes often made by beginner food photographers that are easily solved. As you can see from this post, I went through my fair share of food photography that I’d rather leave in the archives, but years of practice and determination allowed me to create work I’m proud of and also build a successful business around it!
Which of these mistakes do you think you’re making? And what could you try to help improve your skills?
All your hints are very helpful. Thank You for sharing such great post with all of us.
Hey Lauren! This is my first comment here. thanks for all of your informative posts. I really enjoy reading them, and I learned a lot from them! I wanted to thank you for posting your old photos with mistakes here, it made me realize that your success didn’t happen over a night, and you also had mistakes before! it motived me to take more pictures, even though I know they might not all look good.
Hey Faz, thank you so much for this lovely comment! You’re so right, it doesn’t happen overnight, and you never really reach a point when you’re “done” either. I still see my work evolving and changing so much!
I could relate to most of these points! I have been shooting now for a year but still learning about natural light and composition. Last week we did a shoot on a dark rainy day and i was shooting a whole fish! Also tethering first time. Some of my images are over exposed on one side and in some there is blur and distortion. Reading through the points you have outlined i can now narrow down the causes that might have contributed to my over exposed images and some pics having unintentional blurriness. I am now spending SO MUCH time… Read more »
You’re so welcome! So glad you found it helpful!
This is such a helpful post! Thank you for sharing!!
You’re so welcome!
Thank you so much. These small points are so knowledgeable, and even we know, still knowingly unknowingly repeating the mistakes.
It’s definitely the small details that make a huge difference to our images!
Great post, a lot to learn from this approach! Thanks!
Thanks Kristian! So glad you found it helpful!
Wow, thank you for putting up such an informative and thorough article, I am also checking the references you linked in it.
Thanks for the comment Aline, so glad it was helpful for you!
Really helpful and clear
Thanks Kathering! Glad it was useful for you!