


In an age of food photography saturation on platforms like Instagram, GIFs are an extremely fun and engaging way to spice up your food photography content.
From an audience-engagement point of view, food photography GIFs are a total no-brainer. What’s more, GIFs can be shot while you’re working on other projects, and with very little extra effort on your part.
Want to get in on the food photography GIF action, but are unsure where to start? No worries, in this guide to creating mesmerizing food photography GIFs I share all the essential knowledge. Starting with a rundown of all the main points to consider before you shoot; walking you through the technical aspects of actually shooting, and then breaking down the individual steps to take when turning all your photos into a single animated GIF.
Pre-Shoot Considerations
Planning
Photography GIFs always work out best when pre-visualized and carefully planned out. The main point to consider is movement.
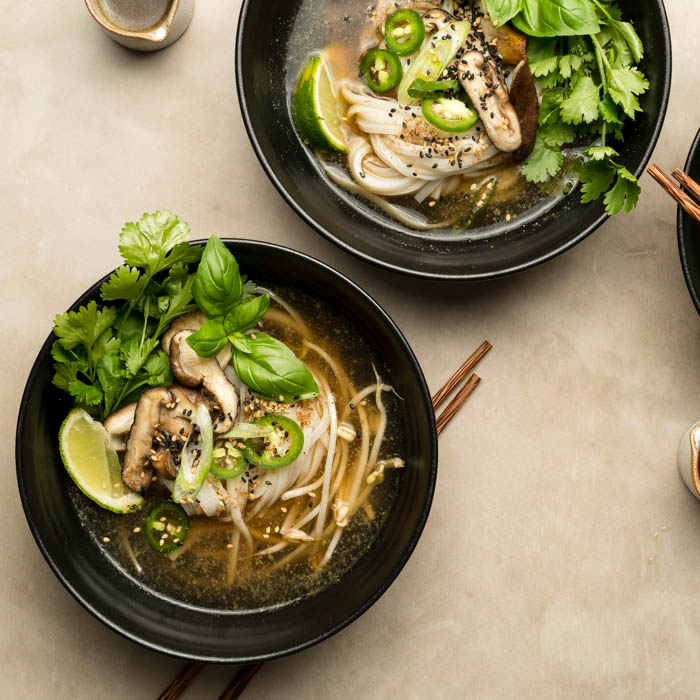
This doesn’t mean that you need to come up with any spectacular action. It can be as subtle as the steam coming off a bowl of soup for example, But you will need to consider what movement takes place in your GIF and how you can best capture it.
Whatever the movement, be sure to consider whether it would be better to keep the camera in a fixed position and let the action pass through the frame, or instead follow the action as it unfolds.
With that said, the best photography GIFs manage to create a kind of seamless loop, without any jump between start and endpoints. To achieve this you’ll need to plan your composition in advance so that the action begins and finishes in almost the same position.
Failing this, in the second half of the GIF sequence you can reuse the same images, but in reverse order. This way the action rewinds to the start. Keep in mind, though, that this is not an approach that will work well with all subjects.
If you want to learn how to use manual mode confidently in less than a week, join our free course using the link below

Free E-Course
Learn Manual Mode in 5 days flat!
Learn Manual Mode in 5 days flat!
Choose Your Method
There are two quite different approaches you can take to shooting GIFs. The final result will usually be similar, but the working processes are quite different; one is slow, one is fast.
The first method is essentially the same as producing stop-motion animation (you know, like the animated clay figures you see in Aardman films such as Shaun the Sheep). Here you set up the first shot and take a frame; then alter the setup slightly and shoot another frame. And so on. Until inch by inch, you’ve created a fluid and natural-looking movement once the sequence is viewed at high speed. Like this:
The advantage of this approach is that you can sometimes use it to create movement that would be impossible in real life (food moving around a plate on its own, for example). The disadvantage is that it takes a long time to do, and if you’re not precise with adjusting the shot each time, the movement can end up looking a little odd (but this can also add to the lo-fi charm, so I wouldn’t rule it out).
The alternative is to capture the action in real-time. This will give you a more fluid and realistic motion that looks almost like a video clip. In order to do this, though, you’ll need a camera with a fast continuous shooting rate.
Regular video usually has frame rate of between 24 and 60 fps. GIFs are usually less than 20FPS. This is where a camera with a very fast burst shooting rate can really be an asset; you set the action in motion and fire off a rapid volley of frames lasting a few seconds. Job done.
Get Creative
Although a GIF is made of photos, there’s nothing stopping you from employing more advanced filmmaking techniques to add extra interest to the scene. Try to think like a movie director. Consider using tracking, pans, focus pulls, wipes, and other video techniques to make your food photography GIFs really stand out.
Timing and Storyboarding
Once you’ve got a basic idea of how you want your GIF to look, and decided upon a technical approach, it can pay to divide up the action into sections and then carefully consider how long each section should be. The reason for this is that you’ll want to be sure to shoot enough frames for each section so as to create smooth movement and a long enough sequence.
Too many frames and the GIF will either be too slow or too long; too few frames and it will either be too short or too jerky. Perhaps both. And keep in mind that if a sequence is too jerky due to a lack of frames, you can’t easily go back later and shoot more images to add to the sequence. For this reason it’s probably better to shoot a lot more photos than you think you’ll need, and then remove extra images if you find that you have too many.
In some cases, you might want to storyboard your food photography GIF beforehand, showing the separate sections and allocating a specific number of frames to each of them.
Tips and Camera Settings for Shooting Food Photography GIFs
Exposure
While I always encourage new food photographers to get used to shooting in manual exposure mode as soon as possible, I know that it can sometimes be confusing for total beginners.
When it comes to shooting GIFs, however, you really are going to have to face up to the challenge and go fully manual. There’s simply no way around it. Otherwise, you risk ending up with variations in exposure between each image in your sequence. This would create a kind of flickering effect once turned into a GIF and would be a real nuisance to fix in Photoshop – if it can be fixed at all.
Join me in my FREE 5-day e-course, “Manual Mode Essentials” to go-pro by this time next week.
Free E-Course
Learn Manual Mode in 5 days flat!
Learn Manual Mode in 5 days flat!
Focus
There are two possible approaches to focus when shooting food photography GIFs. Which of the two you should take will depend on the subject matter and the kind of GIF you want to produce.
If shooting a subject at a fixed distance, you may find it best to set the focus manually. This way focus stays locked on the subject and there’s no risk of the focus point shifting between shots due to erratic AF. However, in the case of a shot involving some kind of rapid action (chopping, pouring, serving etc.), autofocus might provide the best results. If in doubt, run a test and check every frame for focus.
Shutter Speed
If your photography GIF sequence involves some kind of action – and as we’ve already noted, it probably should – then you’ll likely want to freeze this action sharply. To avoid motion blur, then, be sure to set a sufficiently fast shutter speed. Try a few test shots before deciding on a shutter speed setting for your GIF. And be sure to zoom in to check that the images are really sharp, even close up.
Tripod vs Handheld
Although GIFs are by nature a little lo-fi, you probably don’t want your hero dish wobbling around due to unintentional variation in camera position. For the most part, then, you should shoot your food photography GIFs with the camera mounted firmly on a tripod. This will help to avoid a lot of very tedious work at the post production stage trying to align a bunch of files that were all shot from a slightly different position.
Naturally, the one exception to this rule is when your GIF sequence involves a deliberately moving camera. For example, you might want to pan around the subject, zoom in or out, or follow the action as a dish is served. Here you’ll either want to shoot using a gimbal or – if you have a very steady grip – totally free-hand.
Lighting
Studio flash can absolutely be used for making photography GIFs. Depending on the kind of GIF you want to produce, however, continuous light will often work out being the easiest option. Let’s take a look at the pros and cons of each method in turn though.
Photography GIFs Using Strobes
Strobes are always going to be the best bet for freezing action totally sharp. Especially if you want to create a deep depth-of-field. The problem is that most strobes will not be able to recycle quickly enough to fire off a rapid succession of flashes in sync with the really fast burst shooting rates of top-end modern cameras. At least not at full power.
This makes strobes more suitable for the stop-motion animation method of shooting photography GIFs than for the real-time capture method.
Continuous Light Photography GIFs
Continuous lighting will often be the better solution when shooting real-time motion sequences for photography GIFs. Whether you use artificial lights such as LED banks or the daylight from a window, there will be none of the problems with recycling speed that you get with flash photography.
Using natural daylight is a particularly straightforward way of shooting photography GIFs. Not only is daylight free, but you don’t need to spend much – or perhaps even any – time setting it up either (although, for greater control of the final results, you may want to add flags and reflectors to your natural light setup).
Ok so now we’ve covered the planning and shooting of your GIF, stay tuned for Part 2, where we’ll cover editing and creating your GIF.
Enroll in Manual Mode Essentials now!
Great article. Can’t wait to try making GIF this weekend. Thank you!