


Editing is a powerful part of food photography. It’s as much a part of the creative process as styling your shots and taking the photo. These Lightroom tips will help you improve your Food Photography editing quickly, and easily.
A lot of googling and practising later, I got pretty comfortable with most of the basic editing functions in Lightroom, and I was able to edit my photos well. But there was still something lacking compared to those drool worthy food photos I was seeing in magazines.
So I set out to really learn how to get the most out of Lightroom, and what I could do to take my food photography editing game to the next level.
In today’s post, I’m going to share with you my top three Lightroom hacks to help YOU turbo boost your food photography editing, without spending hours and hours researching this stuff, trying to find out what you actually need.
Before we get into this… Lightroom Hotkeys. These are keyboard shortcuts that are going to make your food photography editing workflow SO much quicker and easier. I’ve put together my favourite shortcuts into a handy, free PDF for you to reference any time
So I won’t leave you hanging, what are my top three Lightroom tips to take your food photography from meh to AWESOME?
HSL Adjustments
Sharpening Mask
Radial Filter
I’ve made a video tutorial for these three Lightroom hacks so you can watch how they work in real time live action, or you can keep reading for the written summary if you prefer.
Using these three Lightroom tips for food photography editing
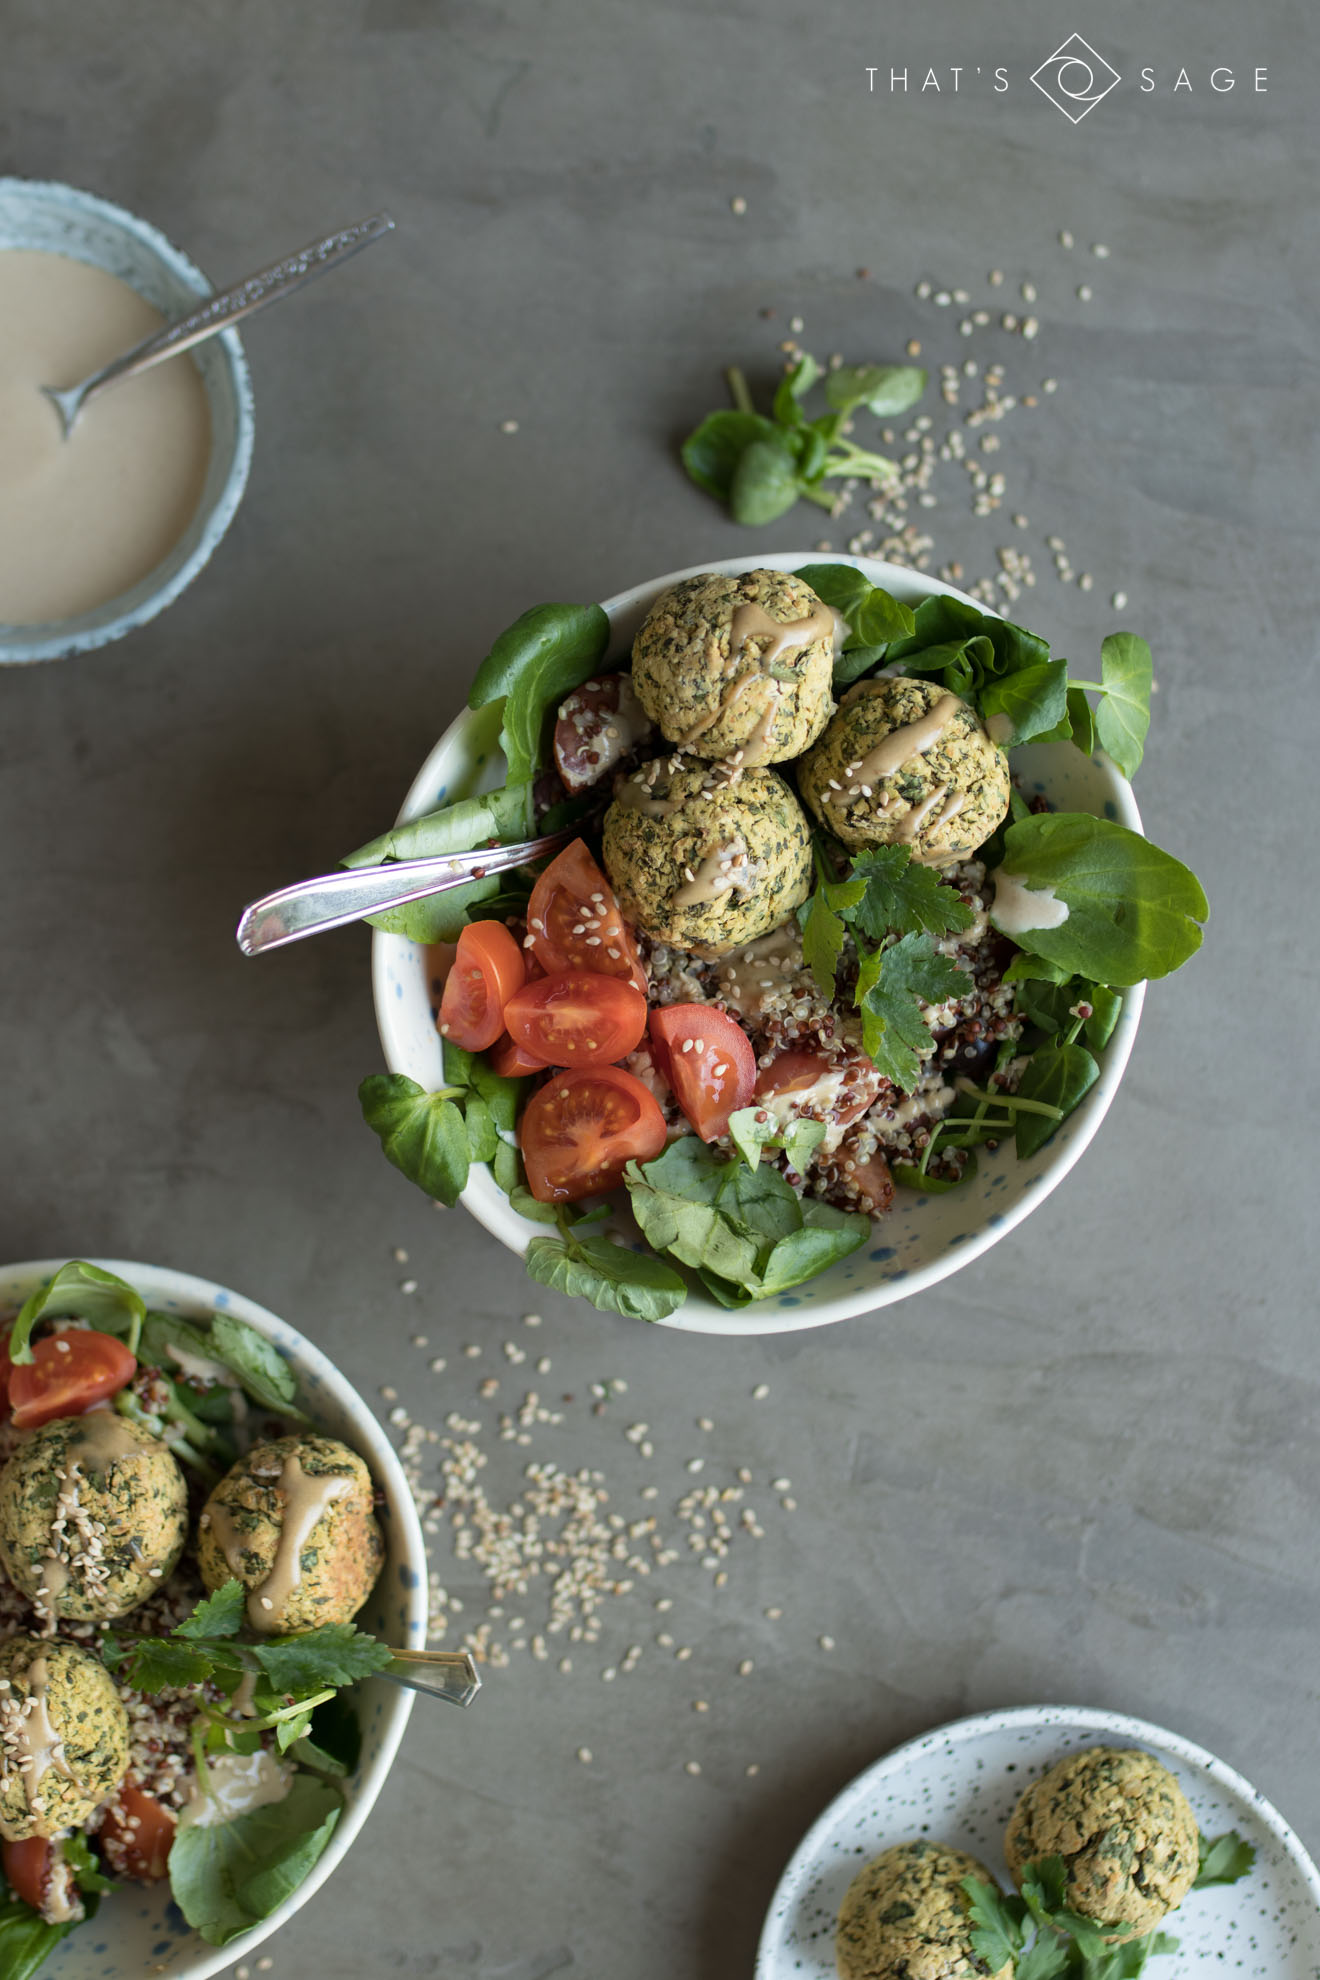
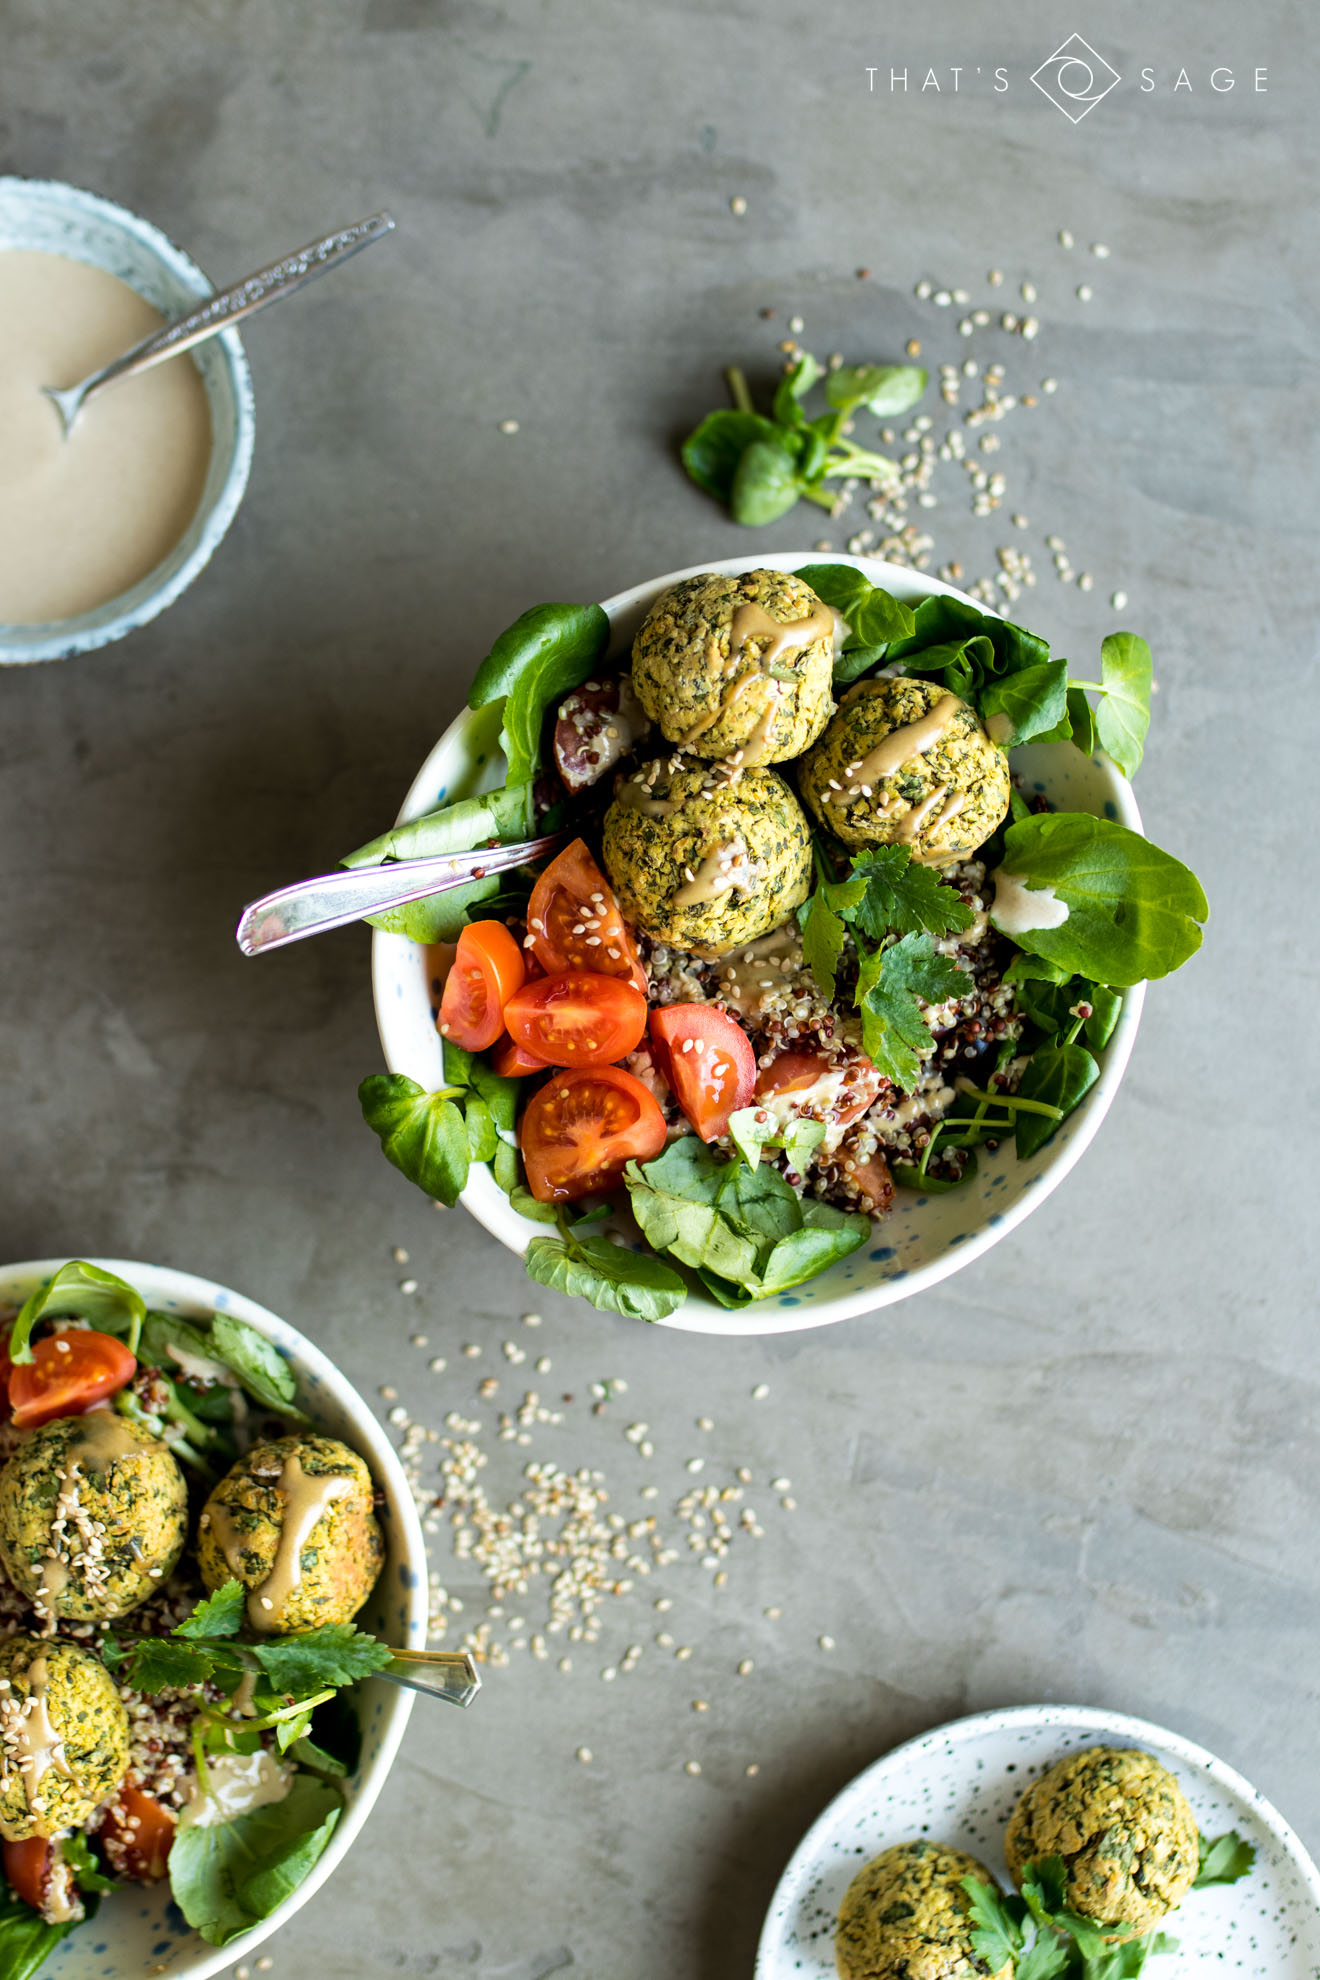
We’re going to be working with a top down shot I took of some falafel bowls. First, here’s the photo straight out of the camera as it comes in raw format. It’s pretty flat and a bit desaturated right now:
Let’s start off by making some basic adjustments.
The edits I made were:
Increasing the exposure and contrast a little
Increasing the whites
Decreasing the blacks
Increasing the clarity
Increasing the vibrance
Increasing the saturation a little too
Perhaps right now these are the only tools you’re using in your food photography editing, but with these Lightroom hacks, I’m going to show you how we can make this photo REALLY pop.
Want my free Lightroom Shortcuts for food photographers guide?
HSL Adjustments
HSL stands for Hue, Saturation and Luminance. The reason this tool is SO powerful in Lightroom, is that it allows you to control colours individually, so you can play around with particular elements of your photo without affecting the whole thing.
Hue = what shade a colour is. For example, if you have a green leaf in your photo, is it purely green, or is it a dark green with a hint of blue, or is it a light green with a hint of yellow? With the hue slider, you can change the shade of your colours.
Saturation = literally how saturated a particular colour is. If you slide the red slider up and down, you’ll see the red in your photo getting respectively more and less colourful.
Luminance = how bright a colour is. If you slide the red slider up and down on this section, you’ll see how the red tones in the photo get brighter and darker.
Let’s take a look at how we use this hack.
Scroll down to the HSL / Color / B&W section of your toolbar on the right hand side, select “HSL”, and make sure that “All” is clicked on the right hand side.

What you’ll see is three sets of sliders stacked on top of each other, one for hue, one for saturation and one for luminance.
Each one has been split into 8 colours, which gives you TONS of flexibility while editing your photo.
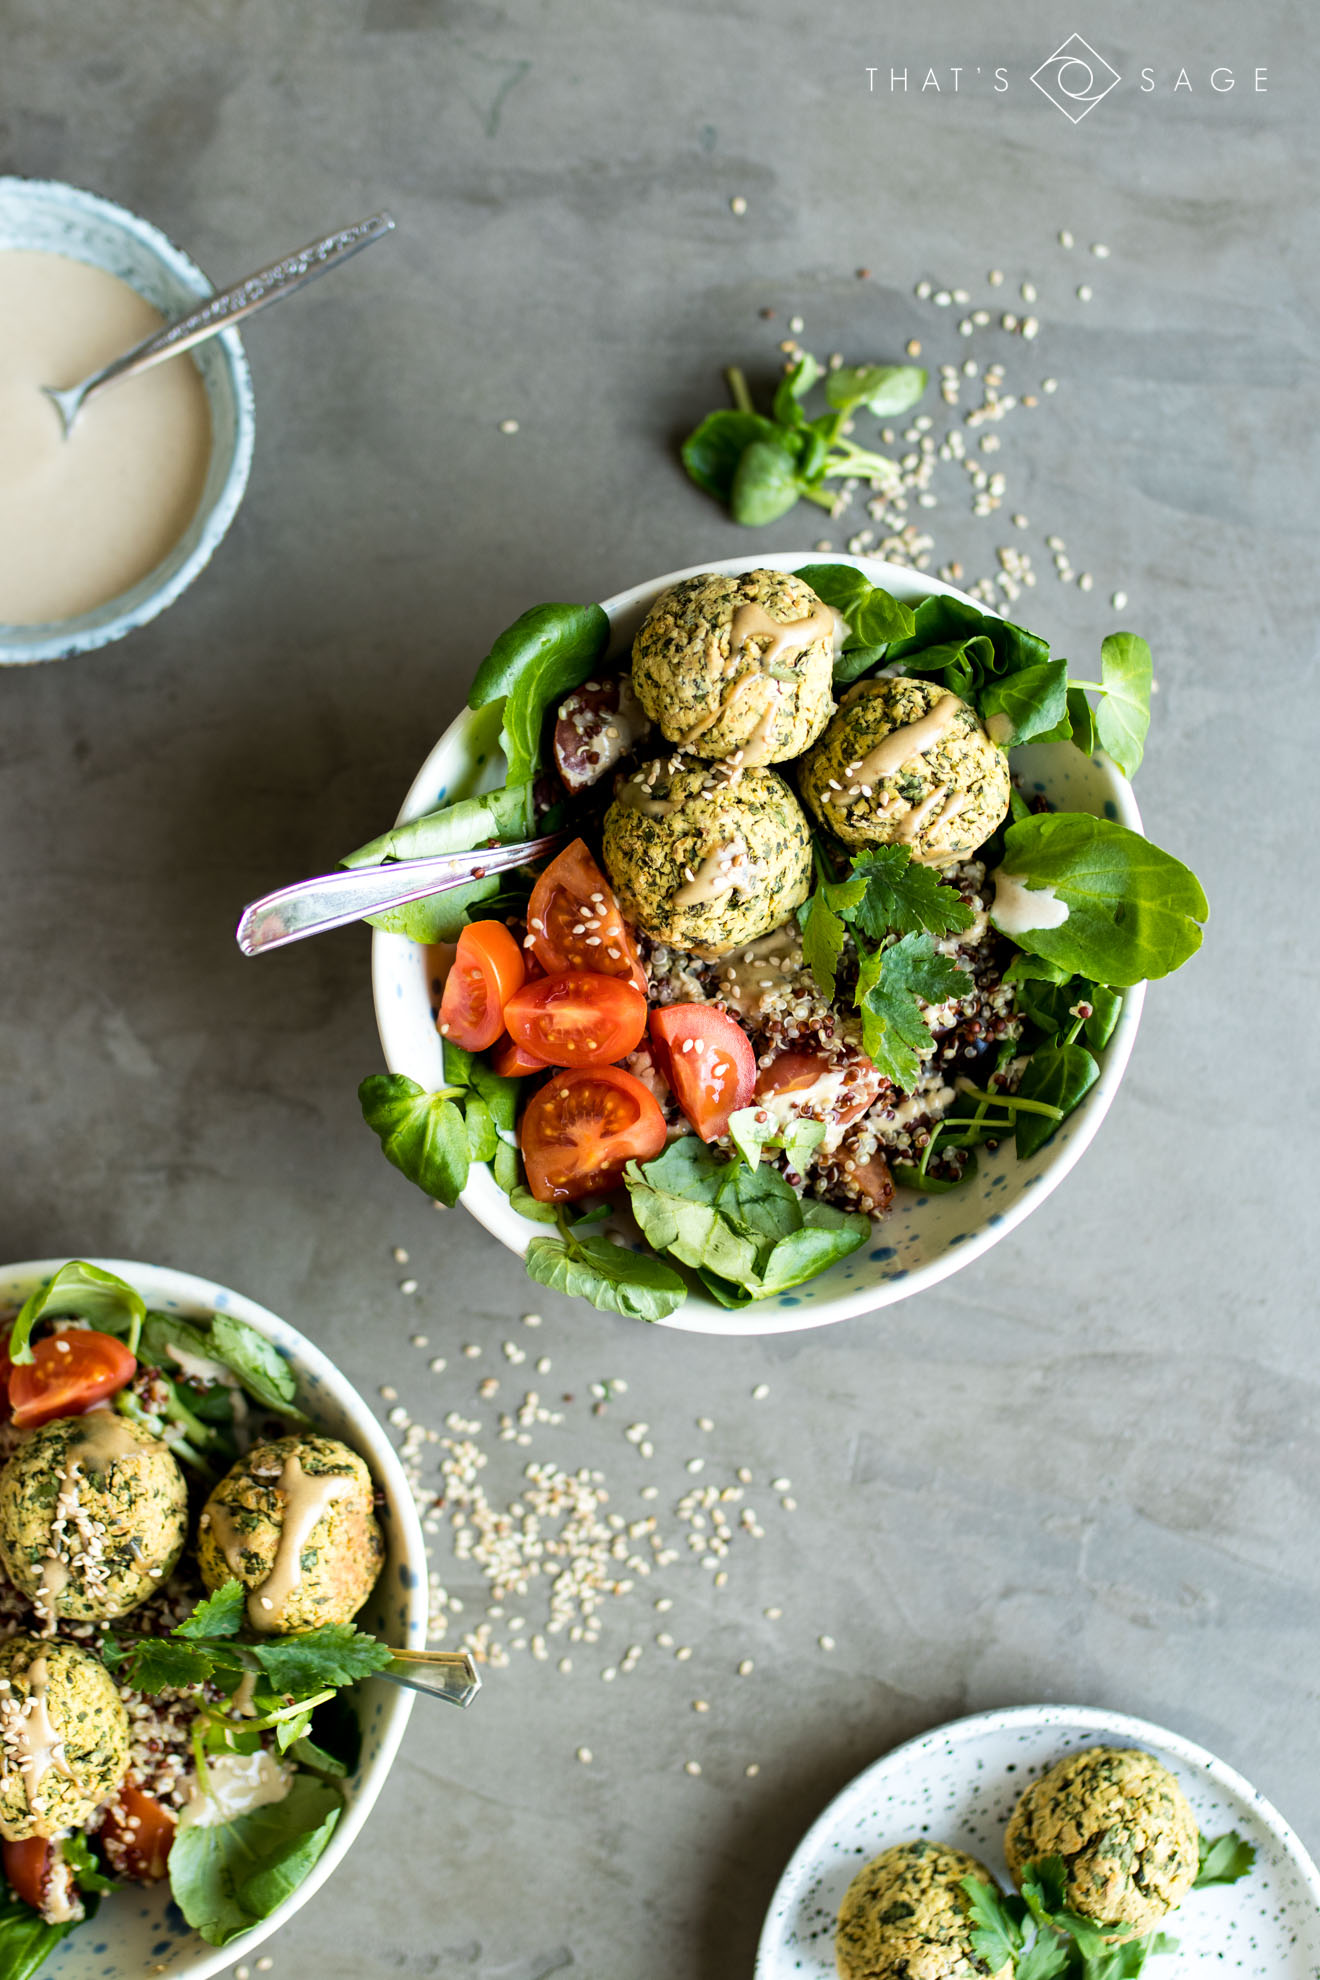
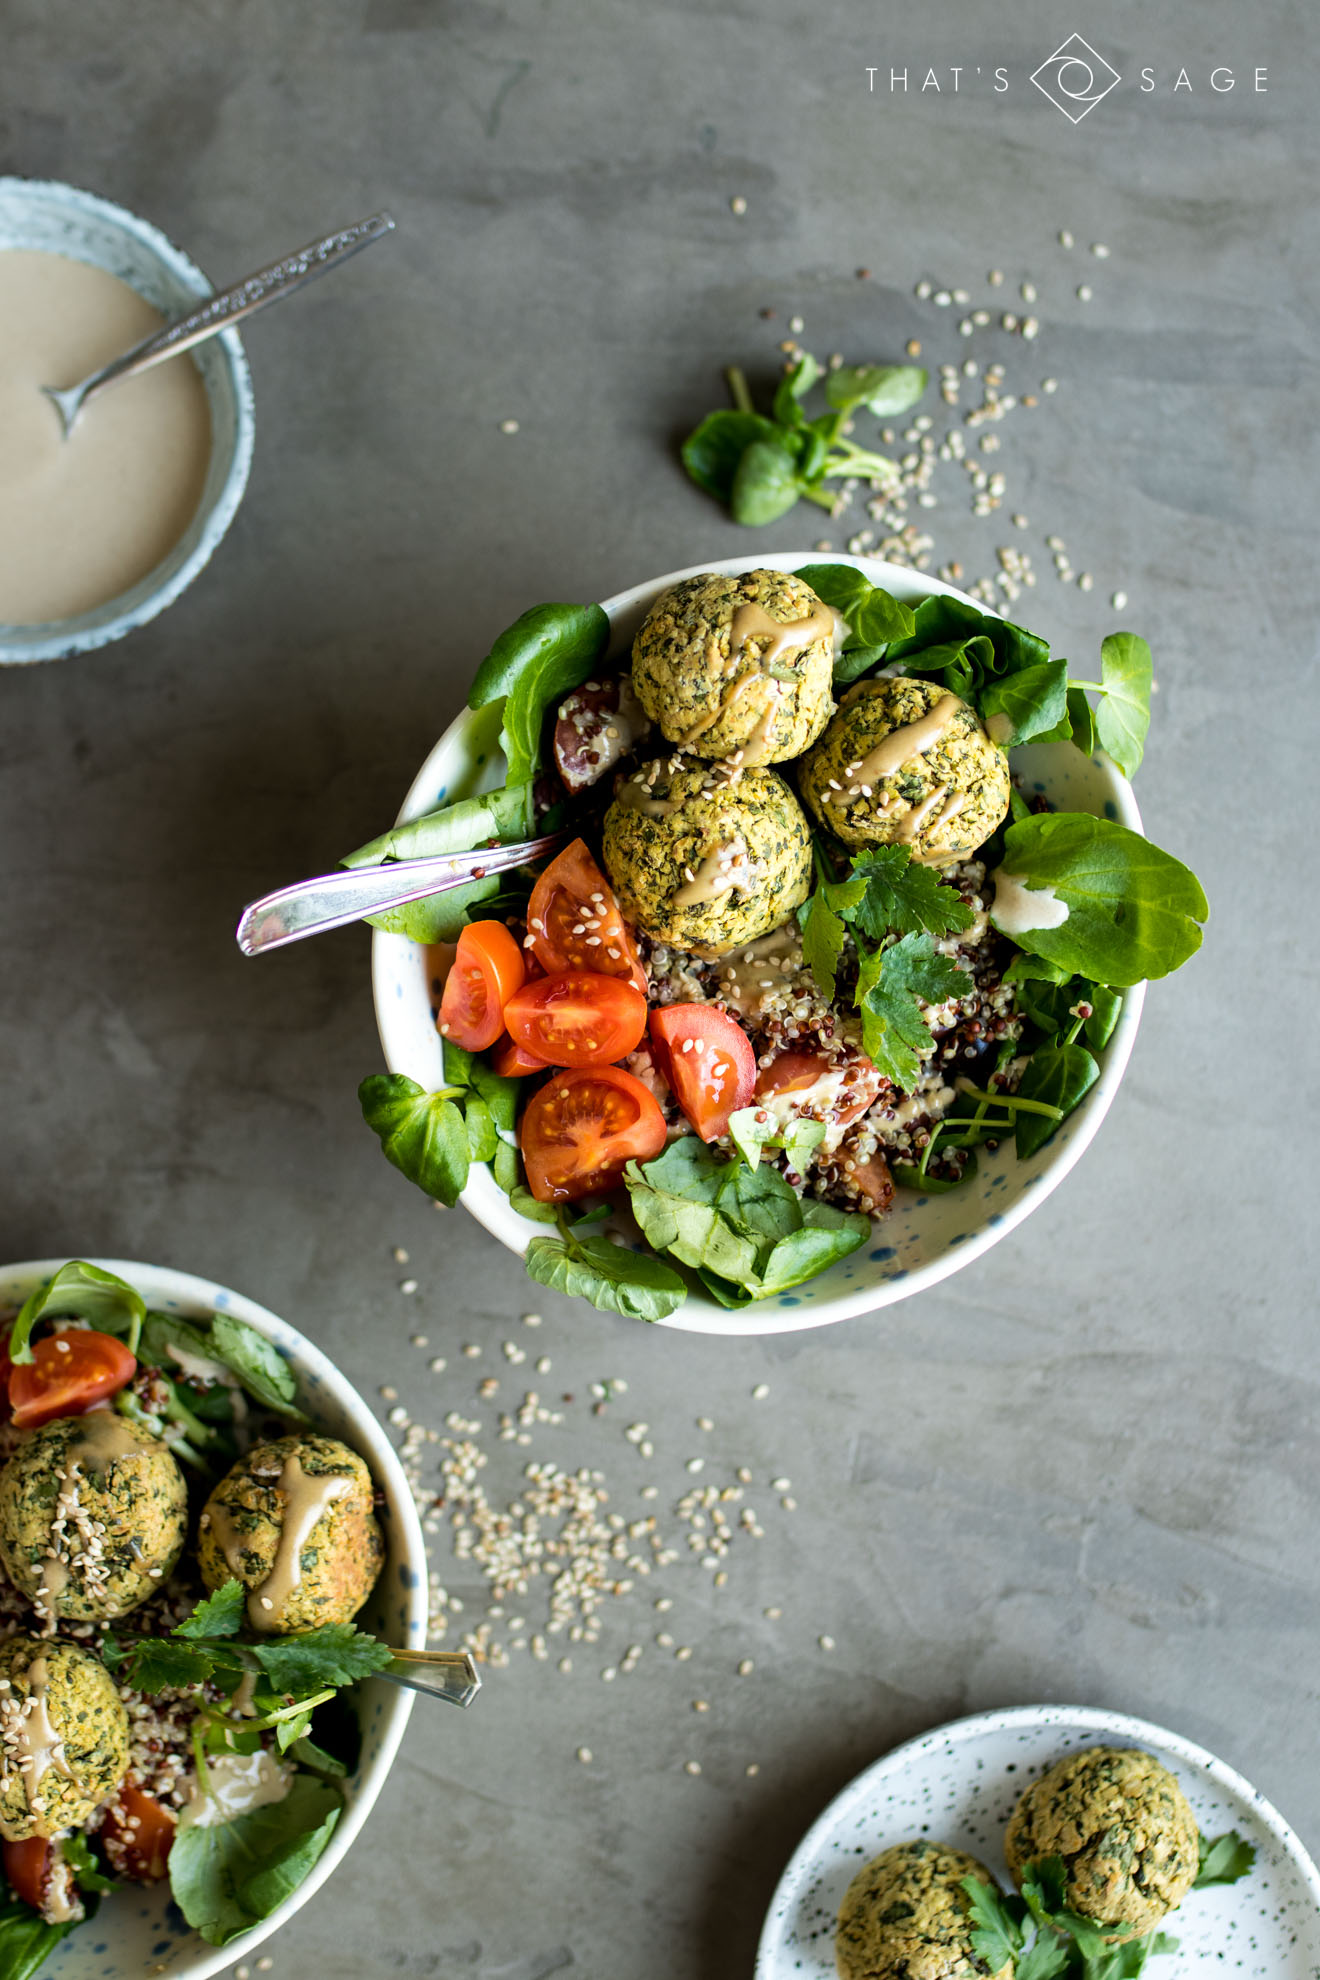
Here’s the same photo after some HSL adjustments:
With this particular photo, I didn’t change anything in the hue panel.
In the saturation panel, I have increased the reds and yellows. This helps the tomatoes stand out a little more.
After the basic edits, although I was happy with the overall photo, I felt that the falafels were now too bright. To rectify this, in the luminance panel I have reduced the yellows quite significantly. You’ll see in the photo they now look much more “real” and less blown out. I also decreased the brightness of the greens to give the salad leaves some more depth.
The Radial Filter
This tool will “mask” off part of your photo. The radial filter can be used to change most of the “basic” adjustments, but only to the part of your photo which is outside (or inside if you invert the mask) of the circle you draw. Here’s where to find it:

When looking at a photo, the viewer’s eye is drawn to the brightest part of the photo first, so by using the radial filter to subtly darken the areas of the photo around your subject, you are giving a clear instruction of what you want the viewer to see first.
I use the radial filter to outline my main subject, leaving a bit of breathing room around it, and then I reduce the exposure, contrast and occasionally the saturation of the rest of the photo.
Here’s how it looks on this photo:
The trick when using this hack is to be subtle. Unless you’re going for a specific effect or style, if you’re too dramatic with the adjustments it will be overly obvious that you’ve made edits, and your photo will end up looking unprofessional. You want to draw the attention to your subject without it being obvious why.
The Sharpening Mask
You’re probably already using the sharpening tool in your food photography editing, but did you know there’s a way to use it even more effectively? Introducing: the masking tool (yes, we’re talking about a lot of masking today).

What the masking tool allows you to do is sharpen ONLY the most in-focus parts of the image, rather than every single pixel in the photo.
The most common reason why you would want to do this is to sharpen your subject and keep the nice softness of the bokeh in your photo.
To use this hack, hold down the option key (on mac) or the alt key (on windows) while you slide the masking slider to the right. You’ll see the image look weirdly x-ray like. As you drag the slider further to the right, the white outlines will get thinner and more defined. I like to slide it until I have a pretty clear outline on my subject, normally between 80-100.
Then go ahead and set your radius to 1.5, then apply the sharpening as you normally would, except now it’s targeted to the right part of the photo.

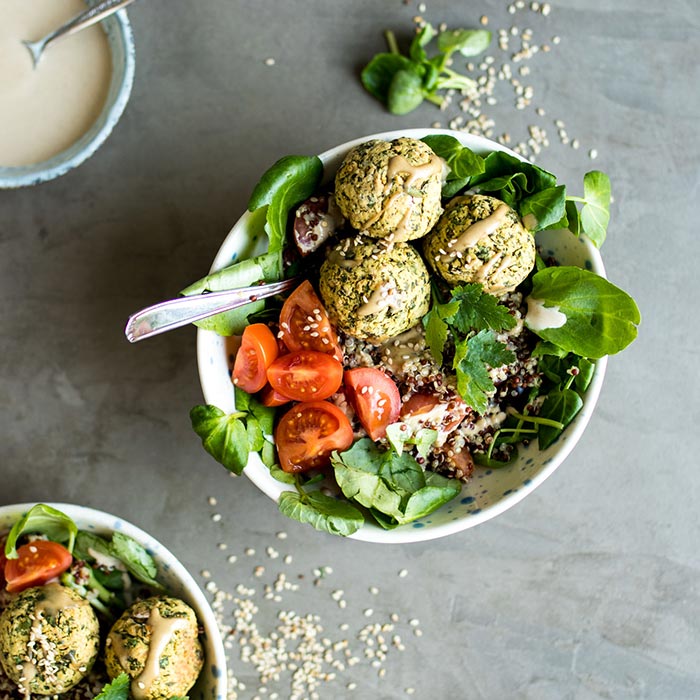
Now let’s just take a look at the before shot with only the basic edits, vs the photo after applying our three hacks: the HSL, Radial filter and sharpening mask tool.
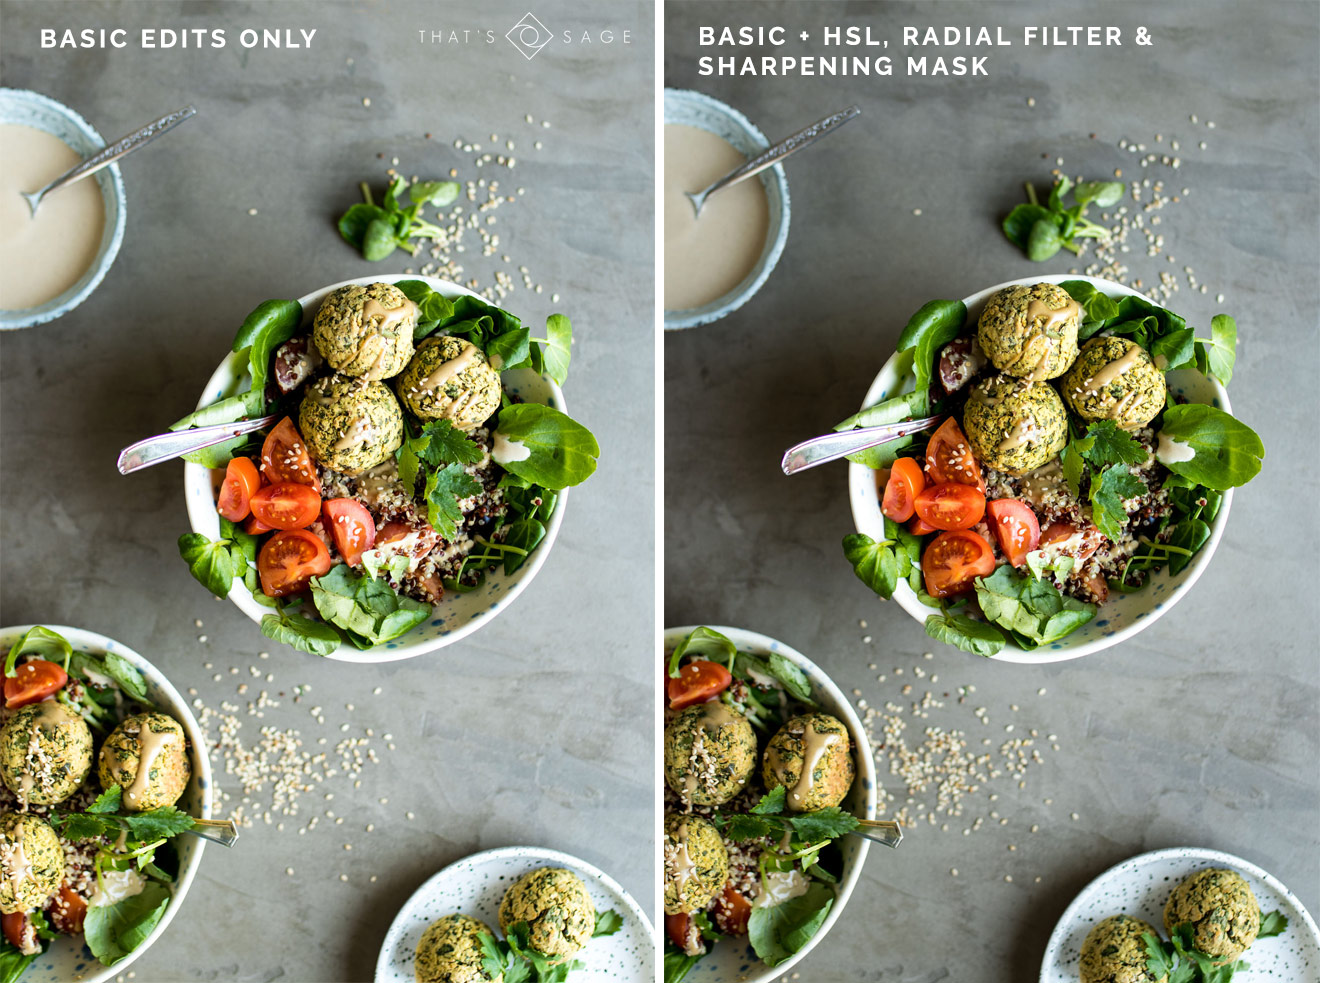
I think there is a massive difference between just the basic edits vs the basic edits + these three Lightroom hacks. What do you think?
Want to learn to work smarter, not harder in Lightroom Classic? Then you need my free Lightroom hotkeys guide for food photographers. Get your free copy below!
HiI’m a big fan of your recipeLove your Awesome Blog! I would love to share it with my friends.
Thank you so much for sharing those helpful Lightroom tips! I use Lightroom for photo editing, but I’m not sure which settings will take the food’s image to the next level. Please continue to write articles like this to share new information with us.
Thanks sharing this article about the food photography editing Lightroom hacks
Great post 🙂 This piece is very informative. Thanks for sharing the valuable blog.
Thanks sharing this article about the food photography editing Lightroom hacks this is really too good information
Oh my god, I really needed some tips on this matter. Your blog helped me alotttt with these photography tips. Thanks a lot.
Thanks for sharing some specific tools that I think will really help solve some of the issues I’ve had with my food photography. All of your content has been valuable and approachable. I can’t wait to learn more.
Thanks sharing this article about the food photography editing Lightroom
You’re so welcome! Glad you found it useful
I love this photography hacks. This is so unique and best way to photograph for food photography. Thanks for sharing it.
You’re welcome!
Wow, this is so easy to do photography of food. I really love these ideas. Thank you for sharing this great article.