In the world of food photography, flatlays are everywhere. You can’t scroll the food photography hashtag on Instagram without being bombarded with about a million gorgeous tables seen from above. And for good reason! Food photography flatlays are a great way to capture food. To add to this, flatlays are in high demand for websites, books, and magazines – many of my clients ask specifically for flatlay shots because they want to add text to the photographs.
As you can see, the food photography flatlay is a crucial part of any food photographer’s repertoire. So if you’re struggling to know where to put things in the frame, how to pull everything together, or even just where to leave negative space – read on. I’m going to show you two easy ways that you can bring your flatlays to the next level!
But first, if you’d prefer to watch this in video format rather than read it, I’ve got you covered:
Equipment is Key
Before we get into the techniques themselves, I want to spend a second talking about equipment. When you are shooting a food photography flatlay, it’s important to keep the camera at exactly a 90° angle above the table. This ensures that you don’t get any unwanted distortion in your image from odd slanting or off-kilter shadows.
I always shoot my food photography flatlays on my Manfrotto tripod, which I love, but my secret weapon is my mounted Hotshoe Spirit Level. I love this little tool! It attaches easily to my camera and helps me to be perfectly sure that my shot is totally balanced and level, with the lens straight from every angle. If you are planning to shoot many flatlays, I would really recommend making this investment.
When it comes to lighting, I like to keep my light source at a slight angle to my subjects just to keep a little interest in the shadows they throw, but I use a softbox to keep the light diffuse and gentle.
Related: Putting Together a Home Food Photography Studio, Pt. 3: Lighting Equipment
Techniques To Improve Your Food Photography Flatlays
You’ve got your equipment sorted and camera set up – now it’s time to stage and style your shot. This is where the magic happens. Here are two easy composition techniques to really elevate your food photography flatlays:
The C Shape
This is a great technique for creating a soft, feminine feel in a photo.
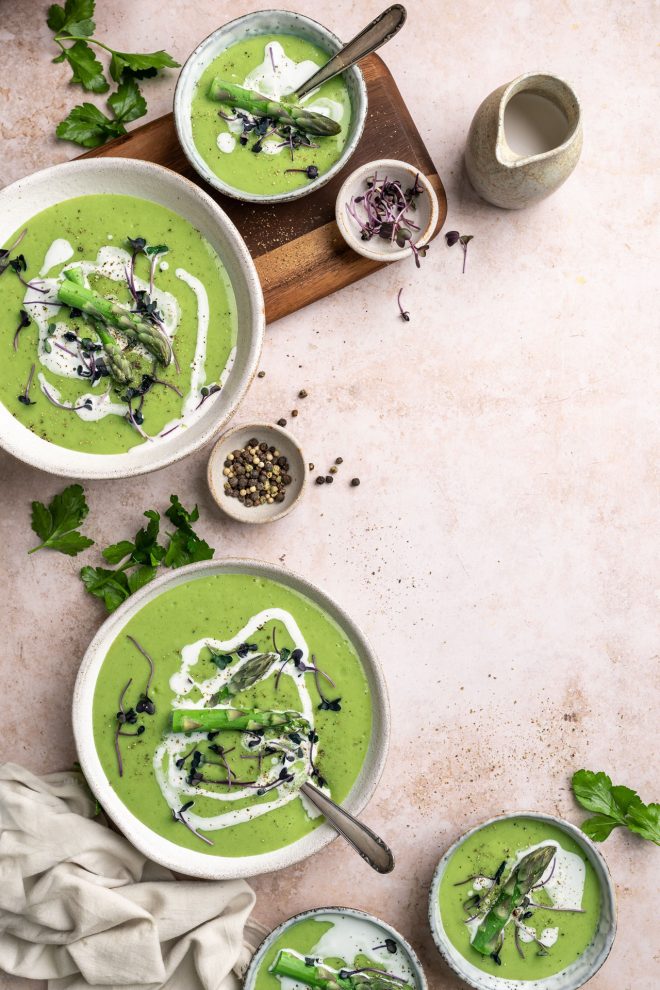
As you can see, when I was creating this image I started by using my props to create a rough C-shape. This instantly created a structure even before I touched any of the food. I started with the bowls and then built out from there: you can use cloths, utensils, boards, and other props to gently lead the eye from dish to dish along the curve.
When it comes to staging the food, you can play with shapes to contrast the C-shape or to echo it. In this photograph, I complimented the softness of the shape with swirls of coconut milk on the soup and added delicate micro-greens to heighten the inviting femininity of the shot. Bouncing off of the main shape of your composition like this will add interest to your food photography flatlays.
The C-shape technique is particularly useful because it naturally builds in negative space. You can see how easy it would be to fit text onto this image, and that is exactly what this particular client was looking for!
Related: Negative Space in Photography: Are You Doing It Right?
So, the next time you are wondering how to add negative space and natural movement into your food photography flatlay, try a C-shape composition.
Diagonals
Another really easy and effective technique to bring to your food photography flatlays is using diagonal lines.
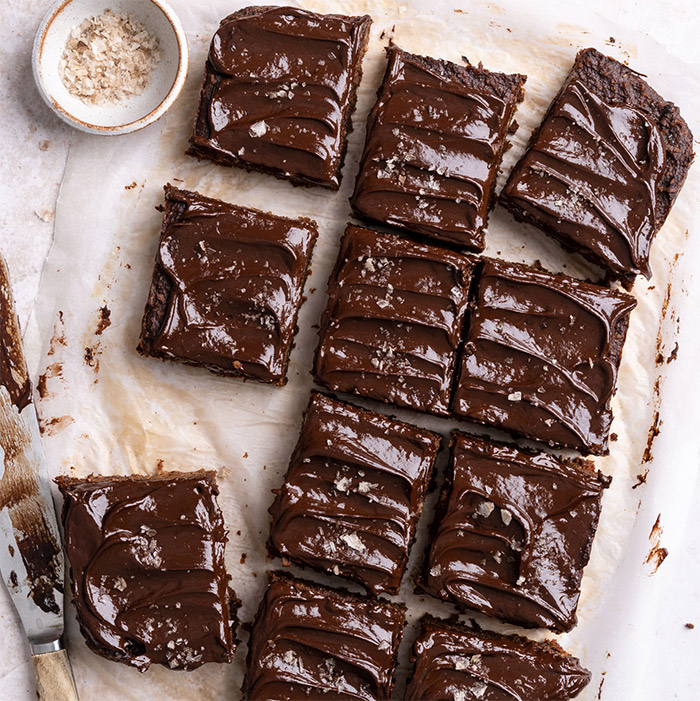
Look at these brownies:
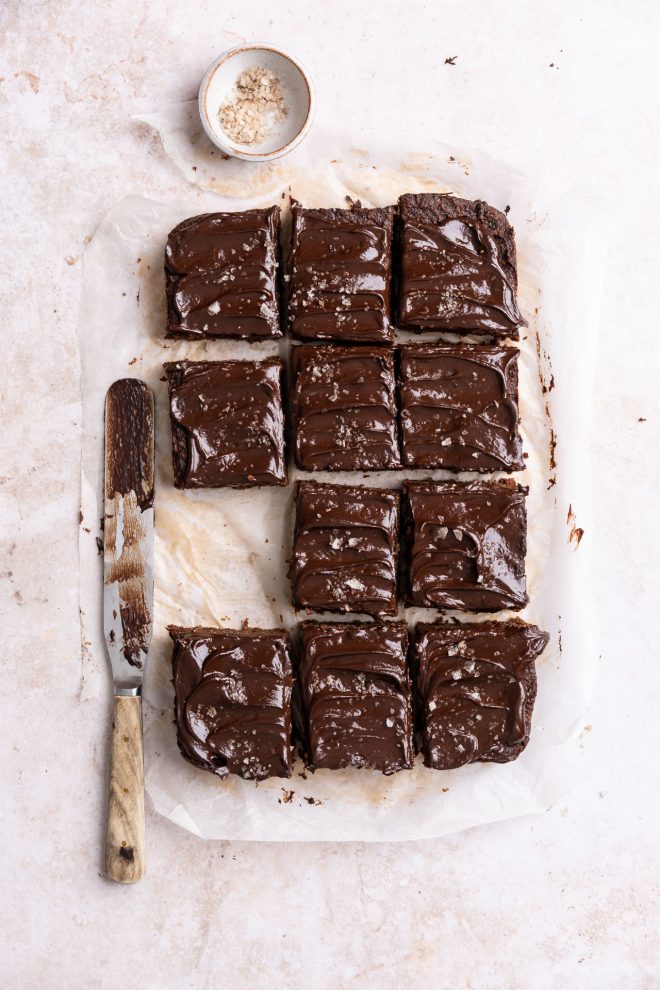
When the brownies are simply arranged in straight lines at right angles, there is not much interest in the photograph. It’s fairly static.
Playing with diagonal lines is a great way to add movement to your food photography flatlays. Creating lines that run in different and diverging directions makes the whole photograph far more interesting, and it helps flatlays to have a more interactive, lived-in feel. Look at what a little rearranging has done to these brownies.
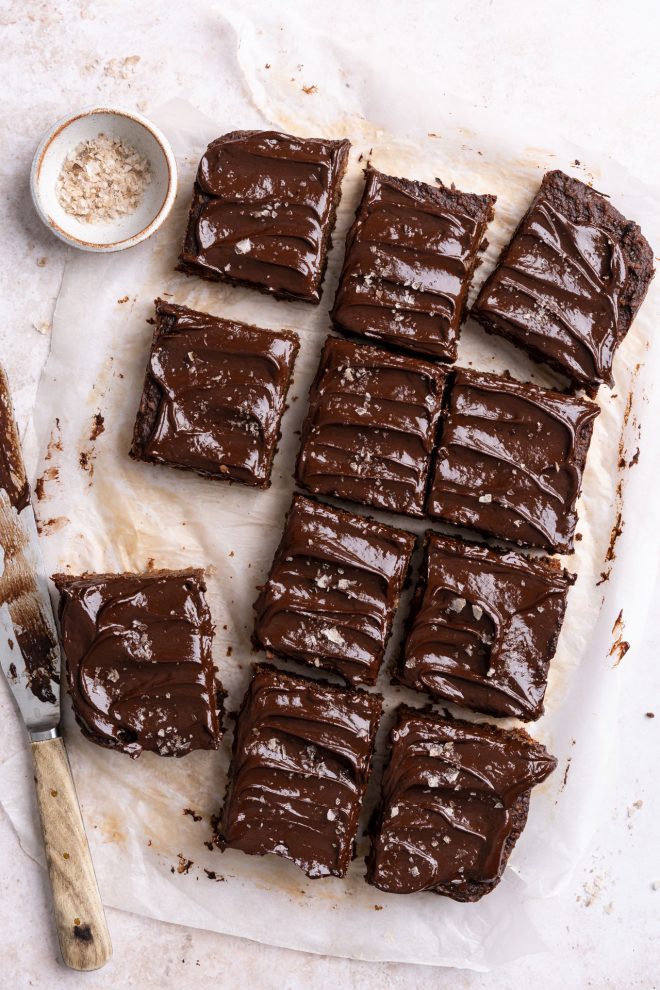
Here, I turned the tray of brownies to point towards the top right corner of the frame and then I moved the pallette knife to point towards the top left. This worked to add dynamic tension between these two subjects, which in turn created a little more interest in the shot.
This technique is incredibly versatile – you can use diagonals whether you have a very small and simple selection of subjects or a huge table full.
Food Photography Composition Kit
If you are actively looking to hone your food photography composition, you’ve come to the right place! These two easy techniques to improve your food photography flatlays are just the tip of the iceberg. I’m passionate about helping food photographers create meaningful creative careers, so I’ve put together some of my favorite tips and tricks from the trade in this free Food Photography Composition Kit.
This free resource will help you take the guesswork out of staging so that you feel completely confident whenever you are faced with the blank canvas of a new project. Check it out!
Final Thoughts
So, there you have it – two highly effective techniques to help you elevate your food photography flatlays. These techniques will allow you to add interest, build structure, and imbue your flatlays with a sense of movement and character. It’s amazing what little tweaks here and there can do to a photograph! The next time you are building a flatlay photograph, I hope you’ll be a little bit more confident to create really beautiful and striking food photography.
Great tips Lauren! I’m about to shoot brownies and the diagonal but will help me with my starting point! Thanks!
Ashley
diagonal bit* I mean 🙂 LOL!
That’s great! Can’t wait to see Ashley!