


When you think of great food photography, the immediate things that come to mind are great colour, creativity, beautiful lighting and ultimately, great images… but in today’s post we’re going to take it back a step, and look and focus on some of the best food photography composition tips.
It is important to remember that composition techniques are guidelines, NOT rules. They aren’t here to hinder your creativity at all, so you shouldn’t feel like you need to stick to them so rigidly that you feel restricted.
To help you put these food photography composition techniques into practice, I’ve created a printable composition kit that you can use to plan your
Free Resource

Stop guessing and start implementing with my foolproof composition system. Elevate your food photography from good to great with composition techniques.
Rules are there to be broken when the time is right, but it’s always good to understand the rule you’re breaking, to know if breaking it will actually improve your photo.
Prefer to watch? Hit play on the video below 👇
There are five food photography composition techniques that I come back to again and again, and those are:
- The rule of thirds
- The golden ratio (also known as the “phi grid”)
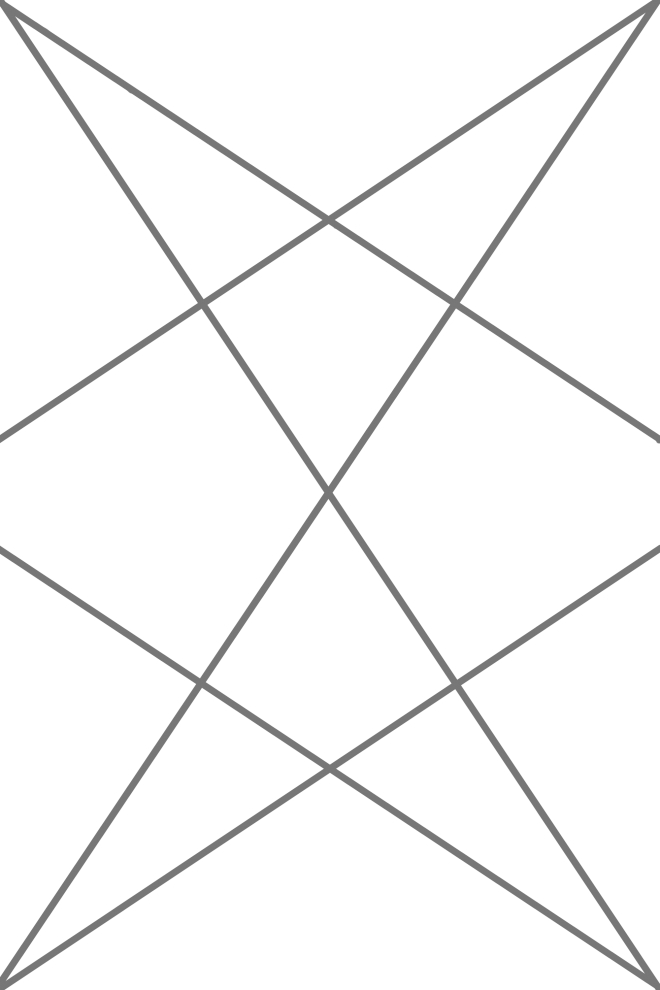
- Dynamic symmetry
- The golden triangle
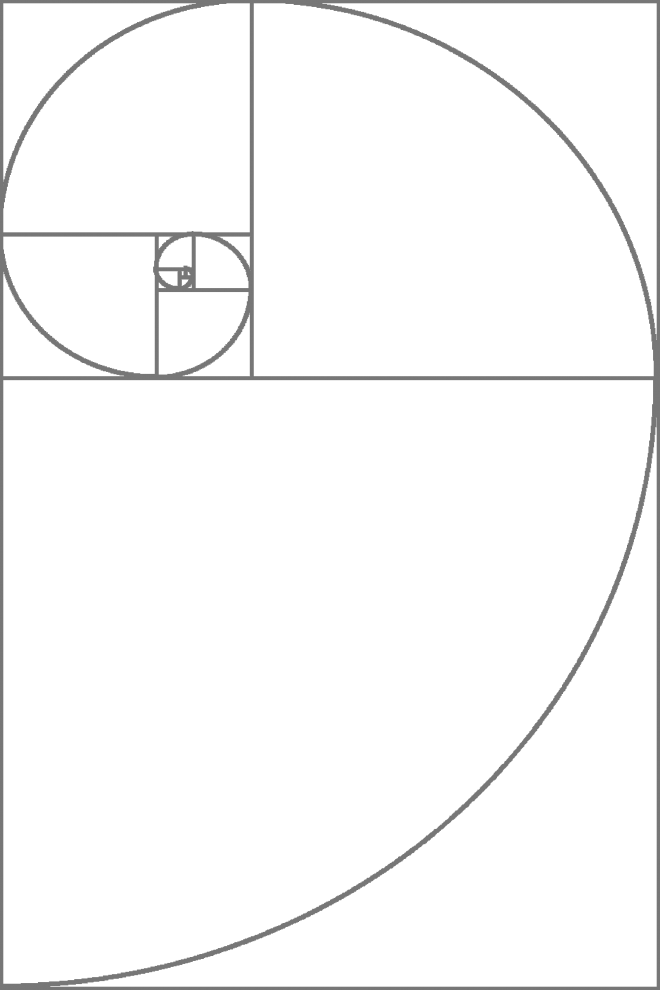
- The golden spiral


I’ve created a handy rule of thirds print-out grid for you to help you plan your compositions more effectively, so you can go ahead and click the link below to get that.
Free Resource
Stop guessing and start implementing with my foolproof composition system. Elevate your food photography from good to great with composition techniques.
The purpose of these techniques in food photography is to give you the tools you need to achieve the best possible photo. Food photography is a form of still life photography, and these principles will help you develop your style and build confidence in the images you produce.
Using techniques like the rule of thirds and other ratios for your composition is also going to help you create balance in your photos. Knowing how to balance your props, the food and negative space, will allow you to control where the viewer’s eye is drawn to in your photo, and more effectively tell the story you’re trying to tell.
So let’s dive into three of my favourite food photography composition techniques, and how you can use them to improve your own images.
Food photography composition technique #1 – The golden triangle
Let’s start with this image of these dumplings
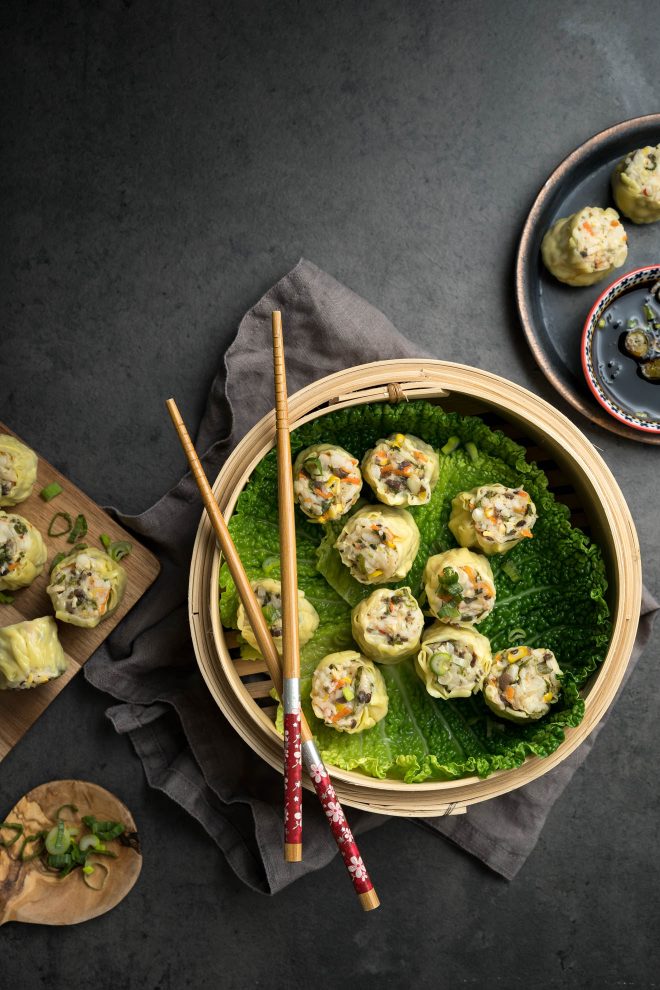
Straight away, you can see there’s a diagonal line going from the bottom left to the top right of the frame. Let’s overlay the composition technique I used and break it down a little more.
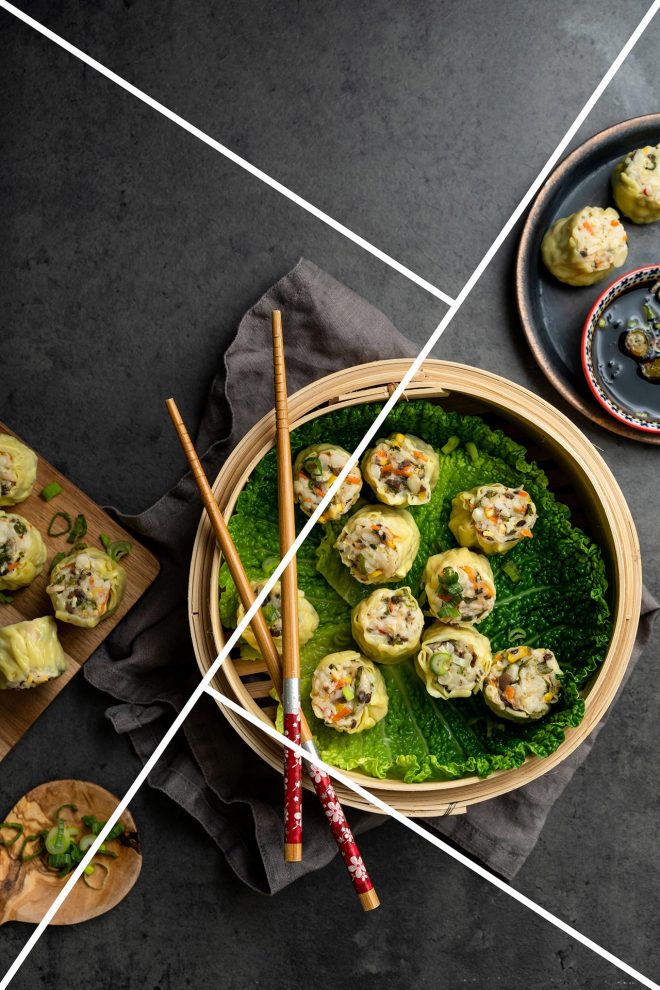
First off, there’s the direction of the props. The lines of the grid (particularly where they meet and cross) are the strongest points of the composition technique, but that doesn’t necessarily mean you need to lay everything out exactly on the lines – that can look a bit forced and unnatural.
I aligned the steamer basket to the bottom intersection, using this point for the main focal point. The chopsticks are a bit rogue, but not every single thing in the frame has to follow a rule.
I then used the main diagonal line and the intersectional line at the top to place the wooden board, which creates a defining shape on the edge of the frame, which ensures I’m taking advantage of this food photography composition technique in the supporting props as well.
The little wooden spoon/tray is also facing in the direction of that main line to create that movement through the frame, and the top plate is just skimming the line, which continues the leading line through the composition.
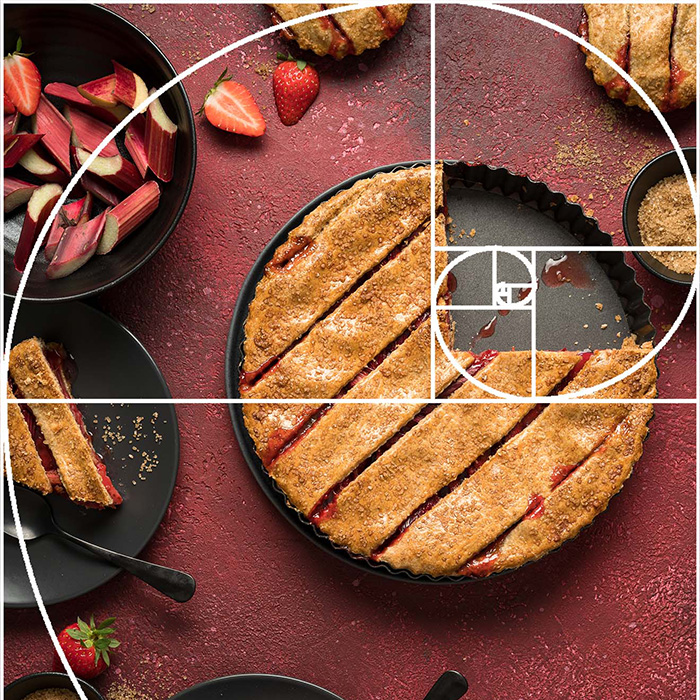
Food photography composition technique # 2 – The golden spiral
Composition techniques like the golden spiral are really useful for bringing a bit of flow and order to busy image, or images where you need to include negative space.
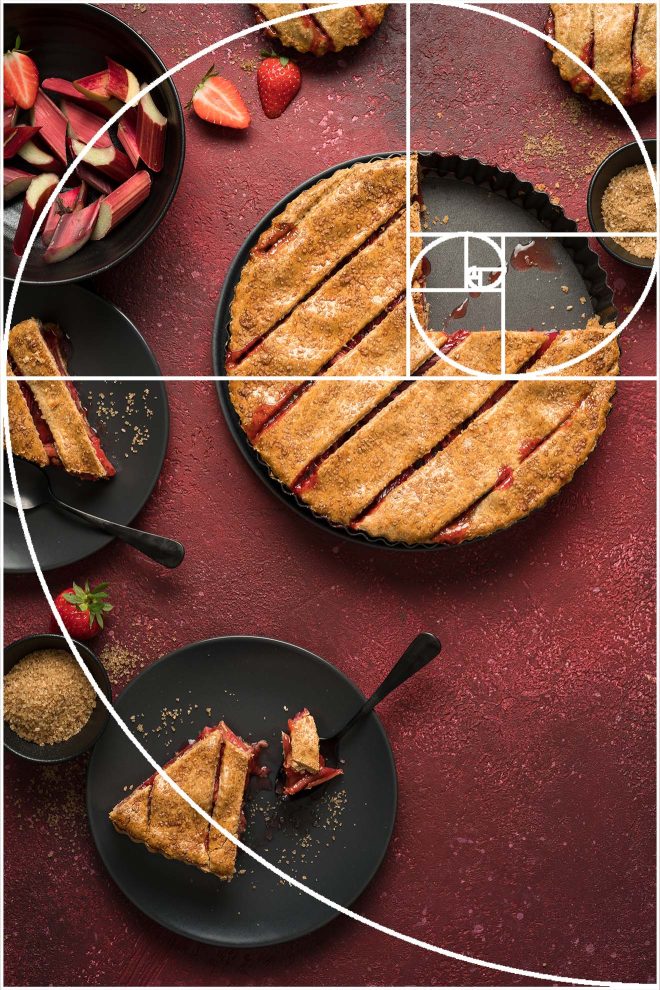
The golden spiral is a great technique for introducing a sense of movement and softness into an image.
In this example, I wanted the pie to be the clear focal point of the image, so I placed it on the centre of the spiral (which is the strongest part of the grid. I then used the long tail of the spiral to place the other plates and supporting elements, making sure that the handles of the spoons were following the same curves.
When you’re composing your own images, you don’t need to follow the spiral the whole way around. You can use your supporting props to create implied leading lines as well.
Don’t forget to download your free food photography composition kit, so you can start implementing these techniques in your own work.
Free Resource
Stop guessing and start implementing with my foolproof composition system. Elevate your food photography from good to great with composition techniques.
Let’s look at one more example, before we move onto some tips and tricks for using food photography composition techniques in your own work.
Food photography composition technique #3 – The phi grid (golden ratio)
The Phi grid is a more advanced rule of thirds grid. The principles of how it works are exactly the same, but it’s based on the golden ratio, which makes the middle third of the grid a bit thinner.
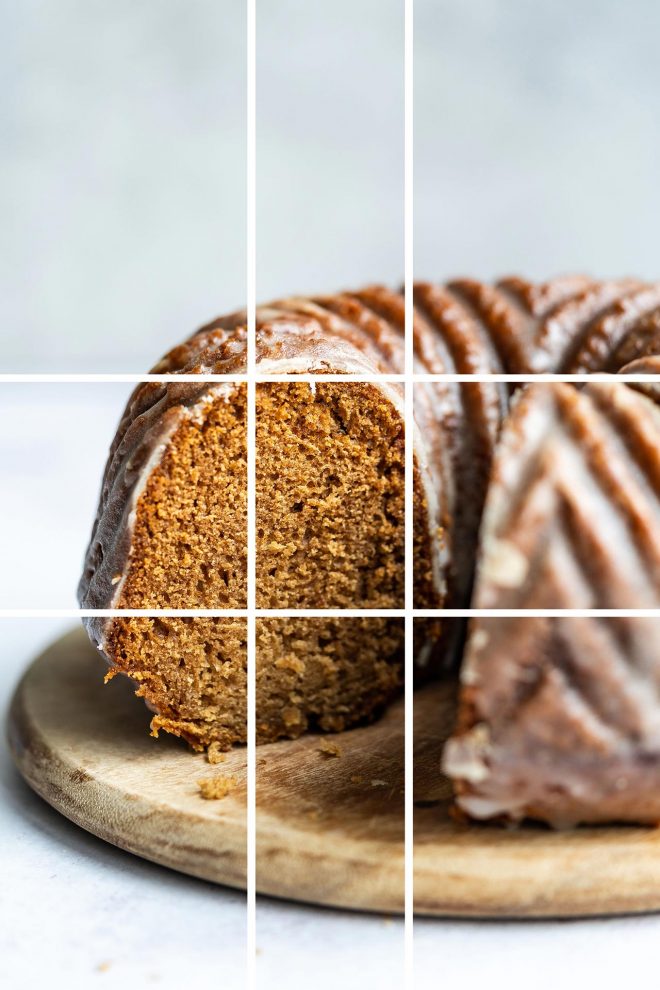
I really like to use this grid to help me place my “horizons” when I’m shooting at a straight on camera angle. In this cake photo , you can see how I’ve used this line to position the line of the backdrop, although the shallow depth of field does make it a little harder to see!
The next thing I did was focus on the left two thirds of the grid to place that main focal point of the cut cake, I also used the top middle line to position the top of the slice, which allows for a nice amount of negative space at the top of the frame. Negative space is a really powerful tool in food photography, because you want your images to have a clear focus, and if they’re too cluttered with props it can make it difficult for the viewer to know where to look.
So not only are these composition techniques useful for choosing where to place things in the frame, but also where not to!
Planning your Compositions
Once you understand the main principles behind the composition techniques you use, one of the best ways to start putting them into practise is to start sketching out your photos before you shoot.
When I started sketching out my compositions before I started my photoshoot, I noticed a dramatic improvement in my work. By starting to think more intentionally about the elements in my photo, my images stood out more and my compositions were more powerful.
Sketching out your photos will help you understand your food photography style too because you’ll be actively broadening your horizons and trying out these techniques in a structured way, you’ll explore food photography composition techniques you probably wouldn’t otherwise, and somewhere along the way, you’ll find your groove.
I’ve created a printable rule of thirds grid for you which you can download from the link right below, so you can easily get started with planning out your images.
Free Resource
Stop guessing and start implementing with my foolproof composition system. Elevate your food photography from good to great with composition techniques.
I personally shoot tethered in Capture One, and one of my favourite features is the option to add overlays to the live view screen. I’ve created PNG overlays of all of these composition techniques, so whenever I’m shooting I can have the grid on the screen to help assist me while I’m setting up my scene.
All of these overlays are available to download inside Food photography Academy, so if you’re interested in becoming a member for this resource and a bunch of other cool food photography education, then check out the Academy!
So there’s a few tips and tricks for you to use composition techniques to improve your food photography. Don’t forget to download your free food photography composition kit, and I’ll see you in the next post.
Great post about different composition techniques. Thanks!
And great composition kit!
I really enjoyed your post on food photography composition techniques. As someone who is involved in landscaping and construction, I can appreciate the importance of visual balance and the impact it can have on the final product. The way you described the use of the rule of thirds and leading lines is something that resonates with me, as we often use similar principles in the design of retaining walls to create visually appealing, functional outdoor spaces. Your tips about framing and focal points were especially valuable, as I now see how they can be applied to not just food photography… Read more »
I will try especially golden triangle it has capacity to create amazing food stories.
That’s great!
Hi Lauren,
Thank you for this useful post!
Thank you for providing such wonderful tips and advice.
Hi Lauren
Your continues lighting video is the simplest yet most helpful clip, I have seen (and I have seen a lot of clips) on Youtube. You definitely deserve a pat on the back for teaching style, enthusiasm, passion, and honesty.
Thank you!
Hey Dan, wow you totally made my day!!! I’m SO happy you found the video useful, I loved making it!