When thinking about food photography composition tips and food styling, it’s part creativity, part logic. I like that. It means you don’t have to guess what makes a good food photo, there are some rules to help you. The rule of thirds is one of the best techniques to get started.
You may have already heard of the rule of thirds, but you may not know exactly what it is, or how useful it can be in food photography.
If you’d prefer to watch a walkthrough video of this composition technique, hit play on the video below!
As with all “rules” in art, the rule of thirds should be thought of more as a “guideline”. Rules are there to be broken when the time is right, but it’s always good to understand the rule you’re breaking, to know if breaking it will actually improve your photo.
Today we’re going to demystify the rule of thirds, learn exactly what it is and find out how it affects your food photography composition. I’ve also created a free food photography composition kit to help get you started!
Free Resource
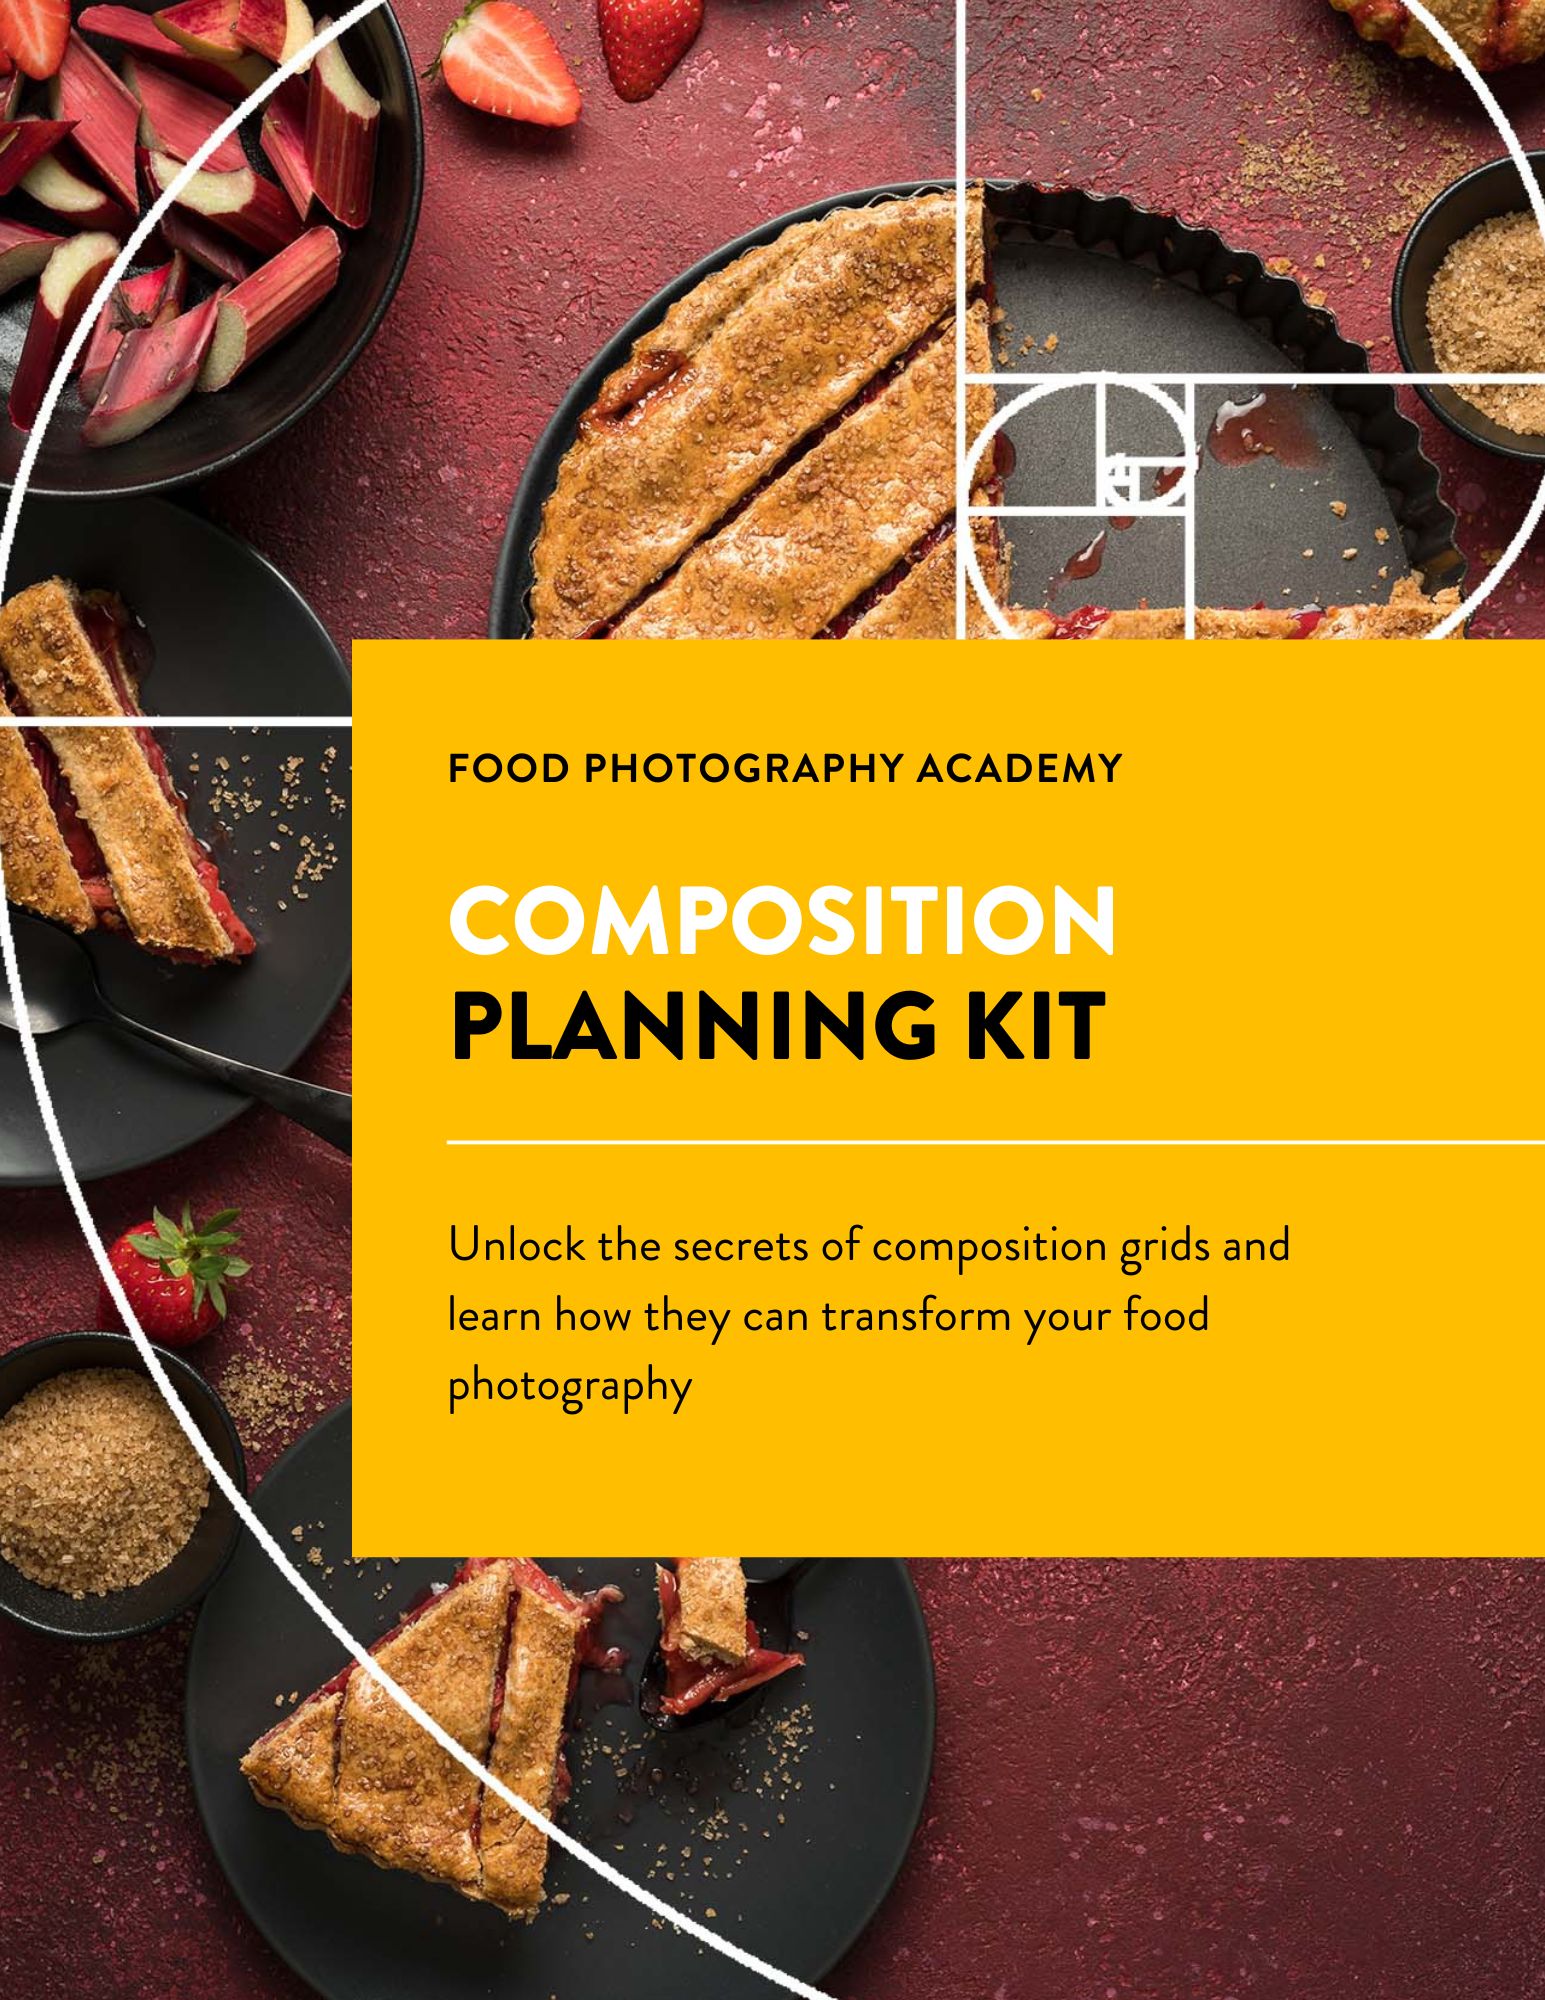
Stop guessing and start implementing with my foolproof composition system. Elevate your food photography from good to great with composition techniques.
What is the rule of thirds?
The rule of thirds is a food photography composition technique. It’s designed to help create balance in your photos, and engage the viewer by drawing attention to the parts of the photo that their eyes naturally gravitate towards.
The rule of thirds works by dividing your frame into 9 equal rectangles, using two vertical, and two horizontal lines that are equally spaced. Just like this:
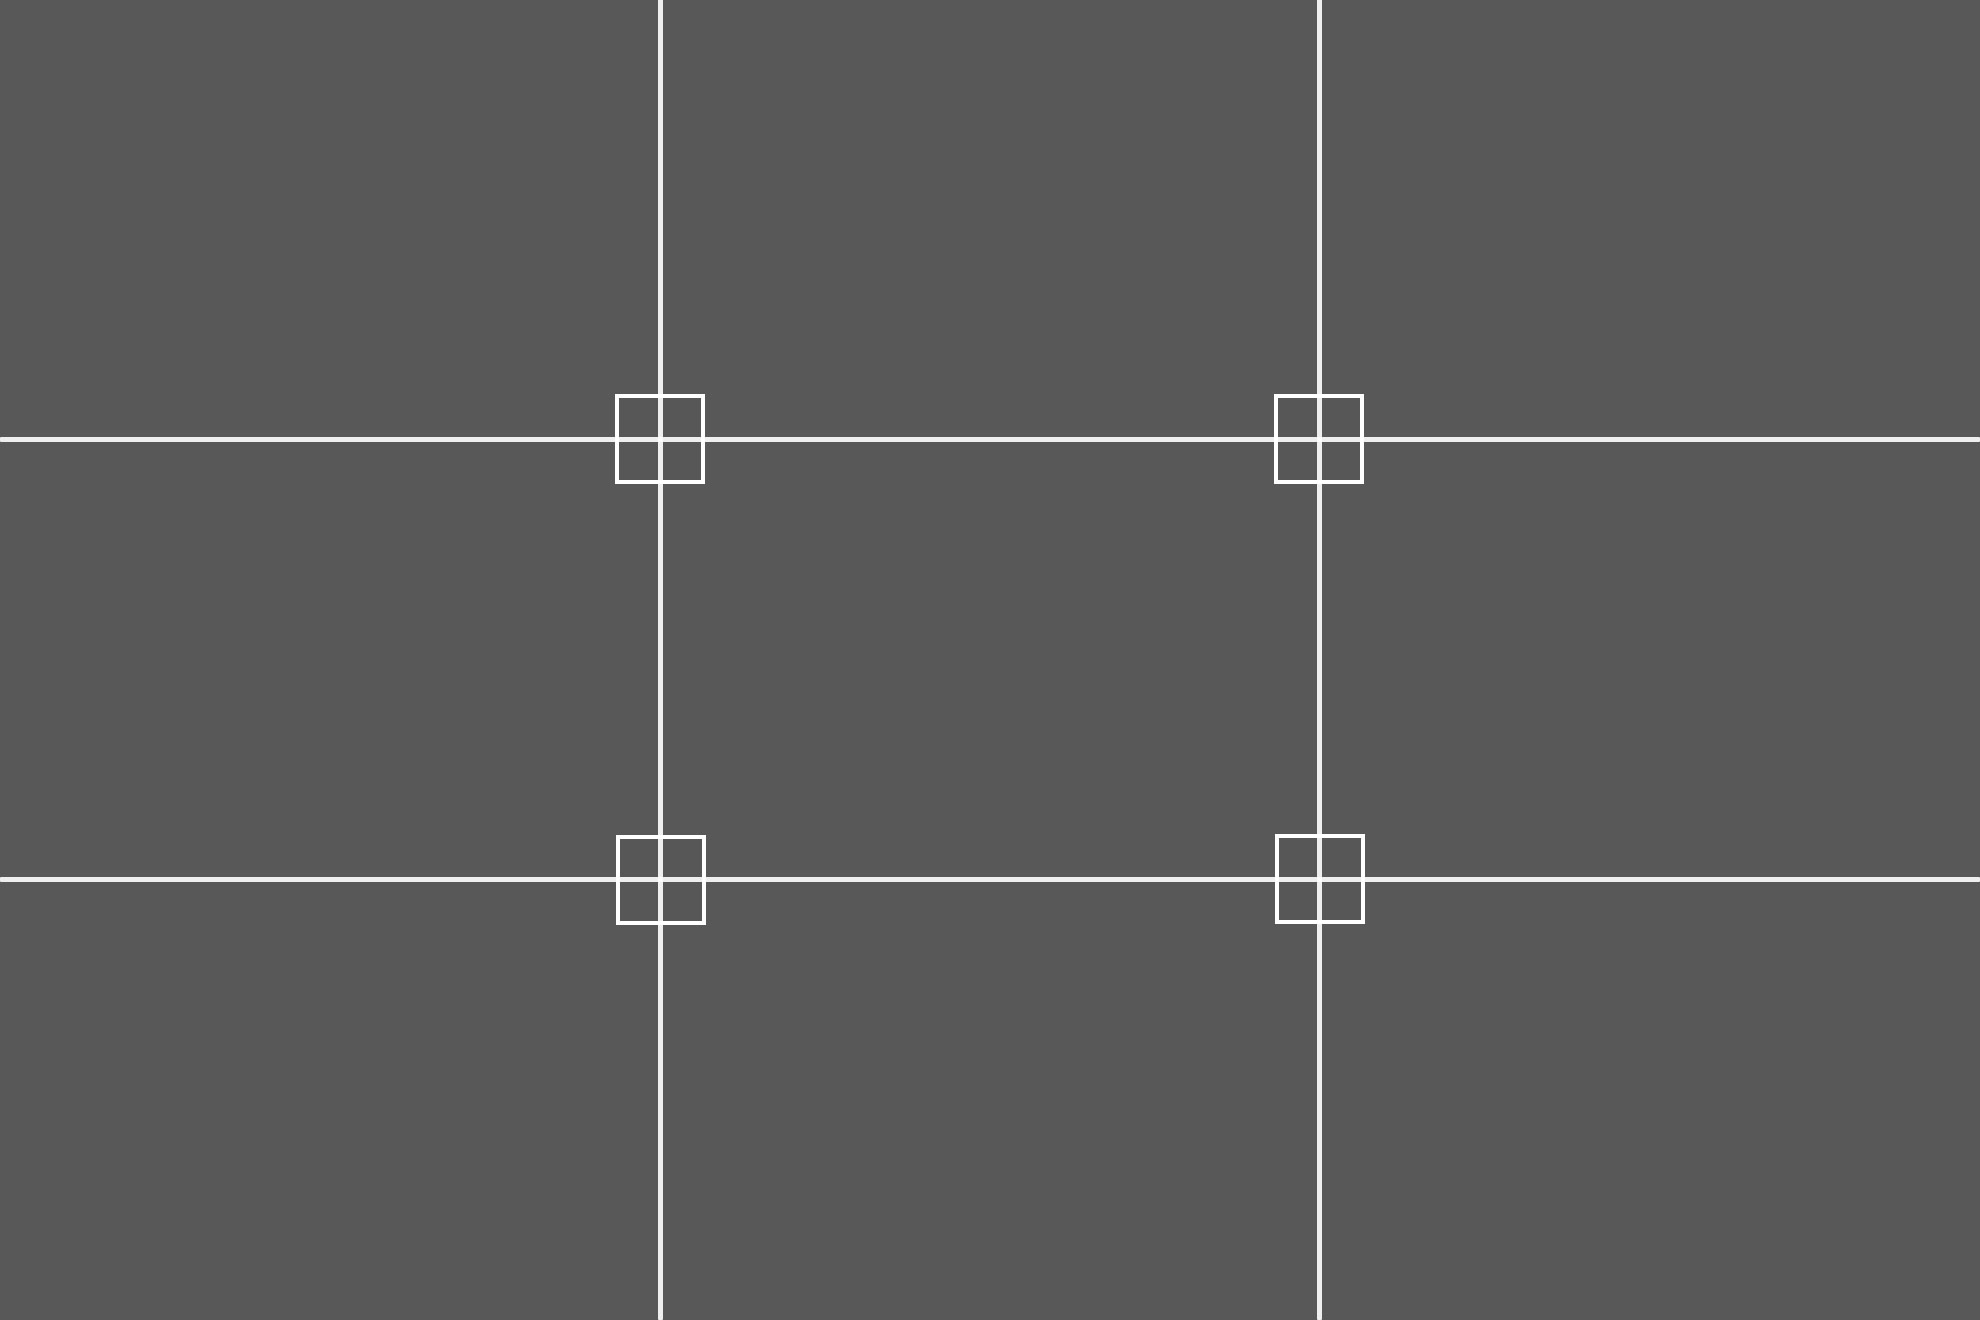
The points at which the lines meet are the key points of interest, and you should try and place your hero subject on or near one of these points.
Placing your subject off-centre and following these lines is more visually pleasing pleasing to the eye than a centrally position subject (although this can work too!).
How to Use the Rule of Thirds to Compose Great Food Photos
When planning out your food photos, there’s a few questions that are useful to ask yourself
- What angle will you shoot your photo at? Top down (birds eye view), 45° or straight on?
- What is your main subject (focal point)?
- Where are you going to place your subject to have the most impact?
Once you’ve established these points, you can start to build your photo.
Sketching out your photo before you start
One of my best food photography composition tips is something I always do before starting a food shoot is to sketch out a rough structure for my photos. Doing this before I walk into my shoot allows me to think about the composition of my food photo, and therefore results in much higher quality photos. The difference I noticed in my photography when I started doing this was huge!
Step 1: Download my printable food photography composition planning kit. This is pre structured for you in a standard 3:2 image ratio, with the rule of thirds grid overlayed for you.
Step 2: Next, think about the questions above and decide which of the lines and points you will place your subject on. You can then use your other props and garnishes to frame your subject and create some shape in your photo.
Step 3: Sketch out a rough structure of your photo on the composition kit and use this as a starting point when composing your photo. If you shoot tethered, you can overlay a rule of thirds composition grid on your screen while you compose your image.
I’ve created a free, printable food photography composition kit, that has all the grids pre-drawn, ready for you to scribble all over and plan your food photos. It’s a game changer. Grab your free copy below!
Free Resource

Stop guessing and start implementing with my foolproof composition system. Elevate your food photography from good to great with composition techniques.
Now let’s take a look at some food photography examples.
Examples of different food photos using the rule of thirds
Overhead food photography example (flat lay)
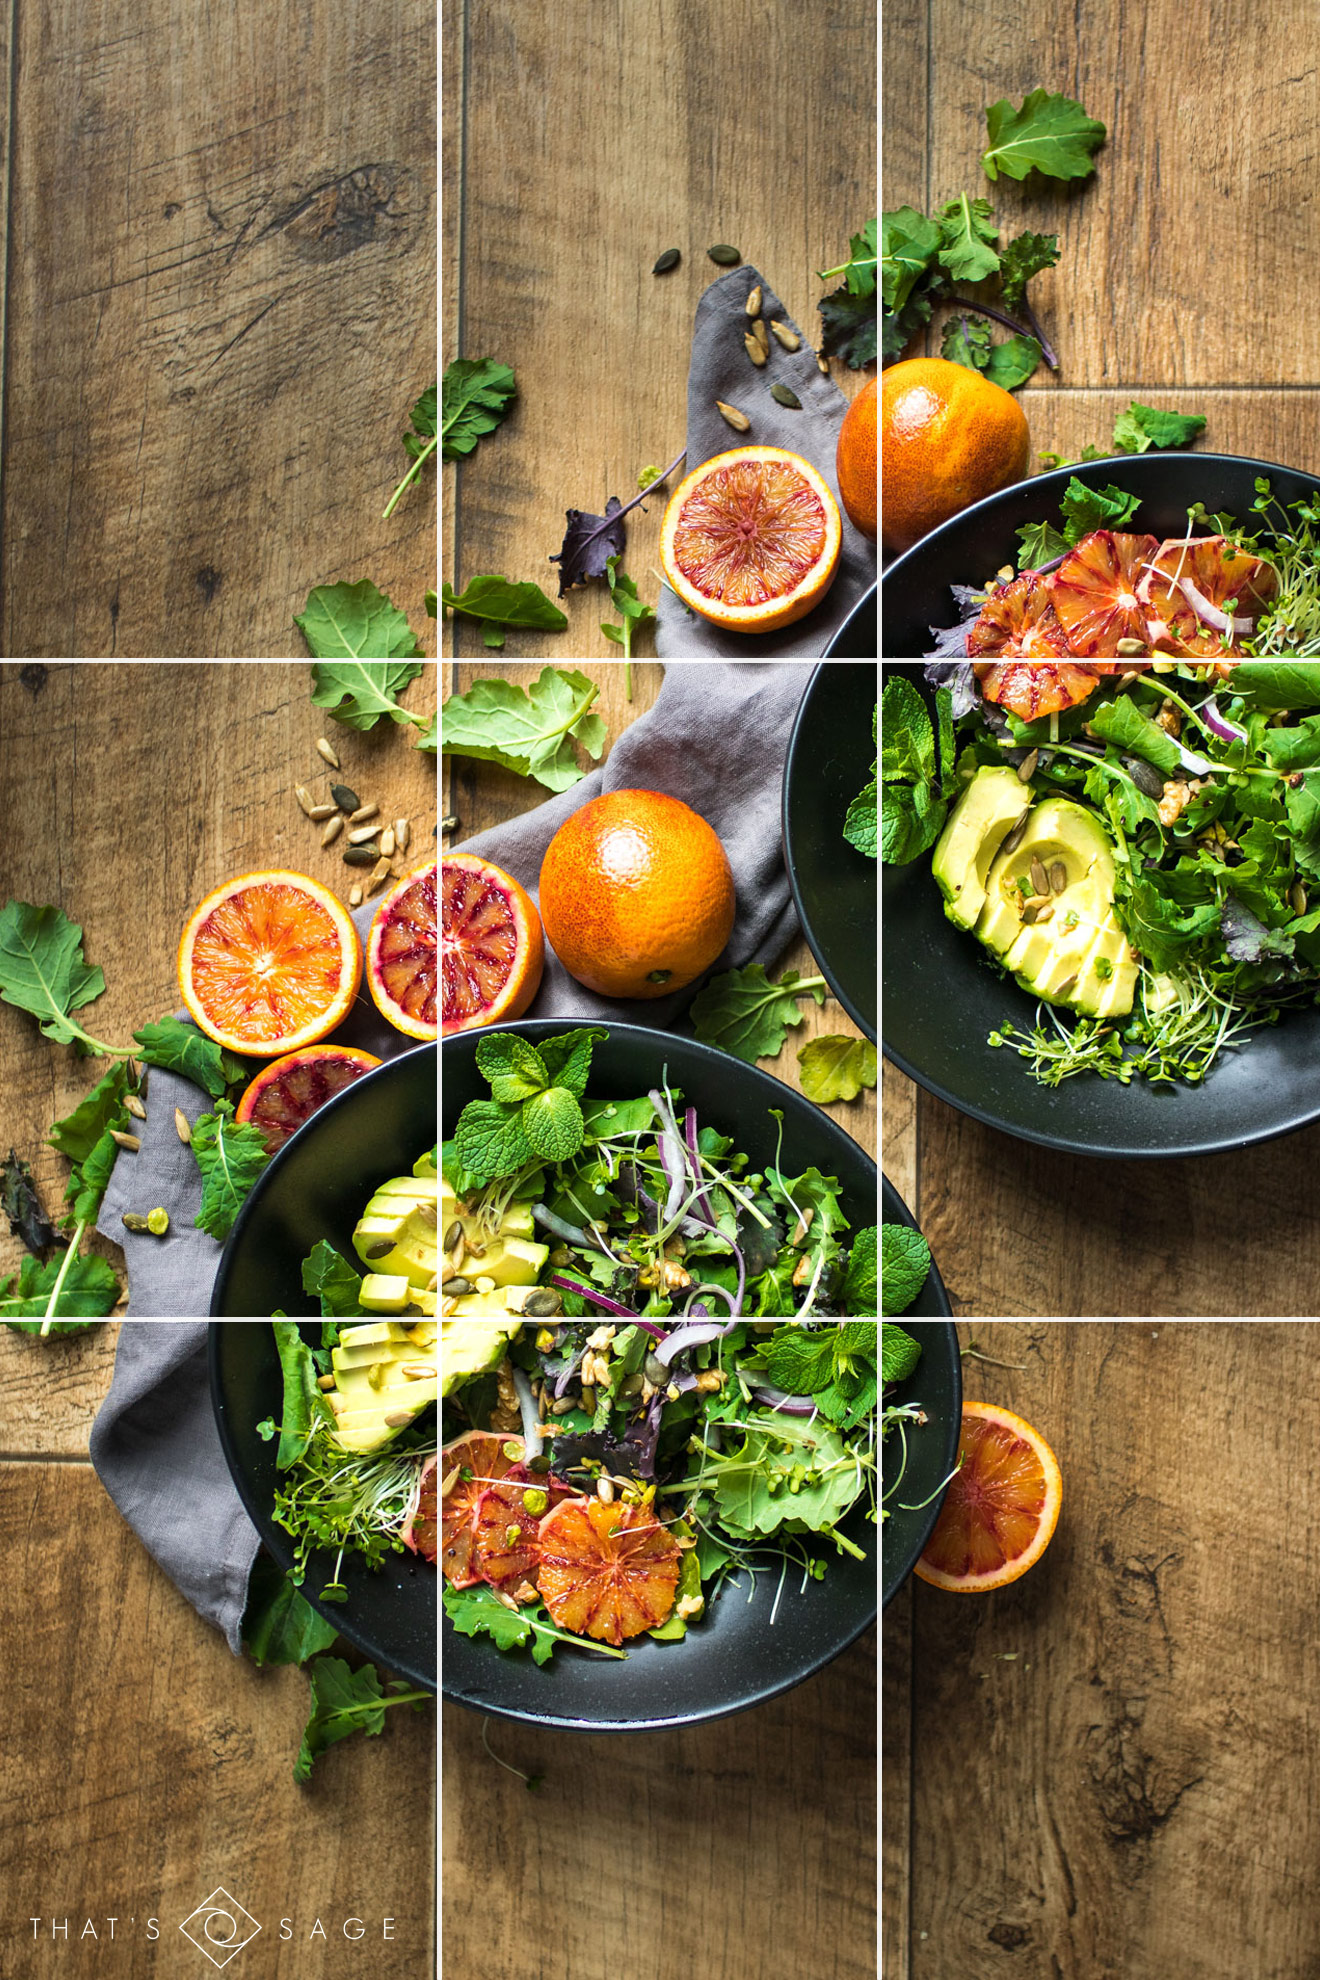
As I mentioned briefly earlier, in a rule of thirds grid, the points at which the lines cross are where the eye is naturally drawn to first. So focus on placing your main subject on or near one of these points.
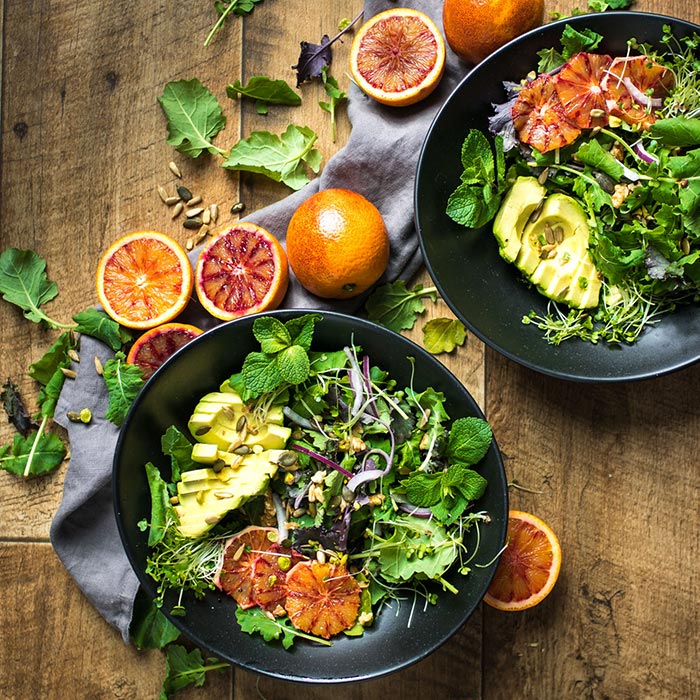
In this photo, the main subjects are the bowls of salad, particularly the bowl at the bottom on the bottom left
In order to help the bowls stand out, I’ve placed them on the intersections of the lines on the bottom and top right of the photo. This immediately draws your eye straight to the bowls, and the negative space around them isn’t distracting. The bowl on the right has been intentionally cropped, to give the bowl on the bottom the most importance in the frame.
I arranged the cut oranges and garnishes around the bowls with a cloth to lead your eye along the lines to the main subject, while also creating some additional interest.
Let’s look at an alternative angle of the same photo, whilst still applying the rule of thirds.
45° Angle Food Photography Shots
When you have a horizon in your photo (most obvious in landscape photography) the rule of thirds suggests that you line up the horizon either with, or near, one of the lines. When you cut a photo in half by putting the horizon right in the middle, it can give an unbalanced feel.
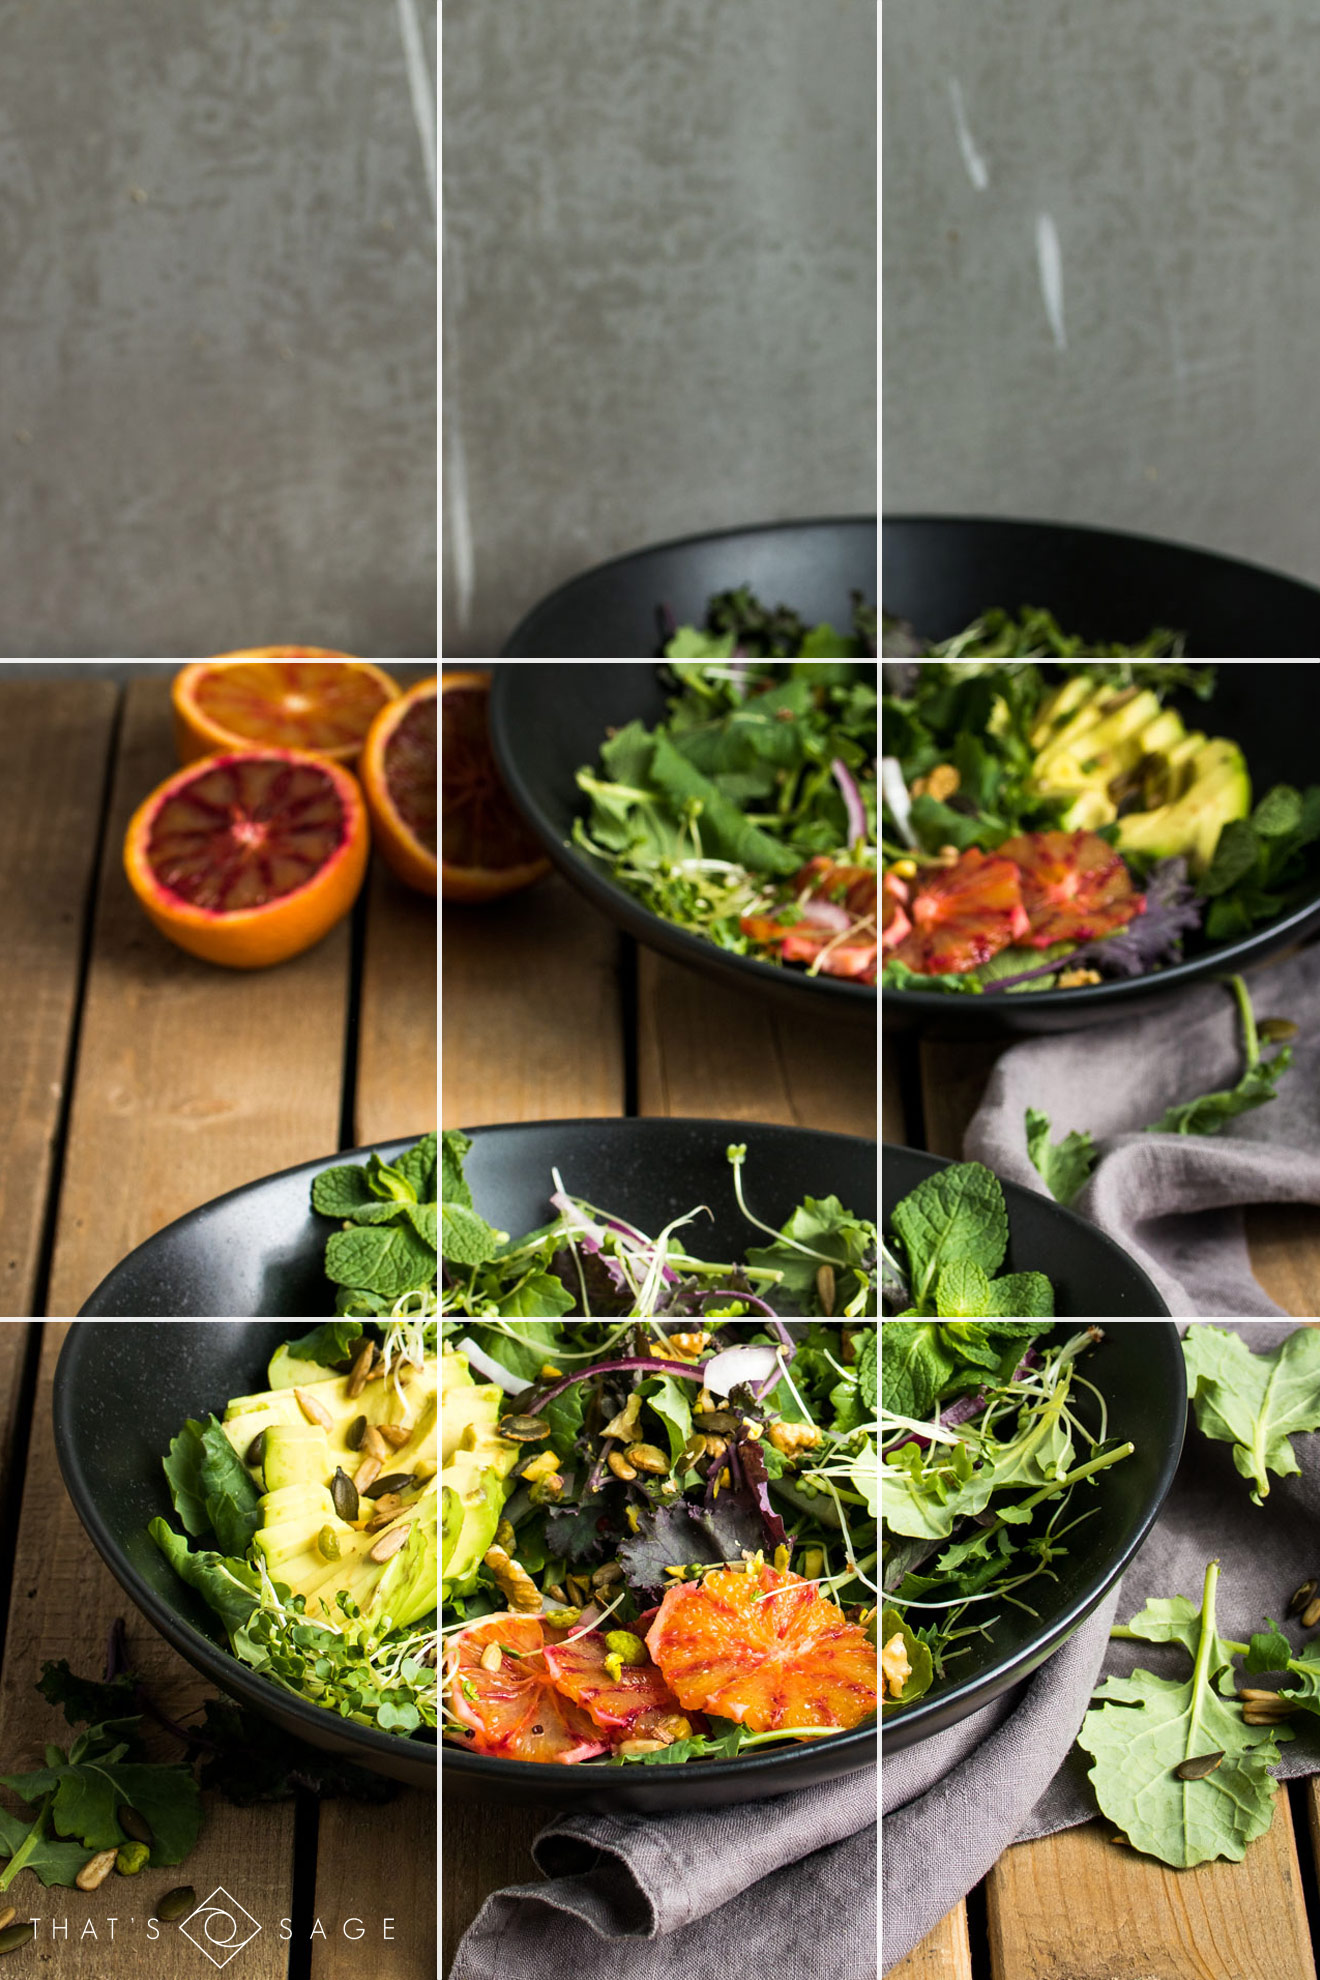
45° angle shots show how this principle is still relevant in food photography. Most setups involve using some kind of “base” which acts like a floor underneath your food, then a wall behind your subject, which creates a kind of horizon somewhere in your photo.
In this example, I lined up the “horizon” with the top line in the photo, then lined up the bowl again with the bottom two intersects, and the top right one.
I also adjusted the aperture to create a shallower depth of field, which makes the front bowl stand out the most.
Don’t forget you can implement these food photography composition tips easily with my free printable composition planner kit. Click the link below to get your free copy instantly!
Free Resource

Stop guessing and start implementing with my foolproof composition system. Elevate your food photography from good to great with composition techniques.
Food Photography Composition Tips For Using the Rule of Thirds when Shooting and Editing your Food Photos
Most DSLR’s and mirrorless cameras have the option to overlay a 3×3 rule of thirds grid on your live view screen, which makes it easier at first to get the hang of where the lines and intersects are. Try turning it on for your next few shoots and see what a difference it makes!
You can also do this while tethering, which I highly recommend you try if you haven’t already.
If you don’t have this feature, or your picture just doesn’t quite have the composition you wanted, don’t panic. There are ways you can “fix” your photo in post production editing.
Adobe Lightroom Classic has a 3×3 rule of thirds grid option which is visible when you’re using the crop feature. As you’re resizing and repositioning your box, you can see exactly where on the grid your subjects will lie, and make any adjustments. Hit the “O” key on your keyboard to cycle through the different composition overlays available.
So let’s put all these tips into action and start using them to plan and shoot better food photos. Don’t forget to download your free photo composition kit to get you started:
Free Resource

Stop guessing and start implementing with my foolproof composition system. Elevate your food photography from good to great with composition techniques.
Summary
- The rule of thirds is a photography composition technique, designed to create balance and draw the viewer’s eye to your subject.
- The points at which the lines intersect are the most powerful points on your frame, so focus on getting your subjects on, or near, these points.
- Turn on the 3×3 rule of thirds grid display on your camera if you have that feature available.
- If not, use the grid feature in the cropping tool in Adobe Lightroom to help you get things lined up and cropped just right.
- Sketch out your photos before you start (and nab your free food photography composition kit if you haven’t already)
- Remember that these are guidelines, not rules, so don’t be afraid to break them when you feel it will improve your photo.
Your Turn
Do you already use the rule of thirds in your photography? Or did this post teach you ways that you can be using it better? Let me know in the comments!
I just commenced 6 weeks in the past and I’ve gotten 2 check for a complete of dollar4,two hundred. This is the best decision I made in a long term. Thank you for giving me this fantastic opportunity to make extra cash from home. This extra cash has changed my lifestyles in so many approaches, for greater details visit this web page…………… m o n e y 6 3 . s o l a r
I watched your video, it was really amazing.
For the Background, what do you use ? 🙂 This article helps me really good 😀
Thanks a lot! I’m a new follower and I really love your content. You are so professional, your way of explaining is so simple and easy to understand. Good job!! I will keep up with all your videos.
Thanks for the info! So grateful!
[…] created squares or triangles of the guide, and let the eye be lead. Some of the tools/guides, like the rule of thirds or the golden triangle, are simpler to […]
Thank you so much Lauren!
You’re so welcome Thu, glad you found it helpful!
Thank you so much. This helped me A LOT!
This has been a great lesson can’t wait to try it
Hi Lauren, I have been following your updates for a while now.. love it…
I am sorry to read the latest email. Hope you are keeping well. Thanks
Hi Shibani! Thanks so much for the kind words! So happy to have you here!
Hi Lauren, I you could not have explained better, I found this really helpful, thank you so much.
Hi Liv, I’m so happy you found this useful!